How to Charge a Battery With a Solar Panel
If you’ve ever wondered how to charge a battery with a solar panel, you’re not alone. The short answer is simple, but the details matter a lot more than most people realize. Connect a panel straight to a battery without the right gear and you risk ruining the battery, starting a fire, or both.
Get it right and you’ve got free energy that keeps your devices running anywhere the sun shines.
Per the National Renewable Energy Laboratory’s solar resource data, a 100-watt panel in the U.S. averages only about 4, 6 full sun-hours per day depending on your location. That means a single panel can take one to two days to fully charge a typical 100Ah battery. Understanding that real-world number is the first step to picking the right components.
Quick Answer
Connect a solar panel to a charge controller. Connect the controller to the battery. Use the right wire gauge and a fuse.
Match the controller type to your battery chemistry. Let the sun do the rest.
That’s the core process. The rest is about making sure each piece fits your specific battery and panel voltage.
What You Actually Need: Panels, Batteries, and the Charge Controller
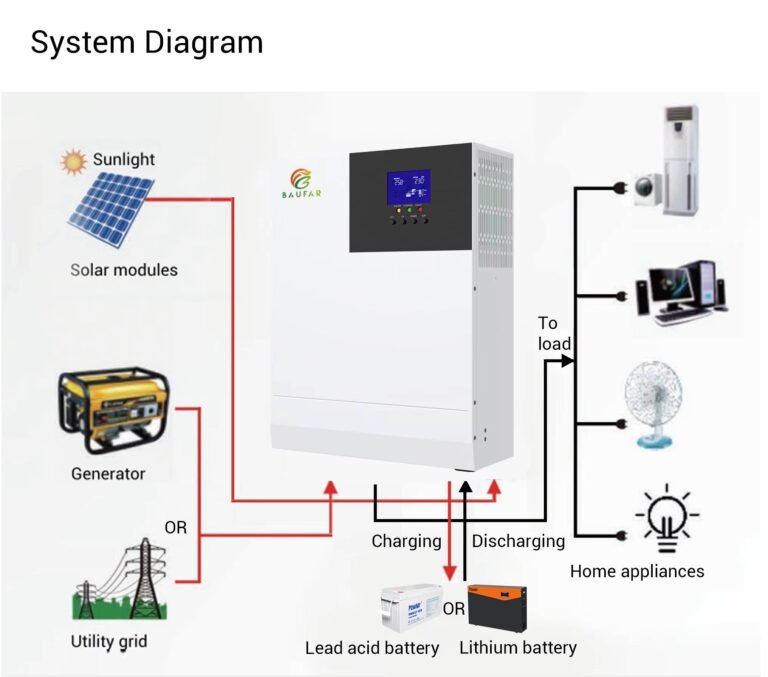
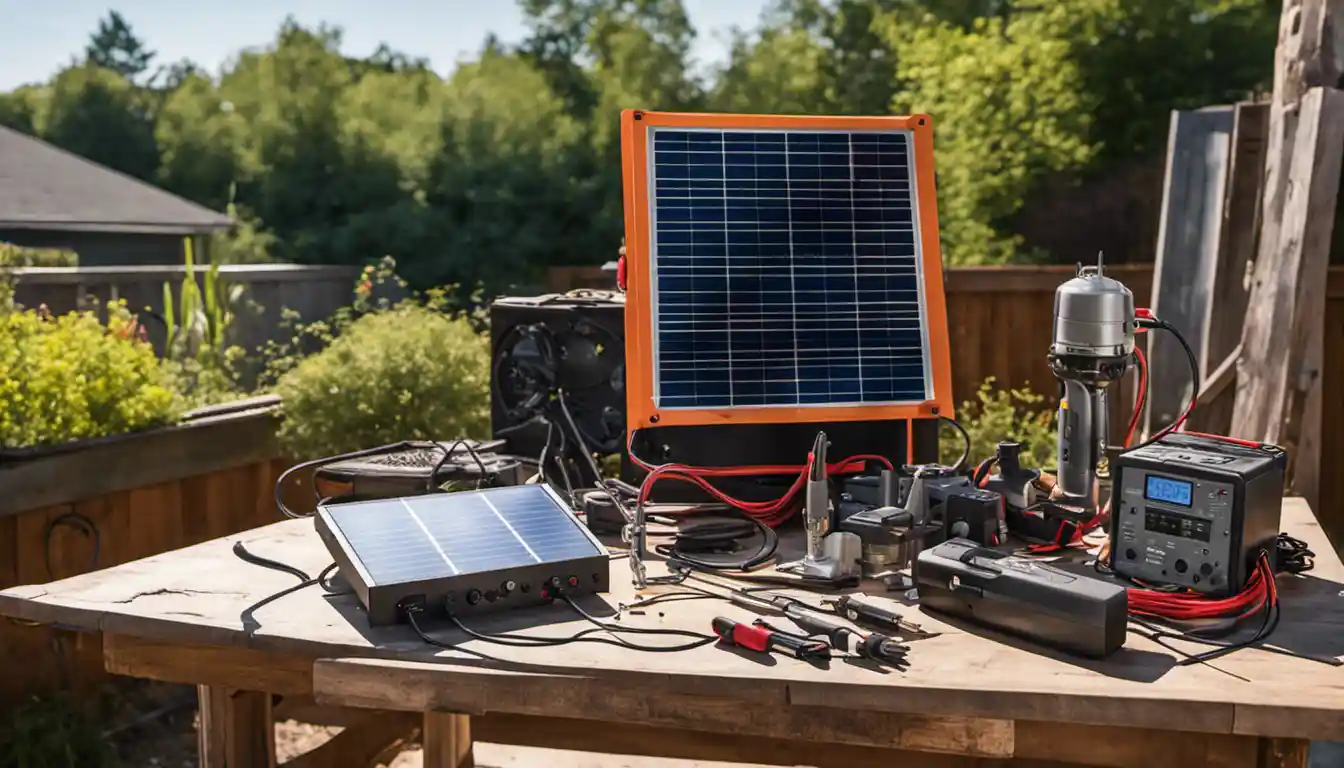
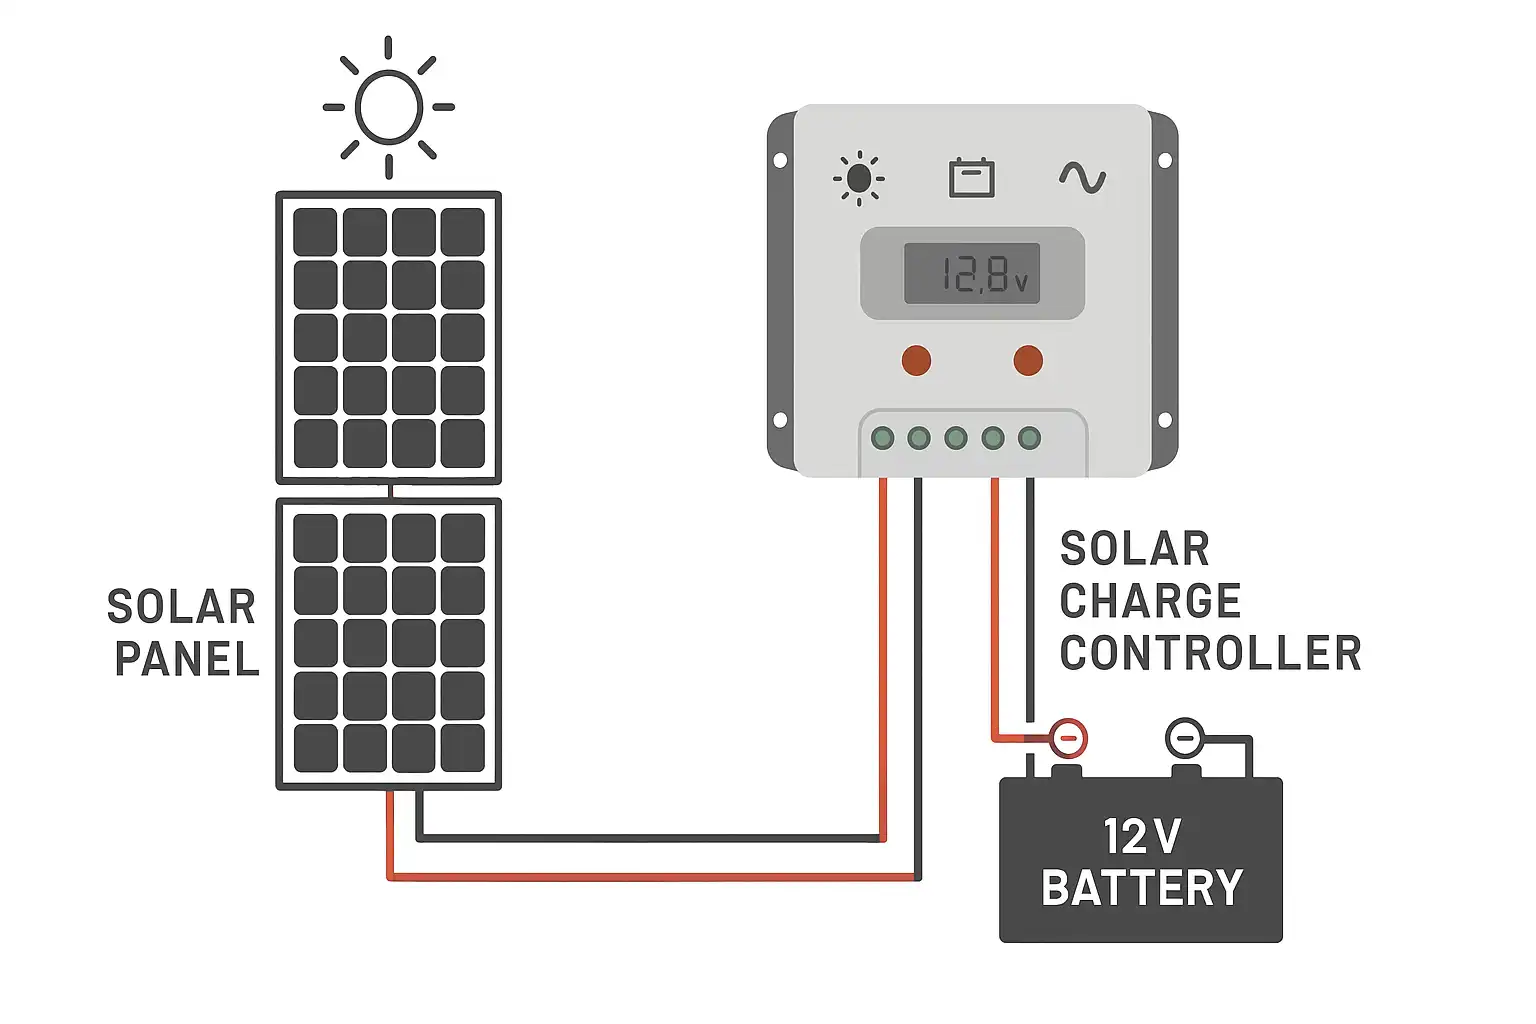
You’ve got three main hardware pieces: a solar panel, a battery, and a charge controller. The panel captures sunlight and turns it into DC electricity. The battery stores that energy for later use.
The charge controller sits in between and prevents overcharging, reverse current at night, and voltage spikes that can destroy your battery.
Without a charge controller, your panel will overcharge a battery in direct sun. Lead-acid batteries will boil dry. Lithium batteries can trigger a built-in protection circuit that shuts them down permanently.
As of 2026, every reputable solar kit includes a controller for a reason.
You also need cables, connectors (typically MC4 for modern panels), and a fuse or breaker. The fuse goes between the charge controller and the battery, close to the battery terminal. It protects the wire if something shorts out.
Don’t skip it.
If you’re new to the whole setup, it helps to understand the different panel types and how they behave. Our guide on the main components of a solar panel breaks down exactly what each cell layer does and why monocrystalline panels are generally the best choice for charging batteries.
The First Fork: What Kind of Battery Are You Charging?
The first decision you need to make is not about the panel, it’s about the battery. Battery chemistry dictates the voltage thresholds, charge profile, and even whether you can use a cheap PWM controller or need a smarter MPPT one.
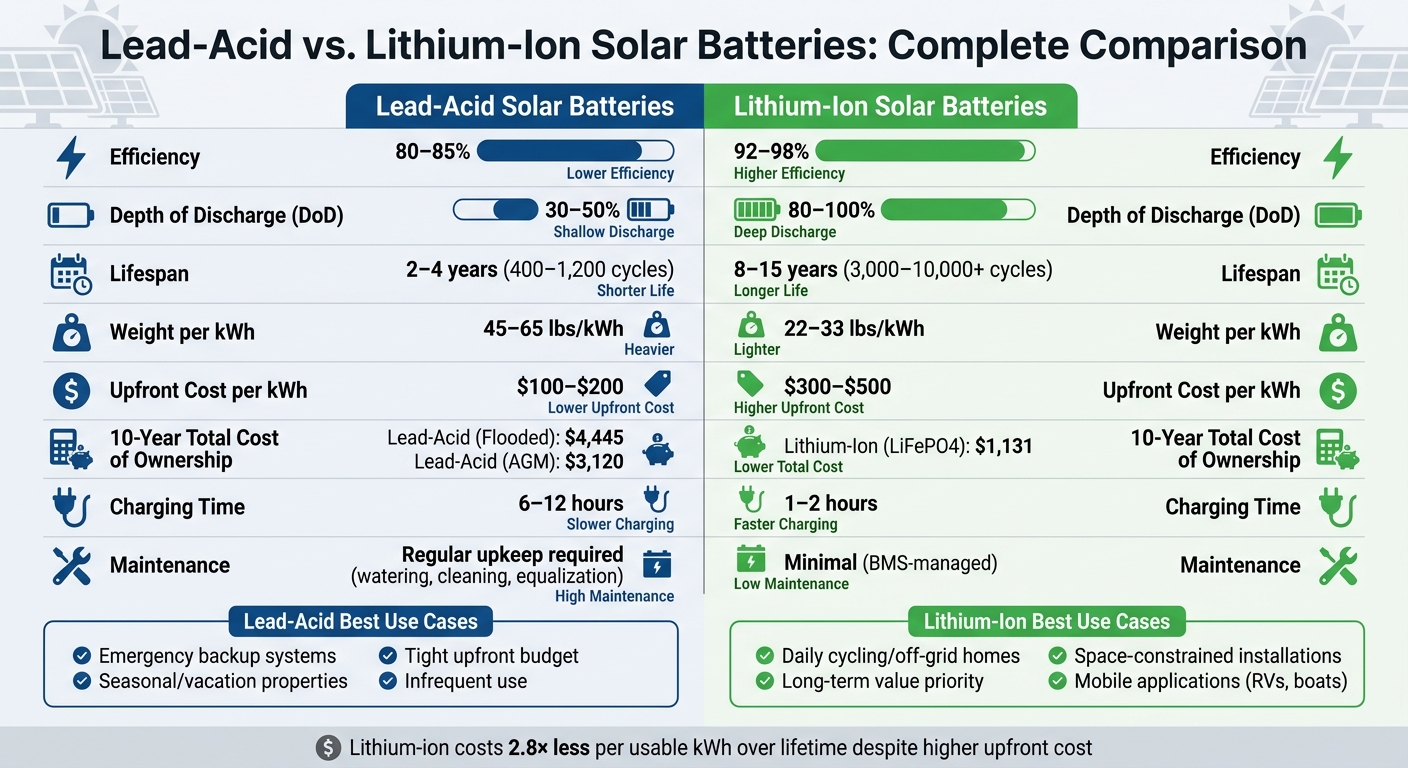
Lead-acid batteries (flooded, AGM, or gel) are the old workhorses. They’re cheap, widely available, and tolerant of overcharging to a degree. But they need a controlled “absorption” phase at around 14.4V and a float phase at 13.2V to stay healthy.
Let them sit partially discharged for a week and sulfation sets in, permanently reducing capacity.
Lithium iron phosphate (LiFePO4) batteries are lighter, last three to five times longer, and can be discharged to near-empty without damage. But they require a different voltage profile, typically 14.4V for bulk charge and no float needed. Many cheap PWM controllers lack a lithium setting, so they’ll either undercharge or overcharge the battery.
To know what profile you need, check the manufacturer spec sheet. For example, Victron Energy publishes detailed charge curves for each battery model. If you don’t have that, the U.S.
Department of Energy’s solar energy basics page is a great starting point for understanding voltage terms.
The Second Fork: Choosing Between PWM and MPPT Charge Controllers
Once you know your battery type, the next fork is the charge controller. Two main types dominate the market: PWM (Pulse Width Modulation) and MPPT (Maximum Power Point Tracking).
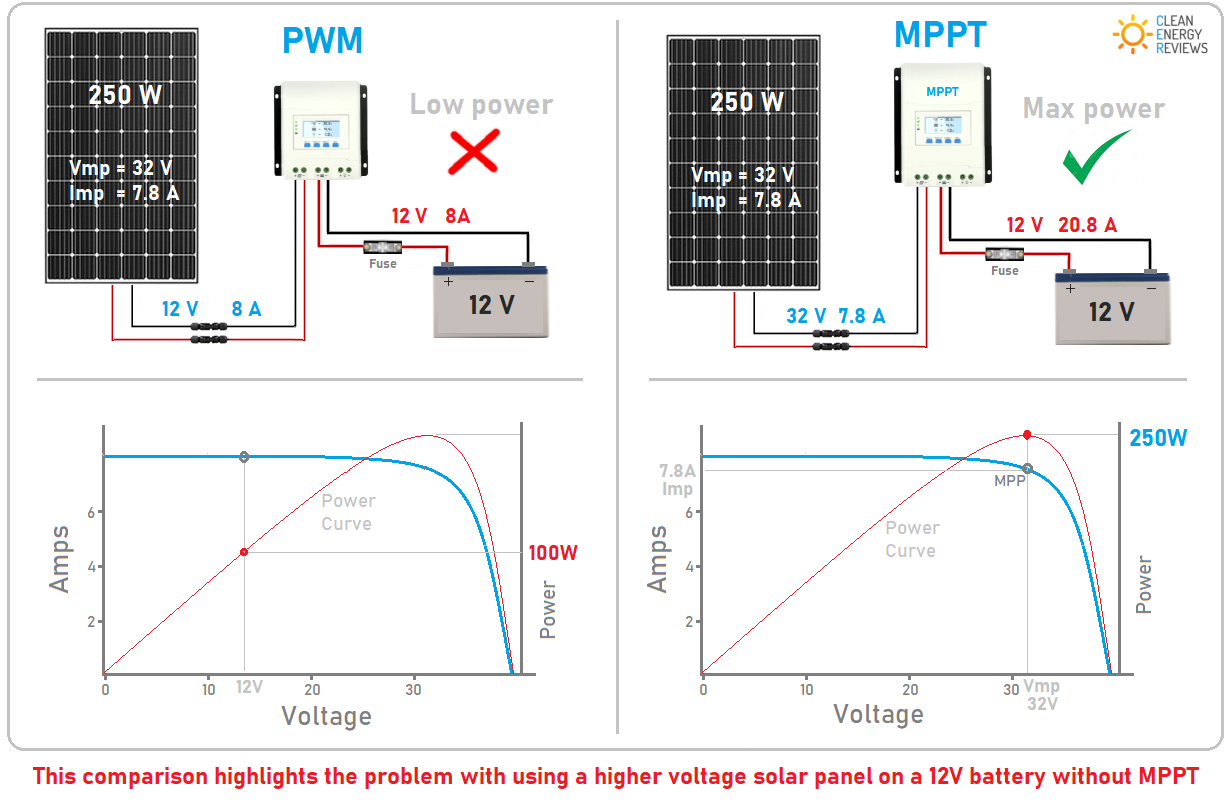
PWM controllers are simpler and cheaper, usually $15, $40. They work by connecting the panel directly to the battery and then “chopping” the voltage to keep it at the target level. But they waste any voltage above the battery’s.
If your panel puts out 18V and you’re charging a 12V battery, the extra 6V is lost as heat. PWM is best when your panel voltage is only slightly higher than your battery voltage, say, a “12V” panel (which is actually around 18V open circuit) charging a 12V battery.
MPPT controllers cost more ($50, $200) but boost efficiency by 20, 30% in real-world conditions. They convert the extra voltage into extra current. That means you can use a higher-voltage panel (like a 24V nominal panel) to charge a 12V battery and still get full power.
In cloudy weather or at dawn/dusk, MPPT pulls more energy from the panel than PWM ever could.
For reference, aggregate reviews on solar forums show that most people with small RV or camping systems (single 100W panel, 100Ah battery) are perfectly fine with PWM. But anyone with a larger array or panels mounted on a roof where shading happens should go MPPT.
The Third Fork: Matching Panel Voltage to Battery Voltage
This is where a lot of new installers mess up. You can’t just grab any panel and plug it into any battery. The panel’s voltage rating (its “nominal” voltage) needs to be in a range the charge controller can handle.
For a 12V battery system, you typically want a panel that has its maximum power point (Vmp) somewhere between 16V and 20V. Most “12V” panels have a Vmp of about 18V. That works with both PWM and MPPT controllers, though MPPT will extract a bit more.
If you use a higher-voltage panel, say a 24V nominal panel with a Vmp around 36V, PWM controllers won’t work because they can only step voltage down inefficiently by chopping. An MPPT controller, however, will convert the 36V down to 12V with high efficiency, and it will actually produce more current than a 12V panel in the same sunlight.
The rule of thumb: for PWM controllers, the panel’s Vmp should be no more than 1.3 times the battery voltage. For MPPT controllers, you can go up to 2, 3 times the battery voltage (check the controller’s input voltage limit). A typical MPPT controller handles up to 100V input.
If you need to wire multiple panels, you can connect them in series to increase voltage (good for MPPT) or in parallel to increase current (better for PWM). Series wiring reduces current and thus allows smaller wire gauge. Our article on how solar panels generate electricity explains the electrical behaviour behind these choices.
Step-by-Step: How to Wire It Safely
Let’s walk through the actual connection order. It matters more than you might think. Many people attach the panel first, then the battery, and that’s a fast way to fry a controller.
Step 1, Mount the charge controller. Place it near the battery but in a spot with good airflow. Keep it out of direct sun if possible. Heat shortens its life.
Step 2, Connect the battery to the controller first. Most controllers have a battery symbol or BATT terminal. Attach positive to positive, negative to negative. Double check polarity.
The controller will power on and detect the battery voltage. This step also lets the controller know the system voltage before the panel hits it.
Step 3, Install a fuse on the positive wire. Place it as close to the battery terminal as you can. Use an inline fuse holder or a breaker. Size the fuse to 1.25× the maximum current your controller can handle.
For a 30A controller, a 40A fuse is standard.
Step 4, Connect the solar panel to the controller. Now attach the panel wires (usually MC4 connectors) to the controller’s PV input terminals. Positive to positive, negative to negative. The panel will start feeding power.
The controller will regulate it for the battery.
Step 5, Verify the charge profile. Set the controller to match your battery type. Most modern controllers have a button or a menu for this. Select flooded, AGM, gel, or lithium.
If you skip this step, the default profile (usually flooded) might damage other battery types.
That’s the standard safe sequence. Reverse it when disconnecting: always remove the panel wires first, then the battery wires. That prevents the controller from running without a battery load, which can damage some units.
Real Numbers: How Long Will It Take to Charge?
This is the question everyone asks. The short answer depends on three things: battery capacity, panel wattage, and sun hours at your location.
Here’s the formula: battery amp-hours (Ah) × battery voltage ÷ panel wattage ÷ efficiency factor = charge time in hours.
Let’s use a real example. Say you have a 100Ah lead-acid battery at 12V. That’s 1200 watt-hours of stored energy.
You pair it with a single 100W panel. In perfect conditions, the panel outputs 100W. But real-world losses add up.
Charge controller efficiency is about 85% for PWM, 95% for MPPT. Wiring losses add another 5%. Solar panels rarely produce their rated wattage except at noon in summer.
The National Renewable Energy Laboratory data shows the average U.S. location gets 4 to 5 peak sun hours per day.
So the math looks like this: 1200Wh ÷ (100W × 0.85 efficiency) = about 14 hours of ideal sun. Spread over 4 sun hours per day, that’s 3.5 days for a full charge from empty. If you use an MPPT controller, that drops to about 12 hours, or 3 days.
Lithium batteries are more efficient. They accept charge faster and don’t need a long absorption phase. The same 100Ah lithium battery might charge in 10 to 11 sun hours.
Real-world adjustment: If you only discharge to 50% (recommended for lead-acid longevity), your charge time halves. A 50Ah draw on that 100Ah battery would charge in about 1.5 days. That’s why most off-grid setups aim for panels sized to replenish daily usage in one good day of sun.
Common Mistakes That Ruin Batteries
Almost every solar charging problem comes down to three mistakes. Avoid these and your battery will last years longer.
Mistake 1: No charge controller. Some people think a small panel can’t hurt. A 10W panel in full sun can still push 12V into a battery. That overcharges a lead-acid battery over a week.
It dries out the electrolyte and warps the plates. For lithium, the BMS might disconnect, leaving you with a dead system. Always use a controller, even for trickle charging.
Mistake 2: Wrong controller settings. A PWM controller set to flooded lead-acid will overcharge a gel battery. A controller with no lithium profile will either undercharge (stuck at 13.8V) or overcharge (trying to float at 13.2V when lithium needs no float). Read the manual.
Set it correctly the first time.
Mistake 3: Undersized wires. Thin wires create voltage drop. More current means more heat. If you run 20 feet of 16 AWG wire for a 20A current, you lose almost 10% of your power as heat.
That means the battery never fully charges. Use the standard ampacity chart to pick the right wire size for your distance.
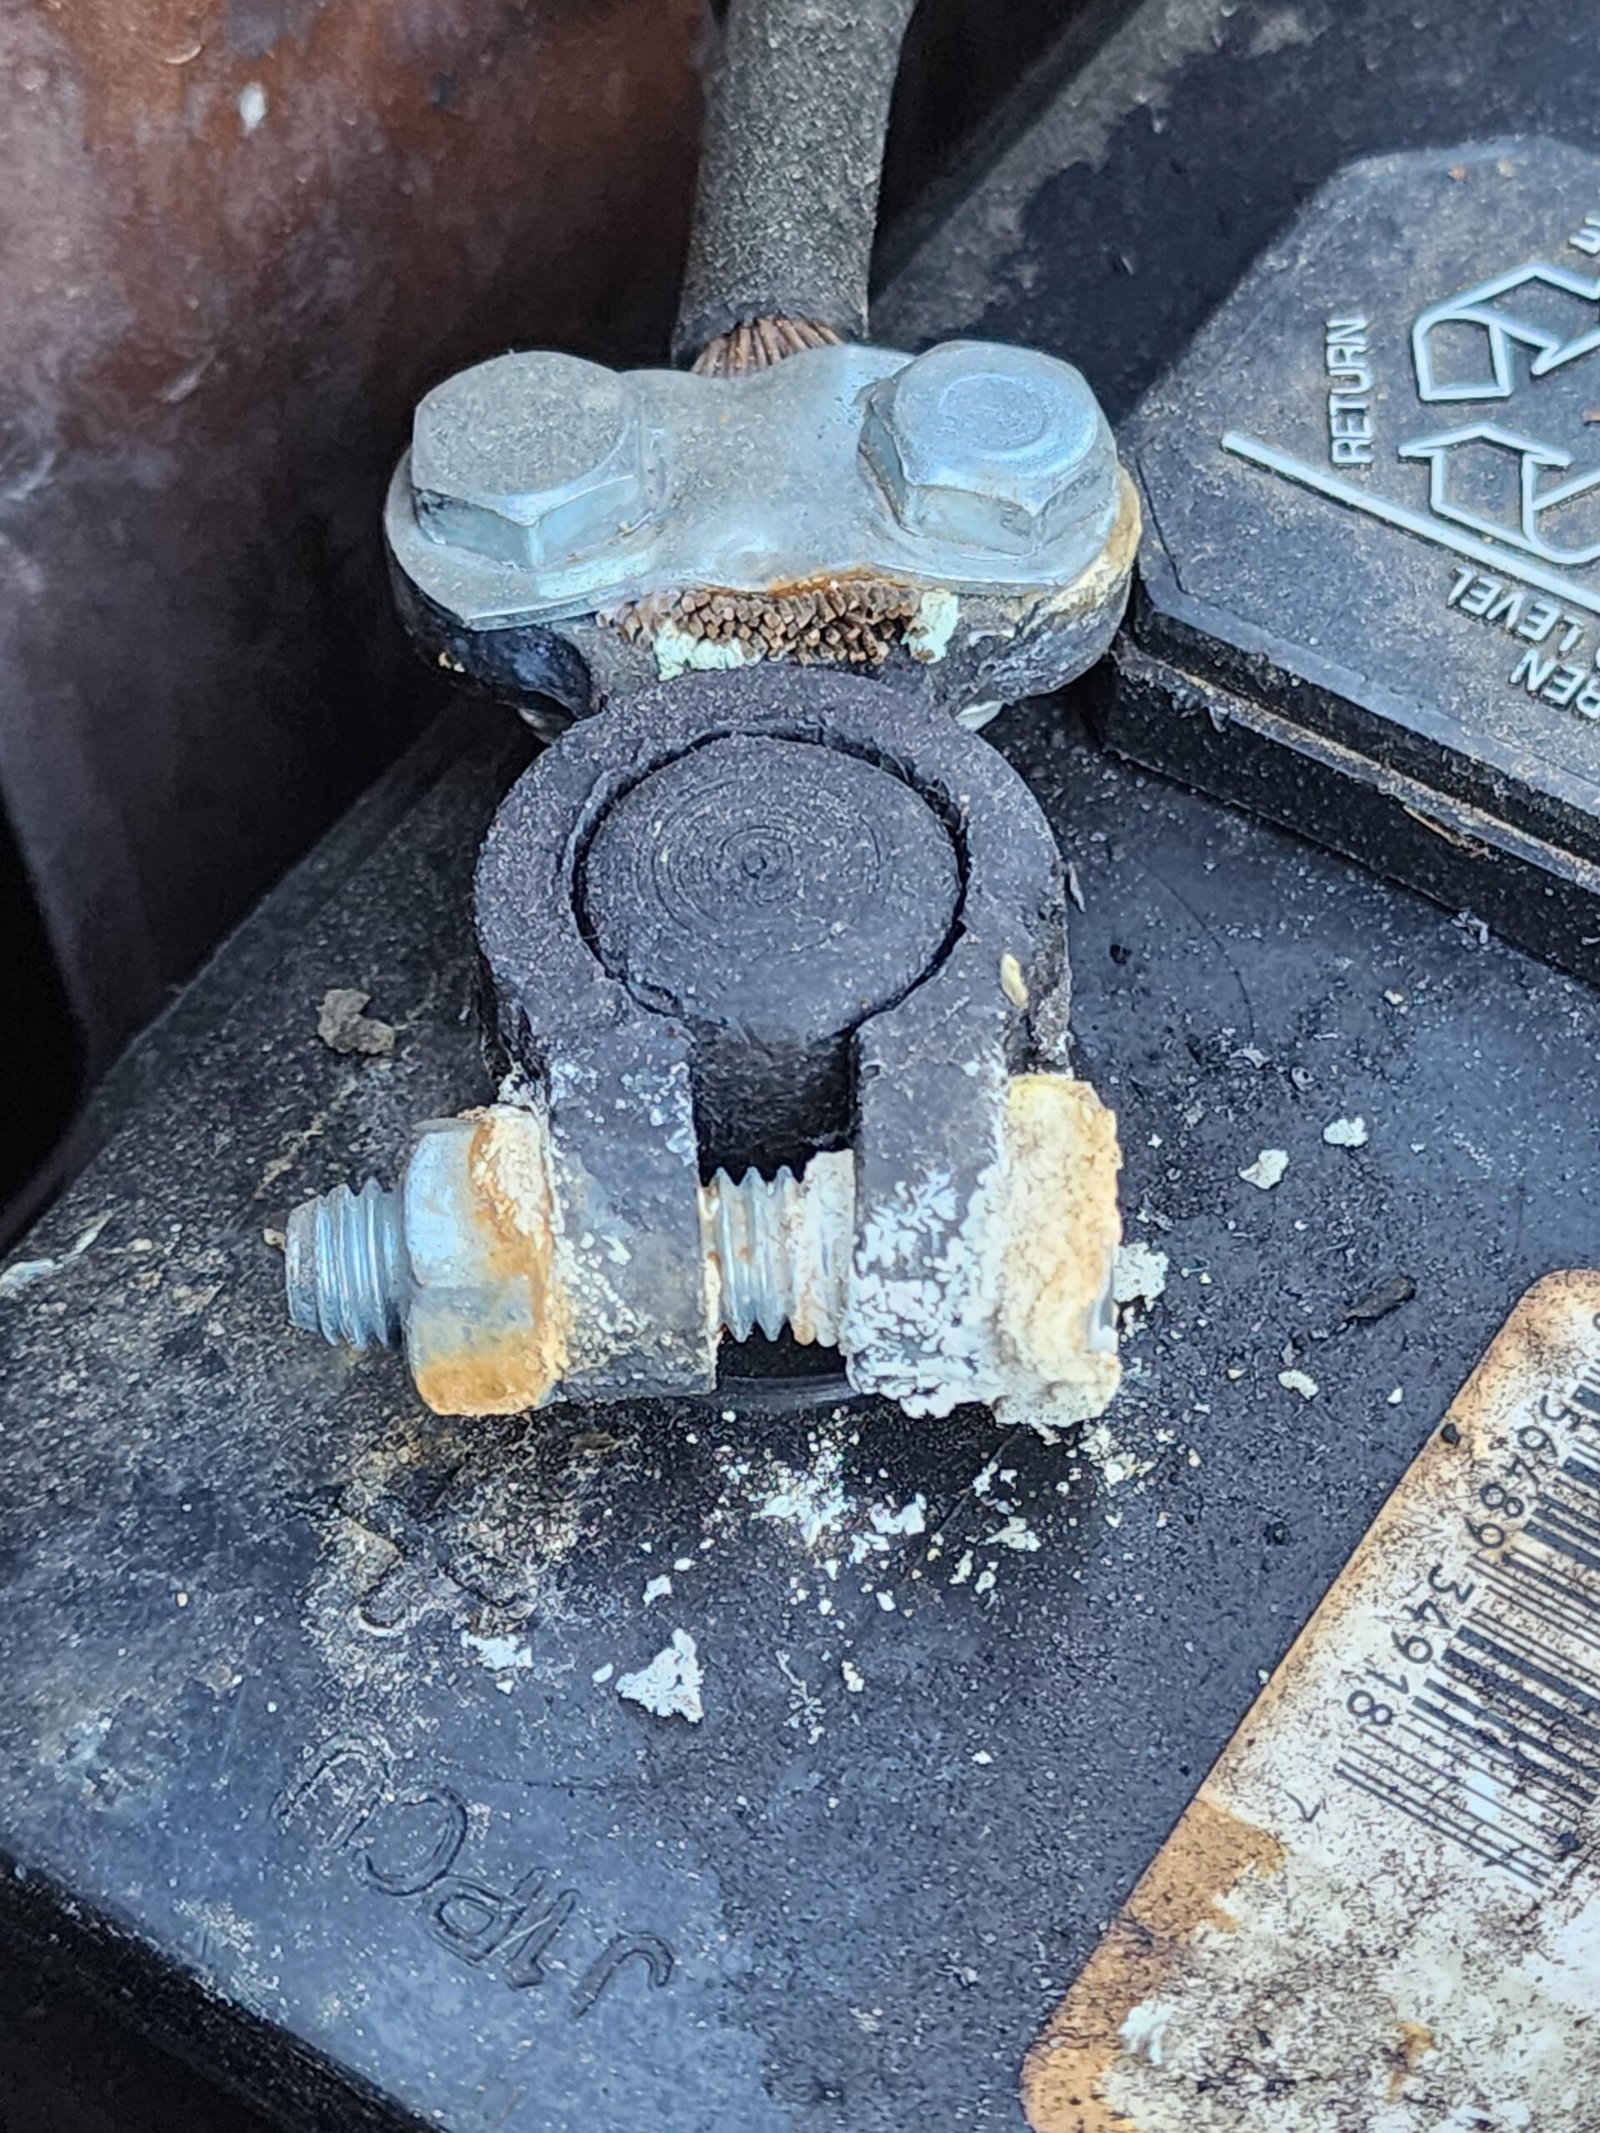
Mistake 4: Letting lead-acid sit partially charged. Sulfation starts within hours at partial state of charge. After a week, permanent capacity loss occurs. Charge the battery fully at least once every two weeks, even if you don’t use it.
A solar trickle charge with a controller set to float voltage keeps it healthy.
Mistake 5: Over-tightening terminals. This strips threads or cracks battery posts. Snug is enough. Use a torque wrench if you have one.
Most terminal bolts call for 50, 70 inch-pounds.
Expert Tips for Keeping Your Battery Healthy Long-Term
A battery is the most expensive and most abused part of a solar system. Treat it right and it lasts years. Treat it poorly and you’re buying a new one every season.
Tip 1, Use temperature compensation for lead-acid. Battery voltage changes with temperature. Cold batteries need higher charging voltage. Warm batteries need lower voltage to avoid gassing.
Most quality MPPT controllers have a temperature sensor input. If you live somewhere that swings between freezing and 100°F, this matters.
Tip 2, Equalize flooded lead-acid occasionally. Every 30 to 60 days, run an equalization cycle if your controller supports it. This applies a controlled overvoltage (about 15.5V) for a couple hours. It stirs up the electrolyte and knocks sulfate off the plates.
Only do this for flooded batteries. AGM and gel cannot be equalized.
Tip 3, Match the lithium BMS to the controller. Some lithium batteries have a BMS that disconnects when full. If the controller doesn’t detect the battery, it may throw an error or keep trying to charge. Look for a controller with a “lithium” or “LiFePO4” profile that matches your battery’s exact absorption voltage.
Many BMS units cut off at 14.6V. Set the controller to 14.4V to avoid nuisance disconnects.
Tip 4, Keep panel orientation seasonal. In winter, the sun is lower. Tilt your panels steeper (about 15 degrees more than your latitude). In summer, flatter is better.
Fixed roof mounts lose 10, 20% annual capacity compared to seasonally adjusted mounts. If you have portable panels, angle them every few hours for maximum output.
Tip 5, Clean panels regularly. Dust and bird droppings can cut output by 20% or more. A quick rinse with water every month keeps them efficient. Use a soft brush if the panel is dusty.
Avoid abrasive cleaners. The glass is tempered, but scratches reduce light transmission.
Decision Guide: Pick Your Exact Setup in 3 Questions
You don’t need to memorize everything. Answer these three questions and you’ll know exactly what to buy and how to wire it.
Question 1, What battery type and capacity do you have?
- Lead-acid (flooded, AGM, gel): go with a PWM controller if your panel voltage is close to battery voltage. Use a controller with adjustable settings or a specific AGM/gel mode.
- Lithium (LiFePO4): go with an MPPT controller that has a dedicated lithium profile. Lithium benefits from MPPT’s higher efficiency more than lead-acid does.
Question 2, What’s the panel voltage relative to the battery voltage?
- Panel Vmp is within 20% of battery voltage: PWM works fine. This is typical for a 12V panel charging a 12V battery.
- Panel Vmp is more than 30% higher than battery voltage: you need MPPT. For example, a 24V panel charging a 12V battery.
Question 3, How many sun hours do you get in winter?
- Less than 3 sun hours per day in winter: go with MPPT. It extracts 20, 30% more energy in low light. Oversize your panel by at least 50%.
- More than 4 sun hours year-round: PWM is fine for small systems. MPPT still helps but the payback period is longer.
Quick reference table:
| Your situation | Controller | Panel recommendation | Notes |
|---|---|---|---|
| Small RV, 100W panel, 12V battery | PWM | 12V nominal panel | Cheap and effective for occasional use |
| Larger RV, 200W+ array, 12V battery | MPPT | Higher voltage panels in series (24V or 48V) | Better efficiency, thinner wires |
| Off-grid cabin, 400W+ array, 24V battery | MPPT | Multiple panels in series | Essential for large systems |
| Trickle charging a car battery | PWM or simple maintainer | 5W–20W panel | A controller is still recommended |
| Camping with portable panel, 12V battery | PWM | 12V foldable panel | Light and simple |
Why Most People Get Solar Charging Wrong (And How to Fix It)
The biggest mistake is thinking you can skip the charge controller. Even a tiny 10W panel will overcharge a battery over several days. The second mistake is ignoring battery chemistry.
A lead-acid profile on a lithium battery causes undercharging or overheating. The fix is simple. Match your controller type to your battery, and always use a fuse.
If you follow the three question decision guide from the previous section, you avoid the most common failures.
FAQs – Quick Answers to What People Actually Ask
Can I charge a car battery with a small solar panel?
Yes, but only with a charge controller. A 5W to 20W panel connected through a PWM controller works as a trickle charger. It maintains a 12V lead-acid battery without overcharging.
For a deeply discharged battery, you’ll need a larger panel and more sun hours.
Do I need a charge controller for a 5W panel?
Technically a 5W panel won’t overcharge a large battery quickly, but it can still cause damage over weeks. A small controller costs under $15 and protects against reverse current at night. It’s worth the peace of mind.
Can I connect two solar panels to one battery?
Yes, but you must match the wiring to your controller. Wire them in parallel if you have a PWM controller and both panels are the same voltage. Wire them in series if you have an MPPT controller.
Never mix different panel voltages without a proper MPPT controller.
How do I know when my battery is fully charged?
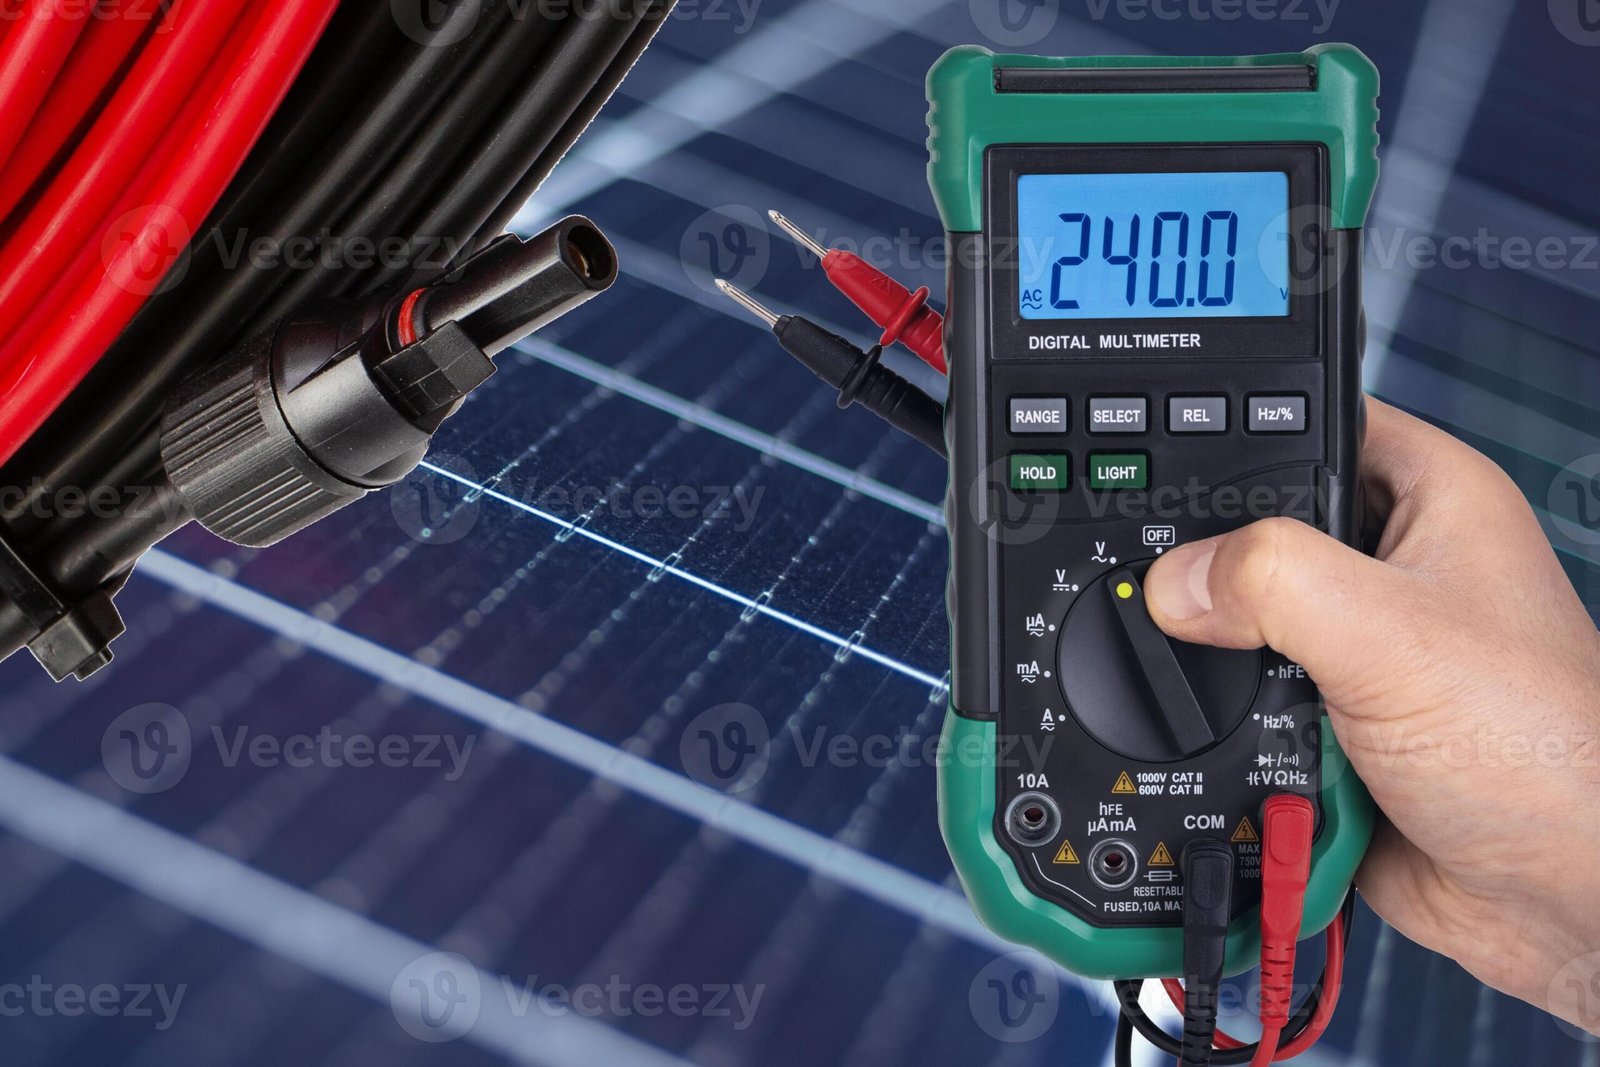
Use a multimeter or the display on your charge controller. For a 12V lead-acid battery, full charge is around 12.6V at rest. For lithium, it’s about 13.6V to 14.6V depending on the BMS.
The controller will show “float” or “full” when charging is complete.
What happens if I connect the panel to the battery backward?
Reverse polarity can destroy the charge controller instantly. Most modern controllers have reverse polarity protection, but not all. The battery connection is the most critical.
Always double check before clamping wires.
Can I leave the solar panel connected all the time?
Yes, as long as the charge controller is present and set to float voltage. Lead-acid batteries benefit from a maintenance charge. Lithium batteries should be disconnected once full if the controller doesn’t have a proper float cutoff.
When Should You Add a Second Panel
If your daily energy use exceeds half your battery capacity, you need more panel wattage. A second panel in parallel doubles the current and cuts charge time in half. For MPPT systems, run them in series to increase voltage and reduce wire losses.
The rule of thumb is to size your array to replenish your daily usage in 4 to 5 sun hours.
What About Charging in Cloudy Weather
Clouds reduce panel output by 60 to 80 percent. MPPT controllers help by tracking the best voltage point. PWM controllers struggle in low light.
If you live in a cloudy climate, oversize your panel by 50 percent and use an MPPT controller. A 200W panel in overcast conditions performs roughly like a 60W panel in full sun.
A Quick Recap Before You Buy
You need three things: a panel, a charge controller, and a battery. Match the controller to the battery chemistry. Match the panel voltage to the controller type.
Wire the battery to the controller first, then the panel. Fuse the positive wire. Set the correct charge profile.
The rest is just sun hours and patience.