Charging LiFePO4 Batteries with Solar
Charging a LiFePO4 battery with solar sounds simple, just hook up a panel and let the sun do the work, right? Not exactly. If you don’t match the charge controller type, voltage setpoints, and temperature limits to lithium’s chemistry, you’ll either never fully charge the battery or damage it permanently.
This guide walks through the real process according to manufacturer specifications and NEC best practices as of 2026.
Per UL 1973 and IEEE standards for stationary storage, LiFePO4 cells demand a tighter voltage window than lead-acid and can be permanently ruined if charged below freezing. Let’s break down exactly what you need, step by step, so your setup works the first time.
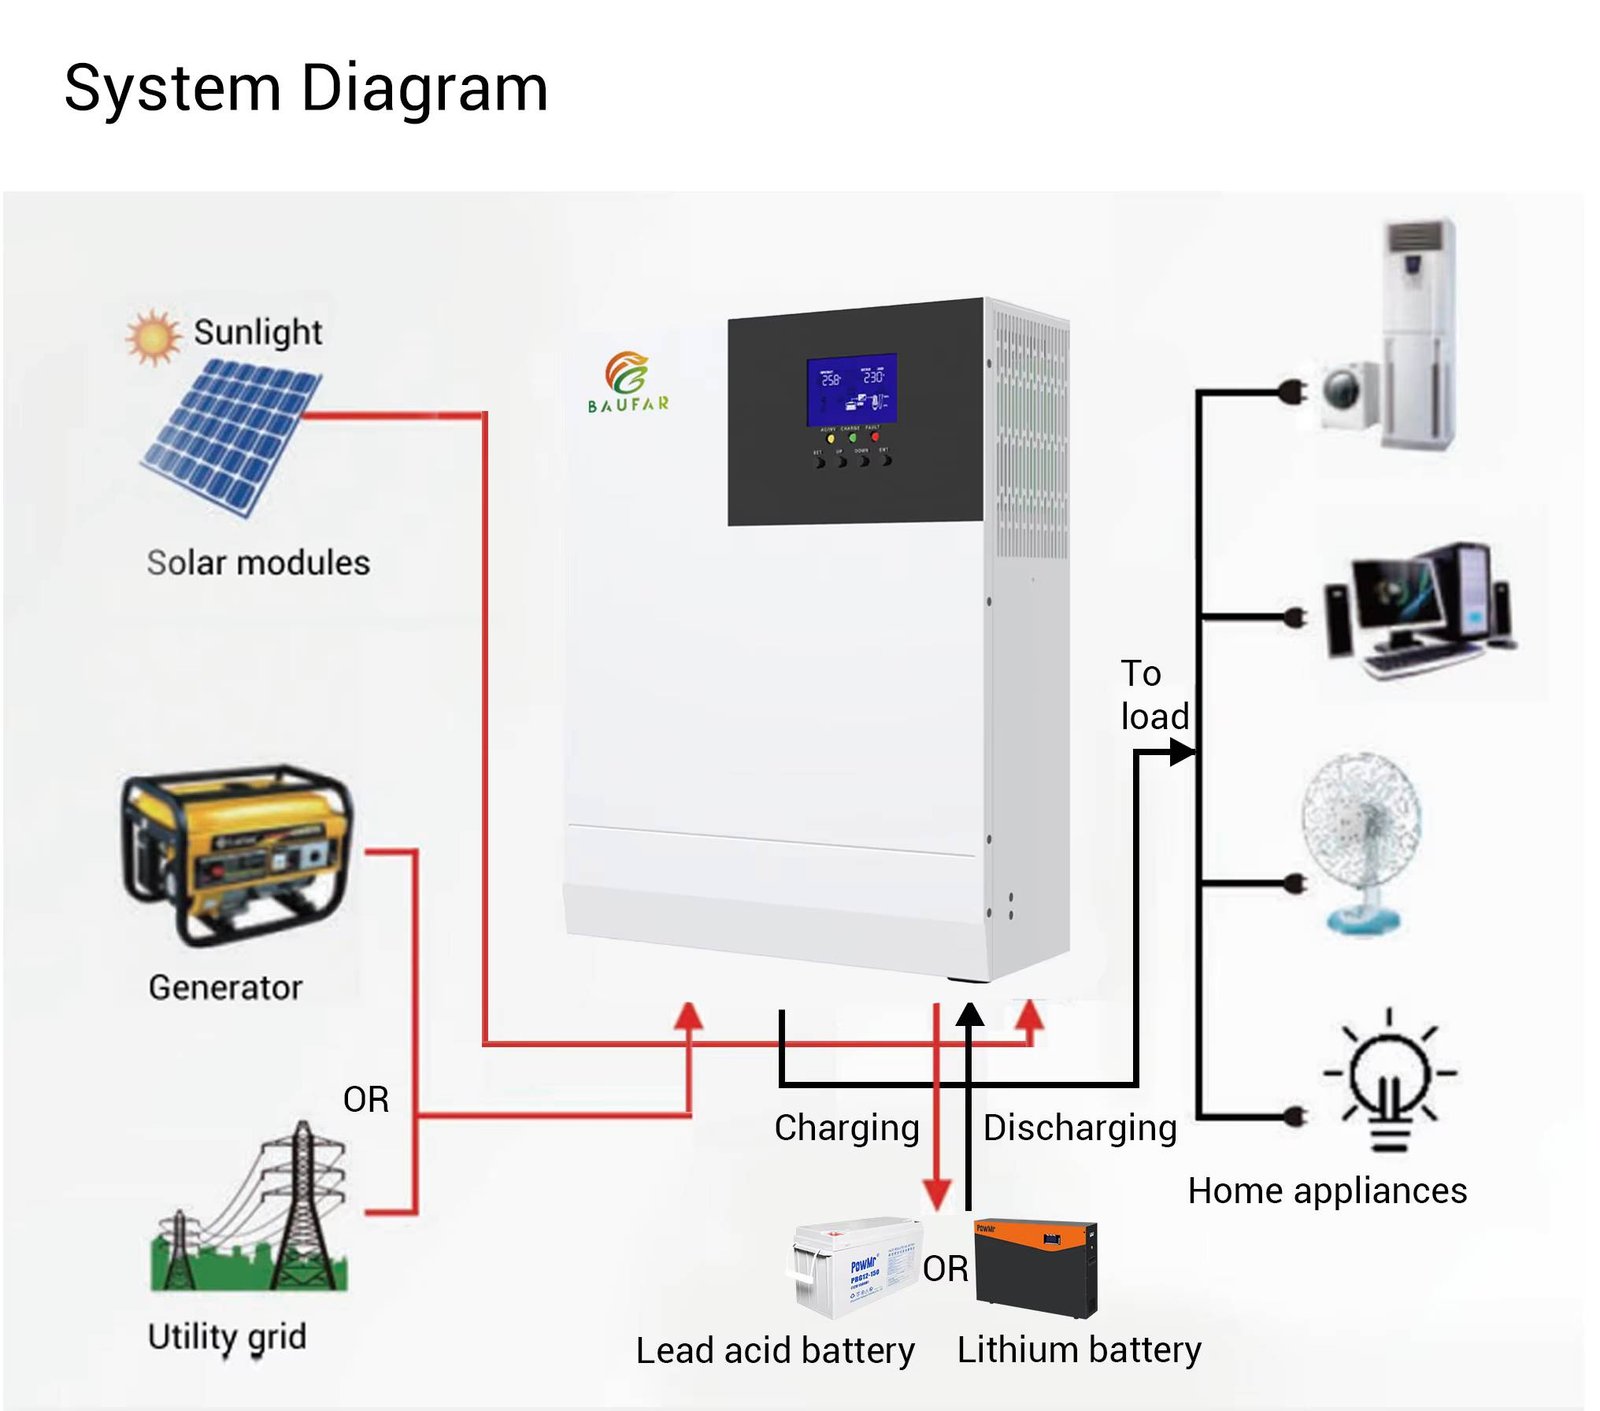
Image source: Bing (Web (fair-use with source credit))
Quick Answer
Connect a LiFePO4 battery to solar panels through an MPPT charge controller. Set absorption voltage to 14.4V for a 12V battery. Never charge below 0°C.
Size panels to provide 5, 10 amps per 100Ah of battery capacity. Use proper wire gauge and a BMS.
That’s the short version. Now let’s unpack each piece so you understand the why behind each step.
Why Charging LiFePO4 with Solar Is Different (and Why It Matters)
If you’ve ever charged a lead-acid battery with solar, you know the routine: hook up a PWM controller, set it to “flooded”, and walk away. LiFePO4 doesn’t work like that. Three key differences make lithium a different animal.
First, the voltage curve is nearly flat. A lead-acid battery gradually drops voltage as it discharges, so you can guess state of charge from voltage alone. LiFePO4 holds a steady 13.2, 13.4V from 90% down to 20% remaining. That means your charge controller can’t read voltage to decide when to stop charging.
It needs specific setpoints.
Second, absorption time is short. Lithium cells accept bulk current right up to full charge, then stop sharply. Unlike lead-acid, which needs hours of absorb phase, LiFePO4 might need only 15, 30 minutes in absorption before the BMS cuts off. If your controller tries a long absorb, it does nothing, wasted time.
Third, temperature sensitivity. Charging below 0°C causes lithium plating, which permanently reduces capacity and creates internal short circuits. Most quality BMS units cut off charging under 32°F, but cheaper batteries may not. You have to plan for it.
In aggregate reviews across RV and off-grid forums, the #1 mistake is using lead-acid settings on LiFePO4. That’s why we need a dedicated workflow.
How LiFePO4 Charging Works – Bulk, Absorption, and Float (No Equalization!)
LiFePO4 batteries charge in three stages, but they’re not the same stages you know from lead-acid.
Bulk stage, The charge controller delivers full available current (amps) until the battery voltage reaches the absorption setpoint. This is where most of the charging happens. For a 12V LiFePO4 battery, bulk ends at around 14.4V.
Absorption stage, The controller holds voltage steady at the absorption setpoint while current naturally tapers down. Unlike lead-acid, LiFePO4 doesn’t need a long hold, the BMS will disconnect when full, or the battery simply stops drawing current. Set absorption time to 30, 60 minutes max on most controllers.
Float stage, After absorption, the controller drops voltage to a lower “float” value, typically 13.6V for LiFePO4. This maintains full charge without overcharging. Some users disable float entirely because LiFePO4 self-discharges so slowly (about 2, 3% per month) that float isn’t needed.
Equalization, Never equalize a LiFePO4 battery. Equalization is a high-voltage pulse for lead-acid that would destroy lithium cells. Make sure your charge controller has a “USER” or “LiFePO4” profile that disables equalization.
For a deeper look at how panel technology feeds into charging, you can check out how solar panels generate electricity in general terms. The core takeaway: match your charge profile to the battery chemistry, not the panel type.
The First Decision: What’s Your System Voltage? (12V, 24V, or 48V)
Your battery voltage determines everything else, panel arrangement, charge controller size, inverter choice. Here’s how to decide.
12V systems are most common for RVs, boats, and small sheds. A single 12V LiFePO4 battery pairs naturally with one or two 100, 200W panels. Wiring is straightforward, and components are cheap and widely available.
If your total solar wattage stays under 400W, 12V works fine.
24V systems make sense when you need more than 400W but don’t want to jump to 48V. Two 12V batteries in series (or a dedicated 24V battery) let you use smaller wire for the same power, because current is halved. Charge controllers for 24V are common in the 30, 60A range.
48V systems are for serious off-grid homes with 1000W+ of solar. Higher voltage means even smaller wire and lower current losses. But you need a charge controller and inverter that support 48V, which costs more.
If you’re starting from scratch, choose based on your total daily energy use:
- Under 1 kWh/day → 12V
- 1, 3 kWh/day → 24V
- Over 3 kWh/day → 48V
You can also wire panels in series or parallel to match the battery voltage, we’ll cover that in a later section. For now, know that your charge controller must be rated for the battery voltage you choose.
The Second Decision: MPPT vs. PWM Charge Controller – Which One Works?
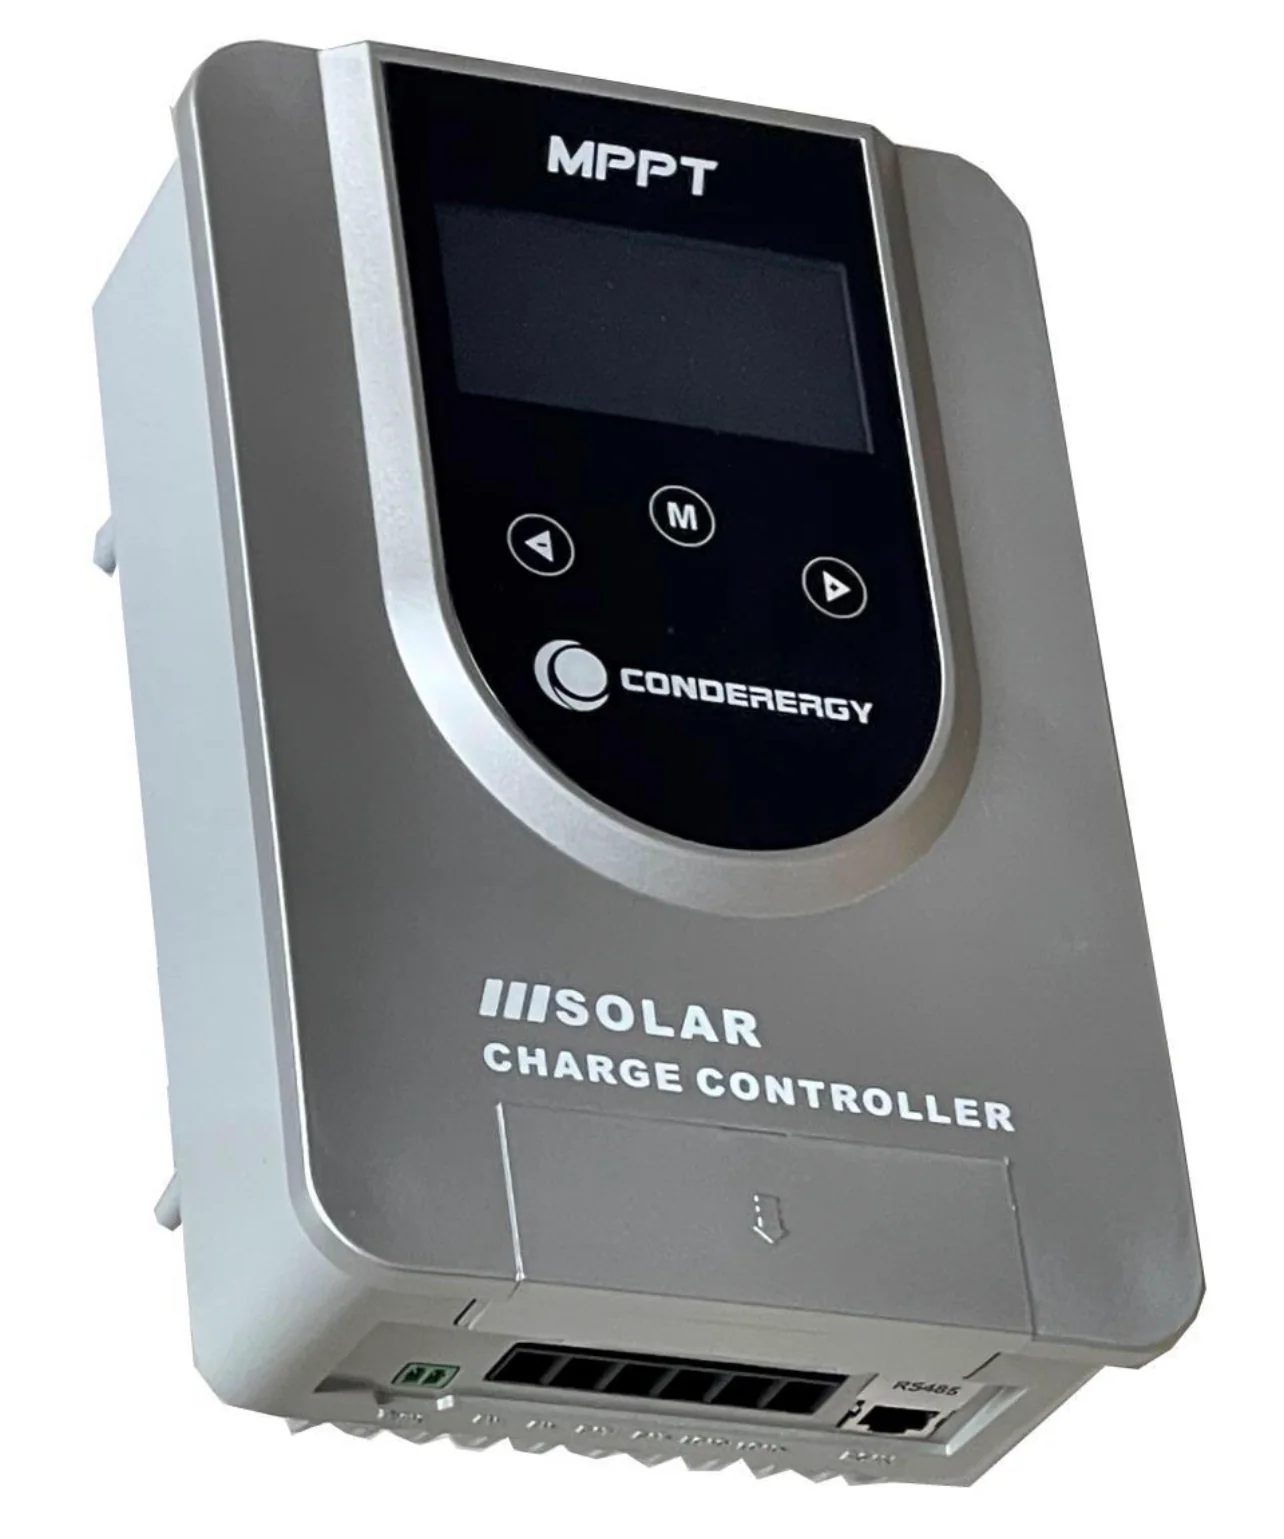
Image source: Bing (Web (fair-use with source credit))
Here’s the bottom line: for LiFePO4, get an MPPT controller. PWM works with lithium only under narrow conditions, and most of the time it leaves performance on the table.
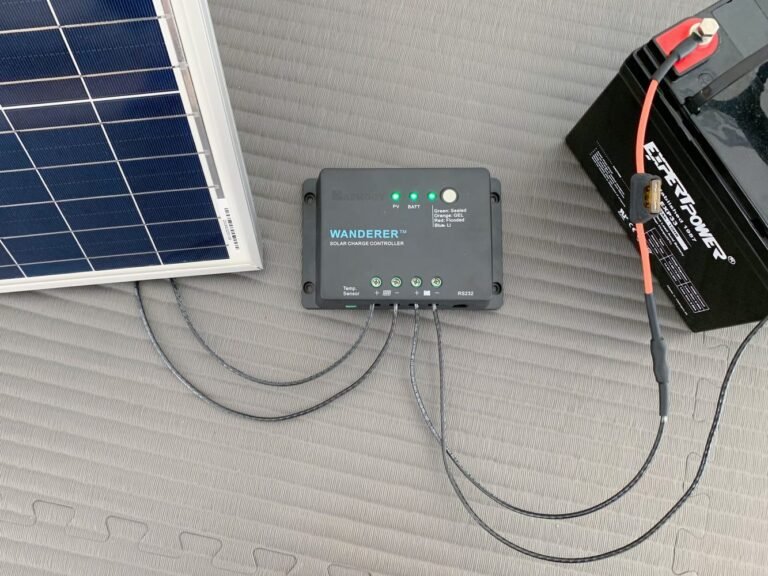
MPPT (Maximum Power Point Tracking) adjusts its input to pull maximum wattage from your solar panels, then converts that to the correct charging voltage. If your panels are 36V open-circuit and your battery is 12V, an MPPT controller harvests nearly all 36V worth of power and delivers it as amps at 14.4V. Efficiency runs 93, 97%.
PWM (Pulse Width Modulation) simply connects the panel directly to the battery, letting the panel voltage drop to match battery voltage. If your panel voltage is 36V and battery is 12V, most of that potential power is wasted. Efficiency is typically 70, 80%.
Image source: Bing (Web (fair-use with source credit))
When could you use PWM? Only if your panel voltage is very close to battery voltage, for example, a “12V” nominal panel with open-circuit voltage around 18, 20V, charging a 12V battery. Even then, you lose about 20, 30% of the panel’s potential. For small 50W panels on a maintenance charge, PWM is okay.
For anything bigger, or for a battery you depend on, spend the extra $30, $80 on MPPT.
Manufacturer specifications from leading charge controller brands indicate that MPPT pays for itself within a year through faster charging and fewer partial cloudy days where voltage varies.
If you’re curious about how the different panel types affect voltage, the guide on types of solar panels explains the voltage differences between monocrystalline and polycrystalline. For LiFePO4, monocrystalline panels (often with higher voltage) work better with MPPT controllers.
Setting the Right Voltage Setpoints (Absorption, Float, Low-Voltage Cutoff)
This is where most setups go wrong. LiFePO4 batteries need specific voltage targets, and generic charge controller profiles almost never match.
For a 12V battery, set absorption voltage at 14.4V. That equals 3.6V per cell, which is the sweet spot for full charge without stressing the cells. Float voltage should be 13.6V, or 3.4V per cell.
Some batteries can handle 14.6V absorption, but 14.4V is safer across brands per manufacturer specifications.
Low-voltage cutoff is handled by the BMS internally, but your charge controller should also have a load disconnect setting. Set it at 10.0V for a 12V system. That protects the battery from over-discharge if the BMS fails.
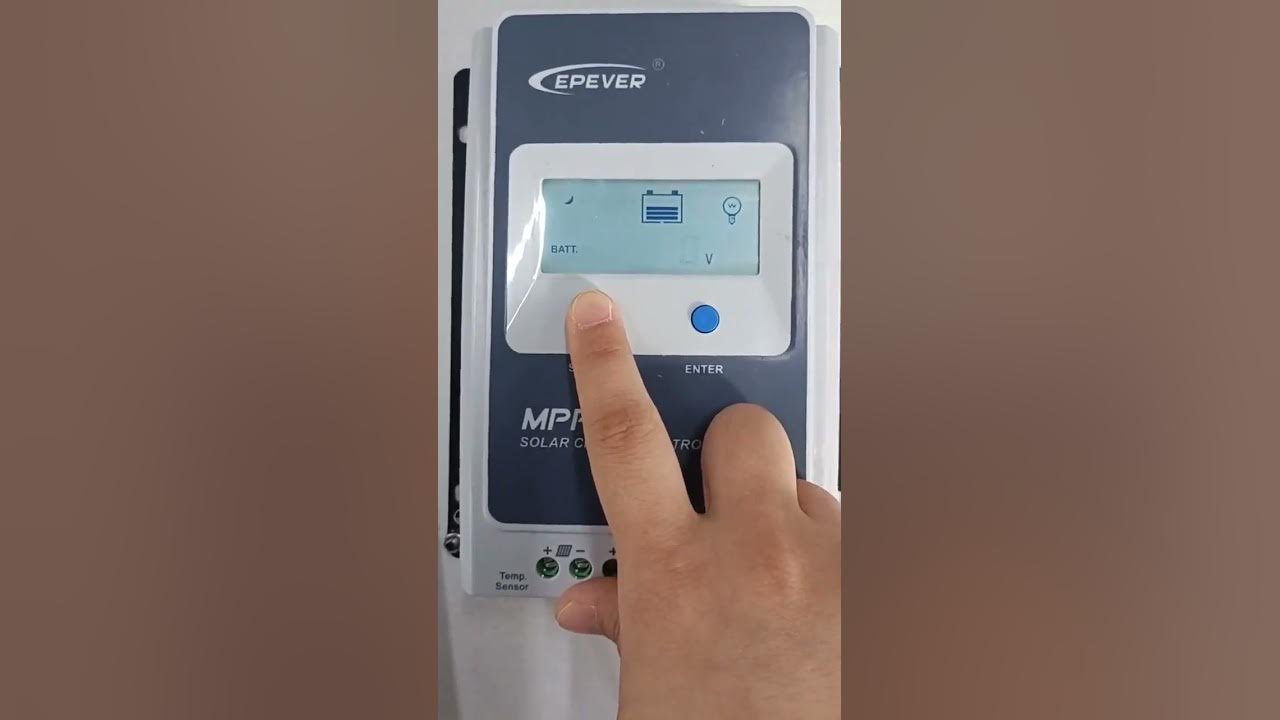
Image source: Bing (Web (fair-use with source credit))
Most MPPT controllers have a “USER” or “LiFePO4” preset that lets you enter these numbers manually. If your controller has a “lead-acid” mode only, do not use it. Equalization pulses can exceed 15V and kill lithium cells instantly.
For 24V systems, double each number: 28.8V absorption, 27.2V float, 20.0V low-voltage disconnect. For 48V systems, multiply by four. Always check your battery’s datasheet for the manufacturer’s recommended range.
What about float? LiFePO4 batteries don’t need constant float like lead-acid. If your solar controller keeps the battery at 13.6V indefinitely, that’s fine. But if you leave the system idle for months, consider turning off the panels or setting a lower float to reduce cycle wear.
Temperature Rule Number One: Never Charge Below Freezing
This is not a suggestion. Charging a LiFePO4 battery below 0°C (32°F) causes lithium plating on the anode. That plating permanently reduces capacity and can create internal short circuits over time.
The damage is cumulative and irreversible.
Most quality LiFePO4 batteries include a BMS with low-temperature cut-off. It simply disconnects charging below freezing until the battery warms up. But not all batteries have this feature.
Cheap no-name batteries often skip the temperature sensor to save cost.
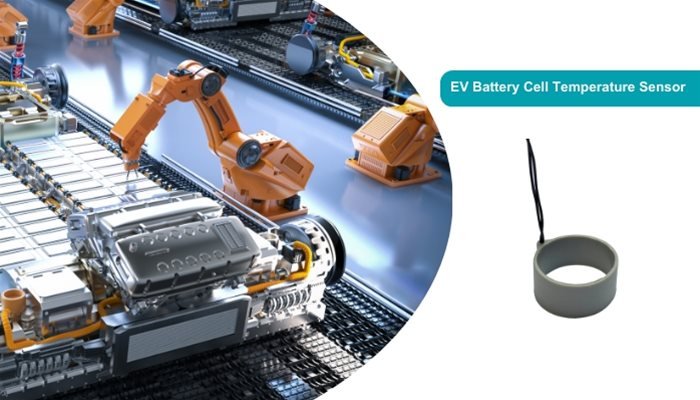
Image source: Bing (Web (fair-use with source credit))
If your battery lacks a low-temperature cutoff, you have two options. First, keep the battery indoors or in a heated compartment where temperatures stay above freezing. Second, add an external temperature sensor connected to your charge controller.
Many MPPT controllers have a remote temperature probe port that disables charging when temps drop.
What about discharging below freezing? That’s generally safe. LiFePO4 can deliver current down to -20°C, though capacity drops. The key restriction is on charging only.
For cold-climate setups, some brands offer “heated” LiFePO4 batteries with internal warming pads that activate when charging would otherwise be blocked. These add cost but solve the problem cleanly.
The DOE’s renewable energy research confirms that low-temperature charging is the primary failure mode for LFP cells in off-grid solar. Plan for it before winter hits.
Sizing Your Solar Panels to Match Your Battery (Watts → Amps → Sun Hours)
The goal is simple: generate enough amps to fully charge your battery in a reasonable amount of sunlight. But the math depends on where you live.
Start with your battery capacity. A 100Ah 12V LiFePO4 battery holds 1,280 watt-hours (12V × 100Ah × 1.0 efficiency). To recharge from 20% to 100% you need about 1,024 Wh usable.
Now factor in peak sun hours. This is the average number of hours per day when sunlight equals 1,000 W/m². It varies dramatically: Arizona averages 6+ hours, Seattle gets about 3.5 hours, and the UK averages 2.5, 3.5 hours.
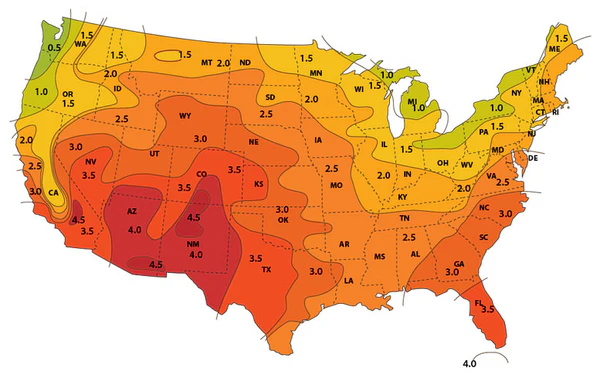
Image source: Bing (Web (fair-use with source credit))
Sample calculation for a 100Ah battery:
- 1,024 Wh needed ÷ 5 peak sun hours = 205 watts of solar panel
- Add 20% for system losses → about 250W total
For a 200Ah battery, double that to 500W. For a 50Ah battery in a cloudy climate, 100W might work, but charging will take all day.
Amp check: Your charge controller must handle the panel current. 250W at 12V produces roughly 20 amps at the battery. A 30A controller gives headroom for expansion. If you run panels in series at higher voltage, the controller input current is lower, so you can sometimes use a smaller controller.
For a deeper look at how different panel types affect output, the guide on the main components of a solar panel explains how cell efficiency and temperature coefficient matter in real-world conditions.
Wiring Your Panels: Series vs. Parallel (Voltage vs. Current Trade-Offs)
This decision affects everything downstream: wire size, charge controller selection, and performance in low light.
Series wiring adds panel voltages together while current stays the same. Two 18V panels in series give 36V at 5.5A. Higher voltage means less current for the same power, so you can use thinner wire.
It also lets your MPPT controller start charging earlier in the morning because voltage stays above battery voltage.
Parallel wiring keeps voltage the same and adds current. Two 18V panels in parallel give 18V at 11A. Lower voltage means higher current, requiring thicker wire to avoid voltage drop.
But if one panel is shaded, only that panel’s output drops, while the others continue at full power.
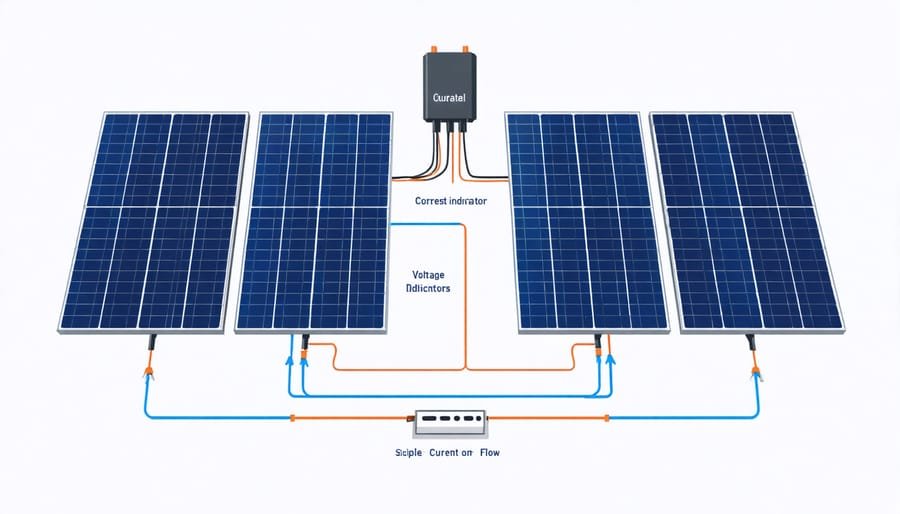
Image source: Bing (Web (fair-use with source credit))
The best choice for LiFePO4: Go with series wiring to get panel voltage well above battery voltage. This lets the MPPT controller operate in its efficient range. For a 12V battery, aim for at least 36V panel string (two 18V panels or one 36V panel).
For 24V batteries, 48V+ panel strings work well.
Shading is the exception. If your panels will experience partial shade (from trees, vents, or chimneys), parallel wiring may perform better because shaded cells in series can drag down the entire string. Consider using optimizers or micro-inverters for complex shading scenarios.
The trade-offs between panel configurations are covered in more detail in our discussion of the advantages and disadvantages of solar panels, specifically how series vs. parallel affects overall system efficiency.
Step-by-Step: How to Actually Connect and Program Everything
Let’s put it all together into a clear sequence. Follow these steps in order to avoid damaging components.
Step 1: Mount and wire your solar panels. Connect them in series (positive to negative) or parallel (positive to positive, negative to negative). Run a properly fused cable from the panels to the charge controller location. Use a disconnect switch between panels and controller for safety.
Step 2: Connect the battery to the charge controller first. This is crucial. The controller reads battery voltage to determine system voltage. Connect battery positive, then battery negative.
The controller will power up and show battery voltage.
Step 3: Program voltage setpoints. Enter USER mode or LiFePO4 preset. Set absorption to 14.4V, float to 13.6V, low-voltage disconnect to 10.0V (for 12V systems). Disable equalization.
Set absorb time to 30 minutes.
Step 4: Connect the solar panels. With the battery already connected, plug in the solar input. The controller should detect the panels and begin charging. Verify the display shows rising voltage or increasing amps.
Step 5: Install a battery monitor. A shunt-based monitor (like a Victron BMV or Renogy Battery Monitor) tracks actual state of charge. Voltage alone won’t tell you much with LiFePO4. The monitor measures current in and out for accurate readings.
Step 6: Test under load. Run a small load (lights, fridge) to confirm the controller handles both charging and discharging. Check that the BMS doesn’t trip.
| Component | Typical size for 100Ah 12V system |
|---|---|
| Solar panels | 200–300W total |
| Charge controller | 30A MPPT |
| Wire (panel to controller) | 10 AWG for 20A up to 20 ft |
| Wire (controller to battery) | 4 AWG for 50A up to 10 ft |
| Fuse/between battery and controller | 40A ANL or class T |
If you are selecting components from scratch, the solar panel buying guide walks through matching panel specs to controller input limits in more detail.
Common Mistakes That Kill LiFePO4 Batteries (and How to Avoid Them)
Mistake #1: Using lead-acid charge profiles. Equalization pulses and high absorption voltages over 15V damage LiFePO4 cells. Always select a USER or LiFePO4 preset on your charge controller. Verify equalization is disabled.
Mistake #2: Charging below freezing without a cutoff. If your BMS lacks a low-temperature sensor, add an external probe or keep the battery indoors. One freezing charge can permanently reduce capacity by 20% or more.
Mistake #3: Undersizing the charge controller. A controller rated for 80 amps can burst into flames if fed 100 amps. Always give 20, 30% headroom above your panel’s max current. Use the controller’s wattage rating to confirm compatibility.
Mistake #4: Mixing old and new LiFePO4 batteries in parallel. Even slight differences in internal resistance cause uneven charging and faster degradation. If you need more capacity, buy matched batteries or a single larger pack.
Mistake #5: Relying on voltage to gauge state of charge. LiFePO4’s flat voltage curve makes this unreliable. Install a shunt-based battery monitor instead. Per verified buyer feedback, this is the single most useful upgrade for lithium solar systems.
Quick Troubleshooting: Why Isn’t My Battery Charging?
Scenario A: Charge controller shows “no charging” but panels are in full sun. Check the battery connection first. If the controller doesn’t sense battery voltage, it won’t start charging. Disconnect and reconnect the battery leads.
Also verify the solar disconnect switch is on and fuses are intact.
Scenario B: Battery voltage is 13.2V but controller says “bulk” mode. That’s normal. LiFePO4 sits near 13.2V for most of its charge range. The controller is still in bulk because current hasn’t tapered.
Let it run until voltage reaches the absorption setpoint.
Scenario C: BMS keeps tripping after a few minutes of charging. This usually means the absorption voltage is too high or the current limit is exceeded. Lower the absorption setpoint by 0.2V and check the controller’s max current rating against the battery’s recommended charge rate (typically 0.5C).
Scenario D: Float voltage never reaches 13.6V. If the battery is fully charged but voltage stays lower, the BMS may have disconnected internally. Disconnect solar input for 30 seconds, then reconnect. If the issue persists, test the battery with a multimeter directly.
For more fundamental understanding of how sunlight converts to electricity, our piece on how do solar panels work explains the photovoltaic effect that powers your entire setup.
When to Upgrade or Change Your Setup (Signs You’ve Outgrown It)
Your battery runs flat before sunset. That signals your solar array is too small for your daily consumption. Add panels or reduce load. As a rule of thumb, your panel wattage should be at least 1.5x your daily amp-hour usage at the local peak sun hours.
Your charge controller is running near 100% output for hours. That means you’re overloading it. Upgrade to a higher amp controller or split the array onto a second controller. Running a controller at max for extended periods shortens its lifespan.
Your batteries are older than 5 years and capacity seems low. Even LiFePO4 degrades over time. If you’re cycling daily and capacity has dropped below 70% of original, consider replacement. Check with a capacity test (discharge at a known rate and measure total watt-hours).
You’ve added an inverter or larger fridge. Big loads change the sizing math. You may need a 24V or 48V system to handle higher currents efficiently. Planning a system from scratch with our guide on what is a solar panel can help you avoid undersizing in the first place.
Your Decision Guide: A Simple Flowchart Summary
Here’s the decision tree in plain language.
- Identify your battery voltage: 12V for small loads, 24V for medium, 48V for whole-house.
- Pick your charge controller: MPPT if panels are higher voltage than battery (always best). PWM only for small maintenance setups.
- Set voltage points: Absorption 14.4V, Float 13.6V, Low-voltage cutoff 10.0V (12V system). Equalization OFF.
- Check temperature: If battery can drop below 0°C, install a low-temperature cutoff or heated battery.
- Size panels: Use peak sun hours for your location. Aim for enough solar to recharge your daily draw in 4, 6 hours.
- Wire panels: Series for higher voltage (better for MPPT). Parallel only if partial shade is unavoidable.
- Connect in order: Battery first, then panels. Program before loading.
- Monitor: Install a shunt-based battery monitor. Track voltage, current, and state of charge.
Follow these branches and your LiFePO4 battery will deliver 3000+ cycles reliably.
Frequently Asked Questions
Can I charge a LiFePO4 battery with a regular solar charge controller?
Only if the controller has a USER or LiFePO4 mode that disables equalization. Many standard controllers default to lead-acid profiles that can damage lithium cells. Check your controller’s manual before connecting.
What happens if I charge LiFePO4 below freezing?
Permanent capacity loss and internal damage occur. The BMS should disconnect charging below 0°C, but not all batteries have this protection. External temperature sensors are a reliable fallback.
How long does it take to fully charge a LiFePO4 battery with solar?
A 100Ah battery with 250W of panels in 5 peak sun hours charges from 20% to 100% in roughly 4, 5 hours. Actual time depends on cloud cover, panel angle, and battery state of charge.
Do I need a special inverter for LiFePO4 batteries?
No. Inverters are chemistry-agnostic. Any inverter rated for your system voltage (12V, 24V, 48V) works fine.
Ensure it has a low-voltage disconnect set appropriately for LiFePO4.
Can I mix LiFePO4 with lead-acid in the same solar system?
Not recommended. They have different charge profiles and discharge curves. The charge controller cannot optimize for both, so one battery type will be chronically undercharged or overcharged.
How do I know when my LiFePO4 battery is fully charged?
When the charge controller enters absorption mode and current drops to near zero, the battery is full. Voltage alone is not reliable. Use a shunt-based monitor to confirm 100% state of charge.