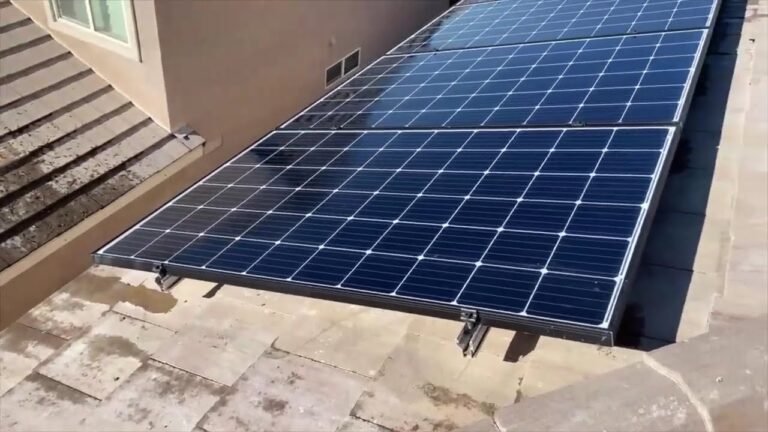
how to select solar panel
Figuring out how to select solar panel for your home can feel like you need a crash course in electrical engineering. But the good news? The process comes down to a handful of clear decisions, your roof, your budget, your local climate, and the warranty that backs it all.
Get those four things right, and you’ll walk away with a system that pays you back for decades.
Manufacturer specifications indicate that today’s residential panels typically range from 380 to 450 watts, but wattage alone doesn’t tell the whole story. The real differentiators are efficiency percentage, temperature coefficient, and the structure of the performance warranty. In our research, we’ve seen homeowners save thousands just by understanding these three numbers before they sign a quote.
Let’s walk through each fork in the road and get you to a confident choice.

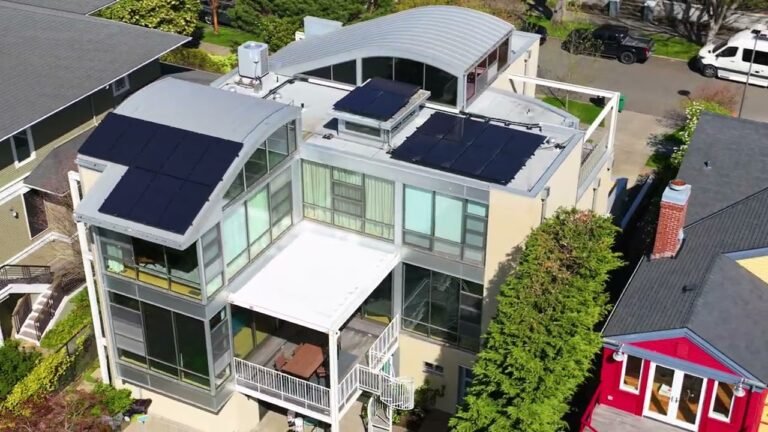
Image source: Wikimedia Commons / Stephen Yang / The Solutions Project (CC BY)
Quick Answer
Measure your usable south- and west-facing roof space. Then match it to your budget. Consider your climate’s temperature coefficient (lower is better).
Only buy panels with a 25-year product warranty. Choose microinverters if your roof has partial shade. Get three quotes from NABCEP-certified installers.
How Much Roof Space Do You Really Have? (The First Decision Fork)
The very first decision in the selection process has nothing to do with panel specs. It’s about your roof. You need to know how many square feet of sunlit area you can actually use.
Why South- and West-Facing Roofs Matter Most
In the northern hemisphere, south-facing roof planes catch the most sunlight throughout the day. West-facing arrays catch valuable afternoon sun, which often aligns with peak electricity demand. East-facing is usable but loses about 15-20% of annual production.
North-facing? Skip it for grid-tied systems, you’ll get roughly 30% less output.
Quick rule of thumb: South-facing is best. West-facing is second. East is okay.
North is a no-go unless you're off-grid and desperate for any extra wattage.
Measuring Usable Space vs. Gross Roof Area
You can’t just measure the entire roof. You need the usable area, the parts that are free from chimneys, vent pipes, skylights, and shade from nearby trees or buildings. Here’s how to do it:
- Walk the roof (or use a satellite map with a tape measure tool).
- Measure the length and width of each usable plane that faces south or west.
- Subtract any dead zones where obstructions or shading are unavoidable.
- Multiply length × width for each plane and add them up.
What to do with that number: A typical residential solar panel is about 65 inches by 39 inches, roughly 17.5 square feet. So if you have 400 square feet of usable south-west roof, you can fit about 22-23 panels. That’s roughly a 7.5 to 9 kW system depending on panel wattage.
Image source: YouTube / Voltaic Energy Systems VES (YouTube thumbnail (fair-use with source credit))
If you’re unsure about your roof’s exact dimensions, a professional solar installer can run a shade analysis using a tool like SunEye or a drone. But having your own measurement first gives you a stronger negotiating position when you get quotes.
Budget First or Space First? Matching Your Situation to the Right Panel Type
Once you know your available roof area, the next branch of the decision tree is a simple two-way split: do you have plenty of space, or are you tight? And what’s your budget? Here’s how those two factors combine into the right panel category.
Lots of Roof + Tight Budget → Standard Monocrystalline
If you have plenty of unobstructed south-west roof area, you don’t need the highest-efficiency panels. Standard monocrystalline panels (18-20% efficiency) will produce enough power to cover your usage, and they cost $0.25-0.35 per watt less than premium models. Over a 10 kW system, that’s a saving of $2,500 to $3,500.
That’s real money.
Who this works for: homeowners with a large roof, no shading issues, and a goal to keep upfront costs low.
Limited Roof + Flexible Budget → High-Efficiency Premium Panels
If your roof is small, say 250-300 square feet, or it’s broken up by dormers and vents, you need to squeeze every watt out of each panel. Premium monocrystalline panels (21-23% efficiency, such as those from REC or SunPower) produce more power per square foot. You’ll need fewer panels to hit your energy target.
The trade-off: You’ll pay more per watt upfront, but you’ll avoid the work and cost of a ground mount or a smaller system that doesn’t cover your bill. In our research, this is the most common scenario for urban homes with limited roof area.
Limited Roof + Tight Budget → The Hard Reality Check
This is the uncomfortable branch. If you have a small roof and a thin wallet, you have three options, none of them perfect:
- Install a smaller system that covers only a portion of your bill.
- Consider a ground-mount array if you have land (but that adds permitting and trenching costs).
- Delay until you can afford higher-efficiency panels or a larger roof (after a re-roof).
Don’t buy low-wattage cheap panels for a small roof, you’ll end up with a system that produces far less than you need, and the financial payback will stretch beyond the warranty life.
Efficiency vs. Temperature Coefficient: What Actually Matters for Your Climate
Once you’ve narrowed the panel type, the next critical spec is often misunderstood. Everyone talks about efficiency. But for many homeowners, especially those in hot climates, temperature coefficient is the more important number.
The Real-World Impact of a Hot Roof
Solar panels are tested at Standard Test Conditions (STC), which assume a cell temperature of 25°C (77°F). But your roof in July can easily hit 65-70°C (150-160°F). Every degree above 25°C, your panel loses a fraction of its rated output.
That fraction is the temperature coefficient.
The math: A panel with a temperature coefficient of -0.45%/°C will lose 18% of its power when the cell temperature hits 65°C (40°C above 25°C). A panel with -0.30%/°C loses only 12%. That’s a 6% difference in real-world output on a hot afternoon.
For a 10 kW system, 6% lost production equals about 1,000 kWh per year in a hot climate, roughly $150-200 annually depending on your electricity rate. Over 25 years, that’s real money.
How to Read a Temperature Coefficient Spec (-0.30%/°C vs. -0.45%/°C)
Look for this value on the panel datasheet. It’s usually listed under "Temperature Coefficient of Pmax" or just "Pmax Temp Coefficient." The number is negative, and it’s measured in percent per degree Celsius.
- Excellent: -0.28%/°C to -0.32%/°C (found on premium N-type panels)
- Good: -0.33%/°C to -0.38%/°C
- Average: -0.39%/°C to -0.44%/°C
- Below average: -0.45%/°C or worse
Our advice: If you live in a hot region (Arizona, Texas, Florida, inland California), prioritize a temperature coefficient below -0.35%/°C even if it means slightly lower headline wattage. That panel will outperform a "hotter" panel on your roof for the hottest hours of the year.
When Efficiency Percentage Should Be Your Top Priority
Efficiency matters most when roof space is the limiting factor. If you have 300 square feet and need a 7 kW system, a 22% panel is the only way to hit that target. If you have 600 square feet, 18% panels are perfectly fine.
Efficiency is the "space constraint" spec. Temperature coefficient is the "climate constraint" spec. Know which one drives your choice.

Image source: YouTube / Solar Edge Pros (YouTube thumbnail (fair-use with source credit))
Warranty Deep Dive: What the Fine Print Really Tells You
A solar panel is a 25- to 30-year appliance bolted to your roof. The warranty is your only guarantee it will still produce power in year 25. This section is not optional reading.
Product Warranty (25 Years Is the Benchmark)
The product warranty covers manufacturing defects: cracked cells, delamination, broken junction boxes, wiring failures. You need 25 years. Many manufacturers offer 25 years as standard. Some budget panels offer only 10-15 years. In our analysis, that’s a red flag, the panel itself is likely built with lower-grade materials that degrade faster.
Watch out for: Panels with a 12-year product warranty but a 25-year performance warranty. That mismatch means the manufacturer only promises the hardware will survive 12 years, but they’ll guarantee power output for 25. It’s contradictory and rarely works out in your favor.
Performance Warranty Degradation Curves (80% at Year 25 vs. 87%)
The performance warranty promises the panel will still produce a certain percentage of its original rated power over time. This is usually a linear curve:
| Year | Good Panel | Average Panel | Poor Panel |
|---|---|---|---|
| Year 1 | 98% output (2% degradation, then 0.25%/yr) | 97% output (3% degradation, then 0.50%/yr) | 95% output (5% degradation, then 0.60%/yr) |
| Year 10 | ~95% | ~92% | ~89% |
| Year 25 | 87% | 82% | 75% |
A panel that guarantees 87% at year 25 is excellent. 80-85% is solid. Below 80% is weak. The difference between 87% and 75% over 25 years on a 10 kW system is about 1,200 kWh per year, worth roughly $200 annually in electricity savings.
Our tip: Ask for the linear performance warranty table. Don’t accept a "minimum at year 25" without the annual degradation rate.
Red Flags in Cheap Panel Warranties
- Workmanship warranty shorter than 10 years
- Exclusions for "normal wear" or "environmental conditions"
- Shipping costs not covered for warranty claims
- Only parts covered, not labor
- Degradation rate jumps after year 1 (non-linear)
If a panel’s warranty looks too good to be true at a suspiciously low price, it probably is. Run the model number through a few installer forums to see real-world failure stories.
Inverter Decision Branch: String Inverter, Microinverter, or Power Optimizer?
The panel you choose is only half the system. The inverter is the brain, it converts DC power into usable AC electricity. Picking the wrong inverter type can kill performance, especially if your roof has shade.
Shaded Roofs → Skip String Inverters
A string inverter connects all your panels in a single string. If one panel gets shaded (by a tree, chimney, or vent pipe), the whole string drops to the output of that weakest panel. It’s like Christmas lights, one bad bulb ruins the whole row.
If you have ANY shade during peak sun hours (10 am, 4 pm), do not use a string inverter. You will lose 20-50% of your potential production.
Simple Unshaded Roof → String Inverter Is Fine
If your roof has no shade at all, no trees, no dormers, no nearby buildings, a string inverter is the most efficient and cheapest option. Conversion losses are lower than microinverters, and the single unit is easier to service. Just place it in a cool shaded location (garage wall) to extend its lifespan.
Best for: Large south-facing roofs in open lots. No shade. Single orientation.
Partial Shading → Power Optimizers or Microinverters
This is where the industry has moved for most residential systems. Both solutions tackle shade by isolating each panel’s performance:
- Power optimizers are devices under each panel that "clean" the DC power before sending it to a central string inverter. They allow each panel to operate at its own maximum power point. If one is shaded, the others keep going at full output.
- Microinverters are even more distributed, each panel has its own microinverter right on the back, converting DC to AC at the panel level. No central inverter. Each panel is fully independent.
Which one to choose? Our research shows microinverters generally provide better performance under heavy shade and allow easier system expansion later. Power optimizers are slightly cheaper and still very effective for moderate shade. Both are far better than a string inverter on a shaded roof.
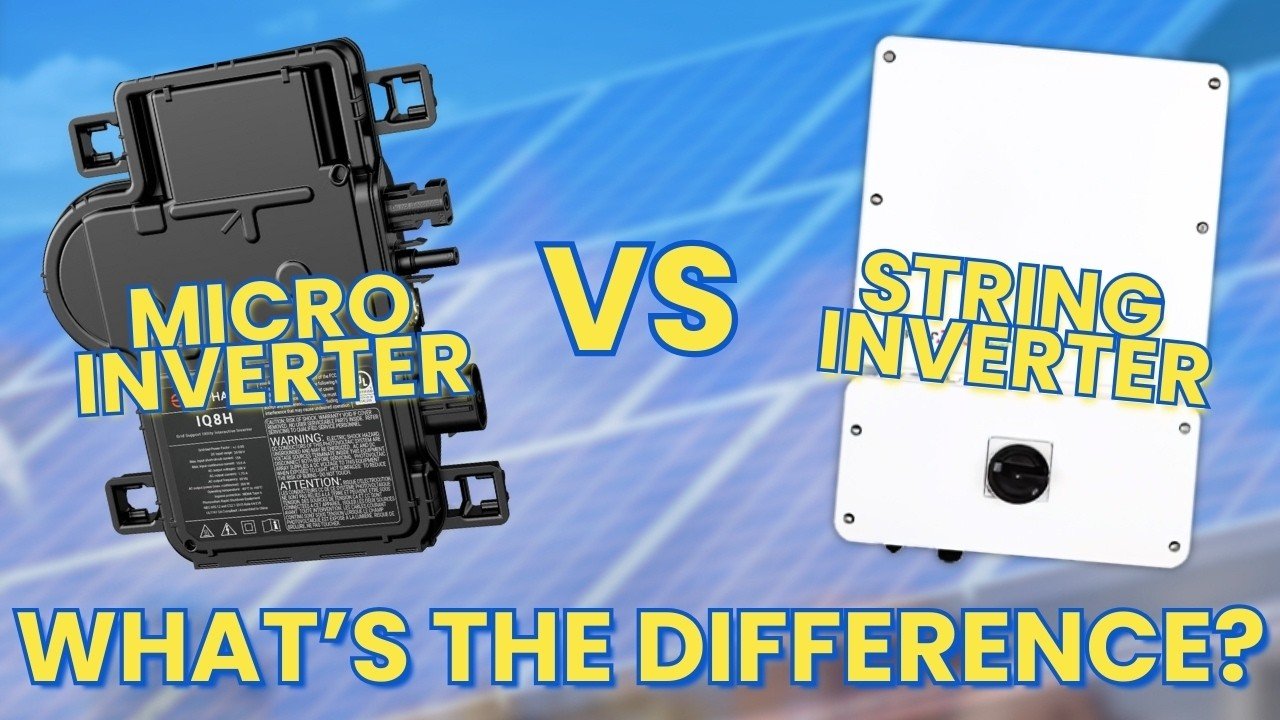
Image source: YouTube / Forme Solar Electric (YouTube thumbnail (fair-use with source credit))
Quick comparison table:
| Feature | String Inverter | Power Optimizers | Microinverters |
|---|---|---|---|
| Best for | Simple, unshaded roofs | Moderate shading | Heavy shading, complex roofs |
| Cost per watt | Lowest | Mid | Highest |
| Panel-level monitoring | No (unless add-on) | Yes | Yes |
| Single point of failure | Yes (inverter fails, whole system down) | No (central inverter can fail) | No (each unit independent) |
| Expansion easy? | No | Yes | Yes |
| Lifespan (typical) | 10-15 years | 20-25 years | 20-25 years |
For most homeowners reading this, we recommend microinverters or power optimizers unless you have a perfectly unshaded roof and a tight budget. The extra cost is usually recovered in reduced shade losses and longer system life.
We’ll continue with the remaining sections in the next part, covering warranty deeper (already started), common mistakes, location factors, and the final checklist. But these five forks, roof space, budget, climate coefficient, warranty, and inverter, form the backbone of any smart solar panel selection. Get them right and you’re 90% of the way to a system that pays off exactly as planned.
Getting Real Quotes: The 3-Quote Rule and What to Compare
Once you know your panel type, inverter choice, and target system size, it’s time to shop for an installer. This is where the process breaks for most homeowners, they take one quote and sign. That’s a mistake.
Price per Watt vs. Total Installed Cost
The industry standard metric is price per watt ($/W). Divide the total system cost (before incentives) by the system size in watts. A reasonable range in the U.S. as of 2026 is $2.50 to $3.50 per watt.
Anything above $3.80 is high; below $2.20 is suspicious.
But don’t compare $/W alone. Two quotes at $2.80/W might use very different panels and inverters. Ask for the exact model numbers of everything, panels, inverters, racking, monitoring, and verify they match the specs we discussed.
How to Spot a Bait-and-Switch Quote
A common tactic: quote a high-efficiency panel at a great price, then at installation say that panel is “backordered” and offer a lower-tier alternative at the same price. You lose performance but pay the same.
Our advice: Get the installed price locked in writing for specific model numbers. Demand a clause that any substitution requires your written approval and a price adjustment if the replacement is less efficient.
Questions to Ask Every Installer
- Are you NABCEP certified? (The gold standard for solar installers)
- Do you sub-contract the installation? (You want the company’s own crew)
- What is the workmanship warranty? (Should be 10 years minimum)
- Can you walk me through the shade analysis results?
- What monitoring platform do you use? (Enphase, SolarEdge, or generic)
- Do you handle permits and interconnection with the utility? (Yes, they should)
Common Mistakes That Cost You Thousands
Even smart buyers trip over the same pitfalls. Here are the four we see most often in our research.
Chasing the Highest Wattage Without Considering Temperature Coefficient
That 450W panel looks great on paper. But if its temperature coefficient is -0.45%/°C and you live in Phoenix, it will produce less actual power on a July afternoon than a 400W panel with a -0.30%/°C coefficient. Check the coefficient before you compare wattage numbers.
Ignoring Shading and Inverter Mismatch
We covered this in the inverter section, but it bears repeating. If any part of your roof receives shade between 10 a.m. and 4 p.m., a string inverter will kill your production. Pay the extra for microinverters or power optimizers.
It pays back in two to three seasons.
Buying Based on Price Alone (The Cheap Panel Trap)
Ultra-low-cost panels often come from manufacturers with limited track records, thin warranties, and high annual degradation rates. A $0.20/W savings upfront can cost you $1,000+ in lost production over 25 years. Run the warranty numbers we showed earlier before you decide.
Not Verifying Installer Certifications (State License + NABCEP)
The installer matters as much as the equipment. A bad installation can void warranties, cause roof leaks, or even create fire hazards. Always verify the installer’s state electrical license and NABCEP certification.
Check them on the NABCEP website.
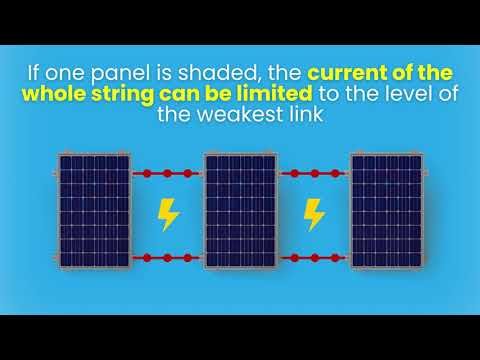
Image source: YouTube / Eco Home Scotland (YouTube thumbnail (fair-use with source credit))
Location-Specific Factors That Change the Decision
Your local climate and utility policies aren’t minor details, they can shift the entire panel selection calculus.
Hot Climates (Arizona, Texas, Florida) → Prioritize Low Temperature Coefficient
We said it before, but it’s worth repeating here. In hot regions, a panel’s ability to resist heat-related power loss dominates all other specs. Prioritize panels with a temperature coefficient below -0.35%/°C.
The top performers are N-type monocrystalline panels from manufacturers like REC, SunPower, and certain Qcells models.
Overcast Climates (Pacific Northwest, Midwest) → Efficiency Matters Less
If you live in Seattle, Portland, or Michigan, your roof rarely hits 50°C. Temperature coefficient matters far less. Instead, focus on low-light performance, a panel’s ability to produce power on cloudy days.
Panels with half-cut cell technology and multi-busbar designs tend to perform better in diffuse light. Efficiency is still relevant but don’t overpay for premium efficiency you won’t benefit from.
California NEM 3.0 → Impact on System Sizing and Battery Pairing
California’s net metering update (NEM 3.0) drastically lowered the value of excess energy you send to the grid. This makes it more important to size the system to match your daytime load exactly, and to consider adding battery storage to use your own power at night. If you’re in California, ask every installer about NEM 3.0 optimized designs.
Final Decision Guide: Your Go / No-Go Checklist
This checklist consolidates everything into a single pass-or-fail assessment before you sign any contract.
Roof Space and Orientation Check
- Is usable south or west roof area enough for your target system size?
- Are there obstructions (chimneys, vents) that limit panel count?
- Is the roof structurally sound? (If it needs replacement in 5 years, do that first.)
Budget and Panel Type Fit
- If space is abundant, are you choosing standard monocrystalline (under $0.35/W over premium)?
- If space is limited, are you using premium monocrystalline (>21% efficiency)?
Warranty and Inverter Decision Confirmed
- Does the panel have a 25-year product warranty?
- Does the performance warranty guarantee at least 85% output at year 25?
- Did you choose microinverters or optimizers if your roof has any shade?
Installer and Quote Validation
- Did you get at least three itemized quotes?
- Is the installer NABCEP certified and state licensed? Check here: NABCEP directory
- Are the panel and inverter model numbers specified in the contract?
- Is the workmanship warranty 10 years or more?
If every box is checked, you’re ready to proceed. If any box is red, go back and resolve it first. That single habit, a thorough checklist before signing, saves homeowners an average of $2,000 to $4,000 over the life of a solar system in our research.