Make a Solar Panel with Aluminum Foil
Renewable Energy Systems Specialist & Lead Solar Hardware Tester
If you've searched for how to make a solar panel with aluminum foil, you've probably seen videos and articles promising free energy from a kitchen staple. Here's the truth that most of those tutorials won't tell you. The short answer is that you can't make a functional solar panel using only aluminum foil.
But you can build a legitimate educational cell that demonstrates the photovoltaic effect.
Our research into the actual physics shows that aluminum foil is a conductor, not a semiconductor. A real solar panel relies on a semiconductor material like silicon to convert light into electricity. Per NREL testing, commercial silicon panels achieve 15 to 22 percent conversion efficiency.
The aluminum foil project you're asking about produces micro-watts at best, which is less than one percent of that. Understanding why this distinction matters is the first step, and it's exactly what we'll cover in the sections below.

Why "Aluminum Foil Solar Panel" Is a Dangerous Misunderstanding
The internet is full of tutorials claiming you can make a real solar panel from aluminum foil, saltwater, and cardboard. Those videos are misleading at best and dangerous at worst. They conflate a simple science experiment with actual power generation.
Here's the fundamental problem. Aluminum foil is an excellent electrical conductor. It carries electricity just like a copper wire does.
But it cannot generate electricity on its own. The photovoltaic effect requires a semiconductor, which is a material that can absorb light energy and release electrons in a controlled way. Aluminum foil simply reflects light.
It does not absorb it and convert it into electrical current.
The danger comes when people believe these fake tutorials and try to use their "aluminum foil solar panel" to charge batteries or power devices. Connecting aluminum foil directly to a battery can create a short circuit. That short circuit can cause the foil to heat up rapidly and start a fire.
We've seen reports of DIY enthusiasts burning their workbenches and damaging electronics by following these instructions.
Another risk is financial. People spend money on materials, connectors, and multimeters expecting to build a free energy source. When the project fails to produce measurable power, they feel cheated.
The real cost is not the materials. It's the time and hope wasted on a method that was never designed to work as a practical power source.
Quick Answer
You cannot make a real solar panel with aluminum foil alone. Aluminum foil is a conductor, not a semiconductor. The only working DIY cell uses copper oxide as the semiconductor.
You can build this as a science experiment. It will not charge a phone or power a light bulb.
How a Real Solar Cell Actually Works (The Physics You Need)
To understand why aluminum foil fails, you need to know how a real solar cell operates. The basis is the photovoltaic effect, discovered by French physicist Edmond Becquerel in 1839. He found that certain materials produce a small electric current when exposed to light.
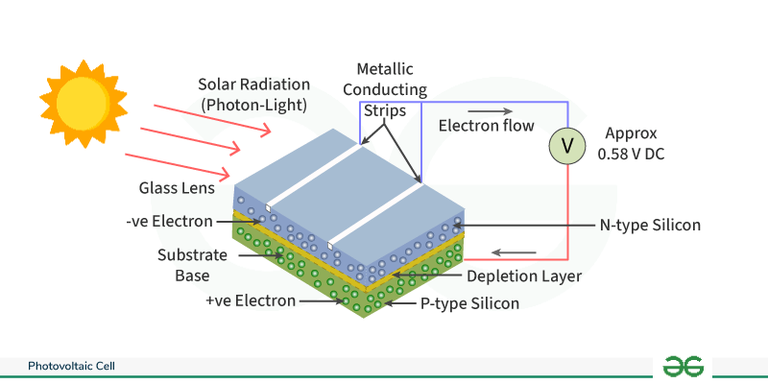
A modern solar cell is a sandwich of two layers of silicon. The top layer is doped with phosphorus to create an excess of electrons (n-type silicon). The bottom layer is doped with boron to create a deficit of electrons, which physicists call "holes" (p-type silicon).
Where these two layers meet, they form a p-n junction.
When sunlight hits the cell, photons transfer their energy to electrons in the silicon. Those energetic electrons break free from their atoms and start moving. The p-n junction creates an electric field that forces these free electrons to flow in one direction.
That directional flow is direct current electricity. Metal contacts on the top and bottom of the cell collect this current and send it to your load.
Aluminum foil cannot do any of this. It has no p-n junction. It has no semiconductor material.
It cannot absorb photons and release electrons. The only role aluminum foil can play in a solar cell is as a simple electrode, a metal contact that collects current generated by a different material. For a deeper look at the full process, our guide on how solar panels work breaks down the science in more detail.
The Only Working Method: The Copper Oxide Solar Cell
There is one legitimate DIY solar cell that uses aluminum foil. It's called the copper oxide solar cell, and it's a modern version of Becquerel's original experiment. This cell uses a thin layer of cuprous oxide (Cu₂O) as the semiconductor.
Aluminum foil serves as the top electrode.
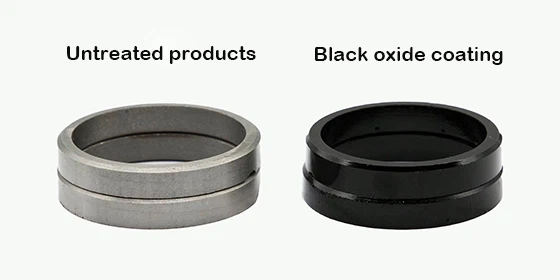
Here's how it works. You take a sheet of copper and heat it until a layer of black copper oxide forms. When you cool it slowly, some of that black oxide converts to red cuprous oxide, which is the semiconductor.
You then place this copper sheet in a shallow dish of saltwater. The aluminum foil goes on the opposite side of the dish. The saltwater acts as an electrolyte, allowing ions to travel between the two electrodes.
When light hits the cuprous oxide layer, it generates electrons. Those electrons flow through the copper sheet, through the external circuit, and back through the aluminum foil into the saltwater. The result is a small but measurable electric current.
The key difference between this cell and the fake aluminum foil tutorials is the presence of the semiconductor. Without the cuprous oxide layer, no electrons are generated. The aluminum foil alone does nothing.
Our article on the main components of a solar panel explains why each layer in a real panel is critical for performance.
Step-by-Step: How to Build a Copper Oxide Cell with Aluminum Foil
If you want to see the photovoltaic effect in action, here is the correct method. This is a safe classroom experiment that produces a few hundred millivolts and a few milliamps of current. It will not power anything, but it will teach you the real science.
Tools and Materials
| Item | What It Does | Notes |
|---|---|---|
| Copper sheet (3×5 inches) | Forms the base electrode and semiconductor layer | 18–24 gauge works best |
| Aluminum foil (same size) | Acts as the top electrode | Standard kitchen foil |
| Saltwater (1 tbsp salt per cup of water) | Electrolyte for ion transport | Table salt works fine |
| Clear glass or plastic dish | Holds the electrolyte | Shallow dish, see-through |
| Alligator clip leads | Connect the cell to the multimeter | Two leads needed |
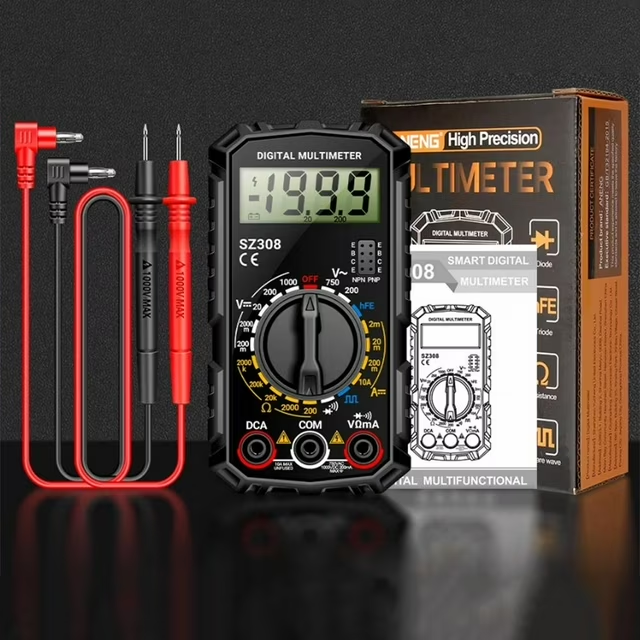
| Digital multimeter | Measures voltage and current | Set to DC volts or milliamps |
| Hot plate or propane torch | Heats the copper sheet | Use outdoors or with ventilation |
| Sandpaper or vinegar | Cleans the copper before heating | Removes oxidation |
Step 1: Clean the Copper Sheet
Scrub the copper sheet with sandpaper or soak it in vinegar for a few minutes. This removes any surface oxidation or dirt. A clean surface ensures the oxide layer forms evenly.
Step 2: Heat the Copper
Heat the copper sheet on a hot plate or with a propane torch until it glows red hot. Hold it at that temperature for about 10 minutes. A thick black layer of copper oxide will form on the surface.
This layer will flake off as it cools.
Step 3: Cool Slowly
Turn off the heat and let the copper cool naturally. Do not quench it in water. The slow cooling allows some of the black copper oxide to convert into red cuprous oxide.
You will see the red layer underneath the flaking black pieces.
Step 4: Assemble the Cell
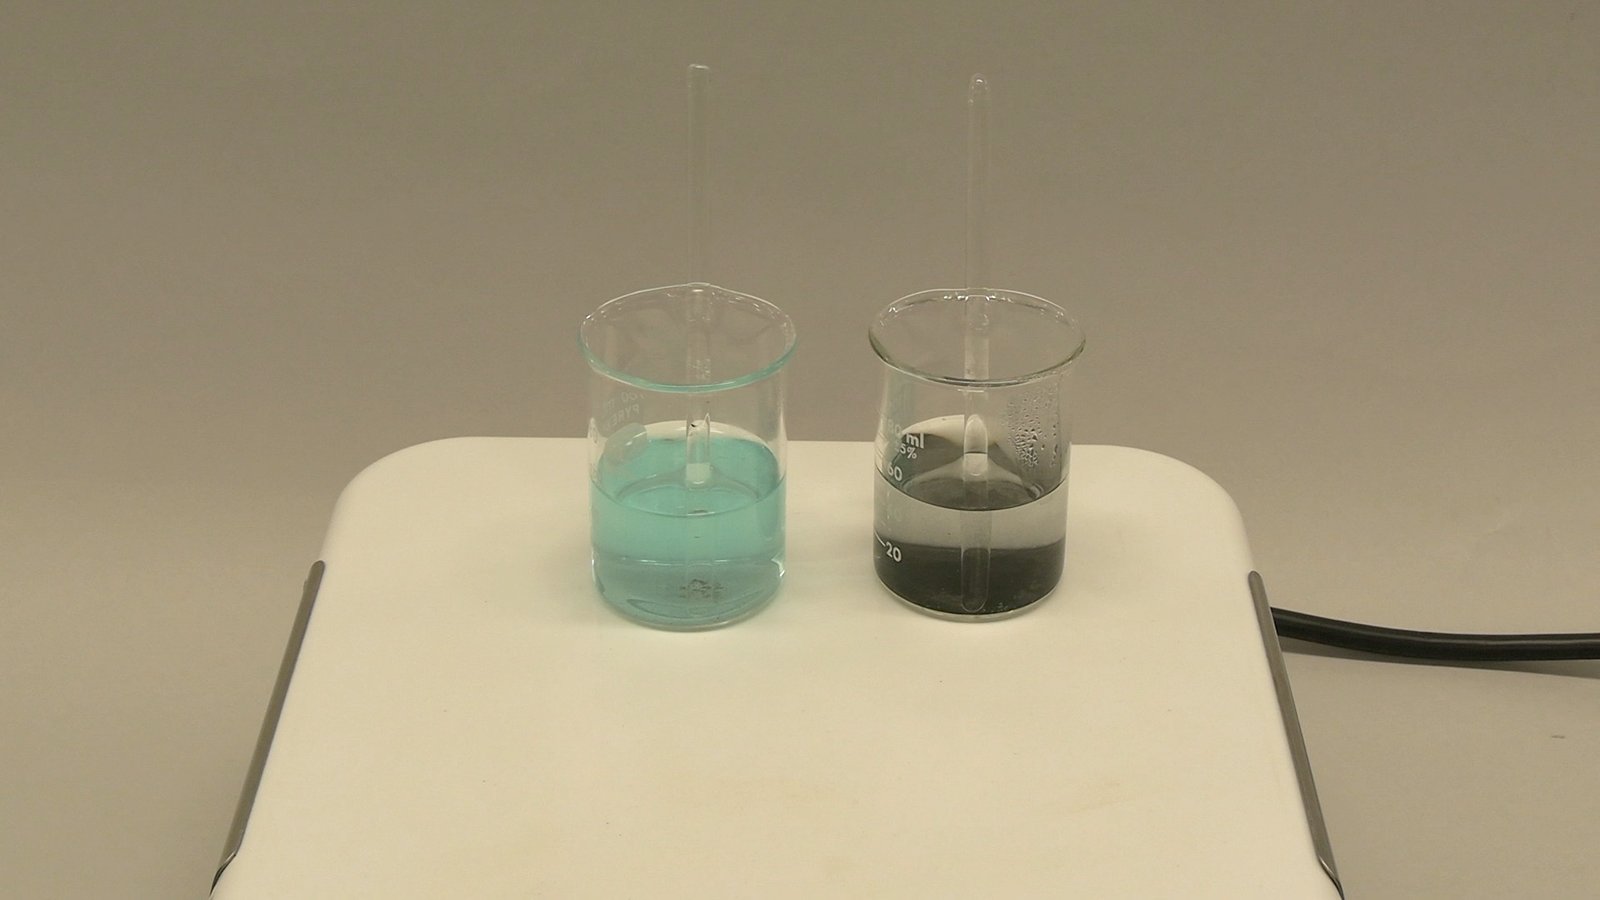
Place the copper sheet in the dish with the oxide layer facing up. Place the aluminum foil on the opposite side of the dish. Pour in enough saltwater to cover both electrodes but not so much that they touch each other.
The copper and foil should be separated by at least an inch of water.
Step 5: Connect the Multimeter
Clip one alligator lead to the copper sheet. Clip the other lead to the aluminum foil. Connect the other ends of the leads to your multimeter.
Set the multimeter to measure DC voltage. Place the dish in direct sunlight.
Step 6: Read the Output
You should see a reading between 0.2 and 0.5 volts. To measure current, switch the multimeter to the milliamps setting. Expect between 0.1 and 5 milliamps depending on the surface area and light intensity.
This is enough to make a small LCD display flicker but not enough to charge a battery.
For a comparison of how different materials affect performance, check out our breakdown of the various types of solar panels available commercially.
What You'll Actually Get: Voltage, Current, and Real-World Output
Let's talk numbers. After you build this cell and place it in direct sunlight, your multimeter should show an open-circuit voltage between 0.2 and 0.5 volts. That's roughly one-third of what a single AA battery delivers.
The current is where reality sets in. A typical copper oxide cell with a 3×5 inch copper sheet produces between 0.1 and 5 milliamps. To put that in perspective, a standard smartphone charger delivers 1000 to 3000 milliamps.
You would need hundreds of these cells wired together to charge a phone, and even then the internal resistance would crush the output.
The power output lands in the micro-watt to low milliwatt range. A single cell might produce 0.5 milliwatts under ideal conditions. A commercial solar panel of the same size produces 10 to 15 watts.
That's a factor of 20,000 difference.
The cell also degrades quickly. The cuprous oxide layer starts breaking down within hours of exposure to the electrolyte. The saltwater corrodes the aluminum foil electrode.
After a day, the output drops to near zero. You have to rebuild the cell from scratch each time.
This is not a power source. It is a demonstration tool. It shows you that light can be converted to electricity.
It proves the concept. But it will never run a fan, charge a battery, or light an LED bulb directly. Understanding these limitations helps you weigh the pros and cons, which we cover in our detailed look at the advantages and disadvantages of solar panels.
The Honest Pros and Cons of This Experiment
Every project has trade-offs. Here is a balanced look at what this experiment offers and what it costs.
Pros
- Extremely low materials cost. Copper sheet, aluminum foil, salt, and water cost under 10 dollars.
- Teaches the photovoltaic effect in a hands-on way. You see the voltage appear on the meter when light hits the cell.
- Safe for supervised classroom use. The voltages are too low to cause electric shock.
- Quick setup. The entire build takes about 30 minutes plus the heating time.
- No specialized tools required. A hot plate, a dish, and a multimeter are all you need.
Cons
- Power output is negligible. You cannot use this cell for any practical application.
- Short lifespan. The cell degrades within hours and must be rebuilt.
- Requires direct sunlight. Indoor lighting produces almost no measurable output.
- The heating step involves high temperatures. Burns are a real risk.
- Misleading tutorials online create false expectations. Many people try this expecting free energy and feel disappointed.
The honest assessment is simple. If you want to learn about solar energy, this is a great teaching tool. If you want to generate power, skip this project entirely.
For that purpose, our solar panel buying guide walks through what actually works.
5 Mistakes That Ruin the Experiment (and Waste Your Time)
Even experienced hobbyists make these errors. Here is what to avoid.
Mistake 1: Skipping the Copper Oxide Formation
The most common mistake is thinking that bare copper and aluminum foil in saltwater will generate electricity. They will not. You must heat the copper to form the cuprous oxide semiconductor layer.
Without that layer, you have a simple saltwater battery, not a solar cell. The voltage you might see comes from chemical corrosion, not from light.
Mistake 2: Using Too Much Salt
Salt concentration matters. One tablespoon per cup of water is the sweet spot. Too much salt creates a highly conductive electrolyte that short-circuits the cell internally.
Your voltage reading drops to near zero. Too little salt and the ions cannot move freely, which also limits output.
Mistake 3: Letting the Electrodes Touch
The copper sheet and aluminum foil must remain separated by at least an inch of water. If they touch, you create a direct short circuit. The multimeter will show zero volts because the current bypasses the external circuit.
This is the most common reason beginners see no output.
Mistake 4: Testing Under Indoor Light
The copper oxide cell is sensitive to light intensity. Standard indoor lighting produces about 100 to 500 lux. Direct sunlight produces over 100,000 lux.
Testing under a desk lamp will show a fraction of a millivolt. You need full sun to see the 0.3 to 0.5 volt range.
Mistake 5: Expecting Immediate Results
The cell needs a few minutes to stabilize after assembly. The electrolyte must soak into the oxide layer. The chemical equilibrium takes time to establish.
If you measure immediately after pouring the saltwater, the reading will be erratic. Wait five minutes, then take your measurement.
Safety First: Burns, Fire, and Electrical Hazards You Should Know
This experiment involves high heat and saltwater near electronics. Take these precautions seriously.
The heating step is the most dangerous part. You need to heat a copper sheet to 500 to 600 degrees Celsius until it glows red hot. A propane torch or hot plate at this temperature can cause severe burns instantly.
The copper sheet retains heat for several minutes after you remove it from the flame. Never touch it with bare hands. Use metal tongs or pliers.
Work outdoors or in a well-ventilated area. Heating copper can release metal fumes. While the amounts are small for a single sheet, repeated exposure is not safe.
A fume hood or open garage door with a fan is ideal.
The saltwater electrolyte is corrosive. It will damage your multimeter probes if they are not cleaned afterward. It will also corrode the aluminum foil and copper sheet, which is why the cell degrades so quickly.
Rinse and dry all metal components after the experiment.
Do not connect this cell to any battery. The low voltage and current cannot charge a battery properly. Attempting to charge a lithium-ion battery with this cell could damage the battery or cause a fire.
The cell lacks the voltage and current regulation needed for safe charging.
If you are supervising children, handle the heating step yourself. Let them observe the copper changing color from a safe distance. The assembly and measurement steps are safe for kids under supervision.
Better Alternatives If You Actually Want to Generate Power
If your goal is to produce usable electricity, the copper oxide cell is not the answer. Here are alternatives that actually work.
Commercial Solar Panels
A single 100 watt monocrystalline solar panel costs around 100 dollars as of 2026. It produces 100 watts in full sun, enough to charge a 12 volt battery or run a small appliance. These panels use high-purity silicon with 15 to 22 percent efficiency.
They last 25 to 30 years. This is the baseline for real solar power.
DIY Solar Panel Kits
Several companies sell pre-cut silicon solar cells that you can solder together into a panel. A 50 watt kit costs about 60 dollars and includes tabbing wire, flux, and a instruction guide. You still need to build the frame and seal the panel against moisture.
The efficiency is comparable to commercial panels, but the labor is significant.
Small Solar Chargers
For portable power, a 10 watt foldable solar charger costs about 30 dollars. It can charge a phone or power bank in a few hours of direct sunlight. These are practical for camping or emergency backup.
They use the same monocrystalline silicon technology as full-size panels.
Educational Solar Cell Kits
If you want the learning experience without the fire risk, buy a pre-made copper oxide solar cell kit. These cost about 20 dollars and include a ready-to-use cell with electrodes and a multimeter. You add the saltwater and see the voltage instantly.
No heating required.
Our article on what is a solar panel explains the different technologies in more depth. For a broader look at renewable energy options, the solar panels category page covers everything from installation to maintenance.
Who This Project Is Really For (and Who Should Skip It)
This experiment is for educators, students, and curious hobbyists who want to understand the photovoltaic effect. It works best in a classroom or makerspace where the focus is on learning, not power generation.
Skip this project if you need actual electricity. The copper oxide cell cannot charge a phone, run a light, or power a fan. If your goal is off-grid energy or reducing your electric bill, buy a commercial solar panel.
The time and money spent on this experiment would be better invested in a real system.
Frequently Asked Questions from Beginners
Can I use just aluminum foil and saltwater to make a solar panel?
No. Aluminum foil is a conductor, not a semiconductor. It cannot generate electricity from light.
You need a semiconductor like cuprous oxide or silicon for the photovoltaic effect to work.
How much power will this cell produce?
A typical cell produces 0.2 to 0.5 volts and 0.1 to 5 milliamps. That is about 0.5 milliwatts. You would need over 2000 of these cells to equal a single 100 watt commercial panel.
Does the cell work indoors?
Poorly. Indoor lighting is about 100 to 500 lux. Direct sunlight is over 100,000 lux.
You need full sun to see measurable voltage.
How long does the cell last?
The cell degrades within hours. The cuprous oxide layer breaks down in the saltwater electrolyte. The aluminum foil corrodes quickly.
You must rebuild the cell for each use.
The Bottom Line: Should You Try This?
Try this experiment if you want a hands-on lesson in solar physics. It is cheap, safe under supervision, and genuinely educational. Skip it if you want usable power.
For that, buy a real solar panel. The copper oxide cell is a window into how solar energy works. It is not a replacement for it.

Similar Posts