Growatt 5000ES Transfer Switch Wiring: Cabin Solar Subpanel
Renewable Energy Systems Specialist & Lead Solar Hardware Tester
Figuring out how to wire a Growatt SPF 5000ES to a transfer switch for a cabin off-grid subpanel and solar array is one of those jobs where a small mistake can cost you thousands or start a fire. The inverter runs on a 48V battery bank and pushes 120VAC to your loads, but the PV input can sit at hundreds of volts DC. That combination demands respect.
The Growatt SPF 5000ES is a 5kW all-in-one off-grid inverter with a built-in MPPT charge controller, so your solar panels, battery, and AC loads all converge on one box. As of 2026, it remains a popular choice for remote cabins because it combines several functions in a single unit. Before you pull any wire, you need to understand exactly what each terminal is supposed to do.
Why This Wiring Job Demands Your Full Attention
Most cabin owners are comfortable swapping outlets or running romex. This is not that. The solar array can deliver several hundred volts DC, and a short circuit in the battery bank can melt a wrench in under a second.
Worse, DC arcs don't self-extinguish the way AC arcs do. They sustain, and they can ignite nearby insulation in milliseconds.
In our research, the most common failure points are not the inverter itself. They are the wiring between the inverter and the transfer switch, and the subpanel neutral setup. That's why a permit and an inspection from your local Authority Having Jurisdiction (AHJ) are worth the hassle.
Inspectors look for exactly these kinds of mistakes. The National Electrical Code (NEC) has specific articles for inverter systems, grounding, and transfer equipment, and official Growatt guidance reinforces the same cautions.
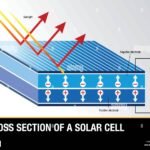
The good news is that you can do this safely if you slow down and verify every connection twice. If you're not completely solid on how solar panels produce electricity, it's worth reviewing the photovoltaic process before hooking anything up.
The Core Setup: What You're Working With
Before touching a screwdriver, map out every piece in the chain. The Growatt SPF 5000ES sits at the center. Solar panels feed DC into its MPPT inputs.
Batteries connect to its DC battery terminals. The inverter's AC output feeds one side of your transfer switch, and the other side gets the backup generator or utility feed. The transfer switch output then runs to the subpanel.
Here's what each major component does, in plain terms:
| Component | What it does | Wiring notes |
|---|---|---|
| Solar array | Produces DC voltage for charging | Must match MPPT input range |
| Battery bank | Stores energy for night and bad weather | 48V nominal, heavy-gauge cable |
| Growatt SPF 5000ES | Inverts DC to AC, charges battery | All-in-one unit |
| Transfer switch | Picks which source feeds subpanel | Must be break-before-make |
| Subpanel | Distributes AC to cabin circuits | Neutral and ground must be separated |
Notice the neutral issue already creeping in. The transfer switch must either switch the neutral conductor or not, depending on your bonding arrangement. That's the next topic, and it's where most people get into trouble.
If you haven't chosen your solar modules yet, our guide to picking panels walks through the trade-offs between monocrystalline and polycrystalline options.
The Critical Decision: Bonded or Floating Neutral?
Here's where most wiring guides lose people. In a normal main panel, the neutral and ground are bonded together at exactly one point. That gives fault current a clear path back to the source.
In an off-grid subpanel, that bond must not exist unless your transfer switch switches the neutral conductor.
The Growatt SPF 5000ES includes a neutral-ground bonding relay. That relay closes when the inverter is running on battery power, assuming you keep the factory default. If you add a generator or utility feed, you have to ask yourself one question: does the transfer switch switch just the hot wires, or does it switch the neutral too?
- If your transfer switch only switches the hot wires, the neutrals from the inverter and the generator are tied together in the subpanel. That creates a parallel neutral-to-ground path through the inverter's relay. It can shock someone and confuse GFCI protection.
- If your transfer switch is a 4-pole unit that switches neutral, then the generator can have its own bond and the inverter can keep its own. The subpanel itself stays unbonded.
The safest approach for a cabin is to use a transfer switch that breaks the neutral, then treat the subpanel as the only point where neutral and ground stay separate. In practice, that means leaving the Growatt's relay enabled if you have a 4-pole switch, and grounding the generator separately. If you're still unsure how the neutral flow works in a PV system, our explanation of solar energy generation covers the basics in plain language.
Step-by-Step Wiring: From Inverter to Subpanel
Once the neutral decision is made, the physical wiring is straightforward. Work with everything off. No exceptions.
- Disconnect all sources. Turn off the inverter, open the battery disconnect, and cover the solar panels with an opaque tarp or flip the PV disconnect.
- Confirm the inverter's N-G relay position. Open the cover and check the relay or dip switch setting against the manual. Write down what you find.
- Mount the transfer switch near the subpanel. Land the inverter's AC output on the inverter input terminals.
- Land the generator feed on the second input set. If the transfer switch is 4-pole, connect the neutrals to the switched neutral terminals.
- Wire the subpanel. Connect the transfer switch output to the main breaker. Keep the neutral bar isolated and the ground bar bonded to the enclosure. Remove any bonding screw between them.
- Connect the battery bank with cable rated for the amp draw. Torque the lugs to the spec in the manual.
- Connect the solar array to the MPPT inputs. Observe polarity and install the fuses specified for your array configuration.
- Double-check every connection before closing covers. Pull gently on each lug to confirm it's tight.
Wire sizing matters. For a 50A AC output, 6 AWG copper is common. For the battery, 4/0 AWG is typical at this power level, but confirm against the manual's terminal entries.
Before you buy parts, think about the trade-offs of off-grid solar so you don't undersize the array.
Common Mistakes That Can Fry Your System or Start a Fire
Mistakes happen, but some are far more expensive than others. Here are the ones we see most often in cabin installs.
- Not switching the neutral in the transfer switch. This tops the list. It creates hot neutrals, ground loops, and dangerous shock hazards.
- Bonding neutral and ground in the subpanel. If your inverter already bonds the neutral, a second bond in the subpanel creates a parallel path. You'll get humming, buzzing, and potential failure.
- Overloading the transfer switch. A 30A switch feeding a load that needs 40A won't last long. Size the transfer switch to the inverter's full output, not just your typical load.
- Using undersized battery cables. Voltage drop at high current causes heat. Heat melts insulation and starts fires.
- Backfeeding the subpanel without a real transfer switch. Never use a regular double-pole breaker to feed the panel backward. The inverter can blast generator power back, and a generator can do the same to the inverter. That's how you destroy equipment.
- Confusing the PV input polarity. Reversed solar leads can damage the MPPT controller immediately.
The easiest way to avoid these is to label every wire before you start. Take photos of your work before and after you close the covers. In our research, the owners who skip labels are the same ones who spend a weekend troubleshooting a loose neutral.
Don't be that person.
FAQs: What People Ask When Wiring This Setup
Do I need to switch the neutral in the transfer switch?
Yes, if you want the cleanest and safest setup. A 4-pole transfer switch breaks the neutral line along with the hot wires. This prevents parallel neutral-to-ground paths between the inverter and your generator.
If your switch only handles the hots, the neutrals stay connected through the subpanel. That creates a feedback loop that can trip GFCIs and cause a shock hazard. Our research shows that using a switch that switches the neutral is the single best way to avoid bonding confusion.
Can I wire the solar array directly to the inverter without a combiner box?
You can, but only if your array has a single string of panels that stays under the MPPT voltage and current limits. The Growatt SPF 5000ES has a maximum input voltage and a maximum short-circuit current rating. If you exceed either, you risk damaging the MPPT controller.
Once you have more than two strings, a combiner box with fuses is mandatory. It also gives you a service disconnect, which is a big safety win.
What size wire do I need between the inverter and the transfer switch?
For the AC output, 6 AWG copper is standard for a 50A feed. If your run is longer than about 50 feet, bump up to 4 AWG to keep voltage drop under 3 percent. For the battery, use 4/0 AWG and keep the run as short as physically possible.
Long battery cables at high current create heat and voltage sag that can make the inverter shut down.
Should I ground the solar array frame separately from the inverter?
Yes. The PV array frame needs its own grounding electrode conductor connected to a ground rod near the array. This is separate from the inverter's main ground.
The NEC requires exposed metal surfaces on a solar array to be bonded and grounded. It protects against lightning-induced surges and ground faults. The manufacturer's manual usually shows a dedicated grounding lug for this purpose.
How do I test the system after wiring it?
Start with everything off. Turn on the battery first, then the inverter. Check the display for voltage and error codes.
Then turn on the solar array disconnect and verify the MPPT is charging. Finally, flip the transfer switch to inverter power and test each subpanel circuit one at a time. If anything trips immediately, turn everything off and trace the circuit.
A loose neutral or a reversed polarity will show up fast.
Final Safety Check: When to Call a Pro and What to Verify
This is the part where you decide whether to flip the switch yourself. If you have wired everything according to the manual and the local code, the final step is a thorough inspection. Go through this checklist before you power up for good.
- Verify that all connections are tight. Use a torque wrench on the inverter lugs and the battery terminals. Loose connections are the leading cause of heat-related failures.
- Confirm that the subpanel has no bond between neutral and ground. If you see a green screw connecting the neutral bar to the enclosure, remove it. That bond must live only at the inverter or at the first disconnect.
- Check that the transfer switch is wired correctly. The inverter and generator feeds must land on the input terminals, not the output. A backfeed here can destroy both sources.
- Test the grounding electrode system. You should see less than 25 ohms of resistance between the ground rod and the soil. An inexpensive clamp-on ground tester can confirm this.
- Label every breaker and disconnecting means. Make sure anyone who walks into the cabin can see which switch turns off the solar array, which one kills the battery, and which one isolates the inverter.
If any of these steps are unclear, or if you opened the subpanel and found a bonded neutral that you cannot explain, call a licensed electrician. There is no shame in asking for help. The cost of a service call is far less than the cost of a new inverter or a cabin fire.
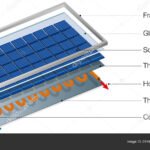
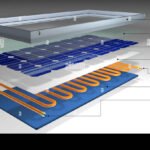
For a deeper look at the different types of solar modules you might pair with this inverter, our comparison of solar panel technologies covers the key differences. And if you want to understand the basic components that make up a solar panel, that guide breaks down the silicon cells, glass, and backing layers that affect performance and longevity.

Similar Posts