How to Choose Solar Panel Frames
You're looking at solar panels, and someone mentioned you need a frame for them. Maybe you assumed the frame was just a simple metal bracket, something you could grab from any hardware store. That assumption is exactly where homeowners and DIY builders get into trouble.
The truth is a frame for solar panels is a carefully engineered structural system. It's the difference between panels that sit safely on your roof for 25 years and panels that cause leaks, cracks, or worse. Get the frame wrong, and you're not just losing efficiency.
You're risking your roof's integrity. As of 2026, the UL 2703 certification standard has become the baseline requirement for any racking system sold in the US, and ignoring that spec means your installation may not pass inspection. Let's walk through what actually matters.
Image source: YouTube / Unbound Solar (YouTube thumbnail (fair-use with source credit))
Quick Answer
A solar panel frame is the mounting structure that holds panels to your roof or ground. It consists of rails, clamps, flashing, and hardware. The frame must handle wind uplift, snow loads, and thermal expansion.
Aluminum is the standard material. Always choose a UL 2703 certified system for safety and code compliance.
Why Getting the Solar Panel Frame Right Actually Matters (And Why It's Not One-Size-Fits-All)
Here's the thing most people miss. The frame isn't just holding the panels in place. It's managing forces you can't see.
Wind doesn't push panels down onto your roof. It lifts them up from underneath, creating suction that can rip a poorly secured frame right off. Snow loads compress from above.
And on a hot summer day, the aluminum rails expand enough to crack panels if they're clamped too tight.
In our research, the most common failure we see isn't the panels themselves breaking. It's the frame system failing at one of these points. A mismatch between the frame design and your local climate is the number one reason installations get flagged during inspection.
The frame you need in coastal Florida is structurally different from what works in snowy Colorado. The material choices, the clamp spacing, the flashing type. All of it changes.
You can get a solid understanding of how the full system ties together by looking at the main components of a solar panel. The frame is part of that ecosystem, and each piece needs to work with the others.
What a Solar Panel Frame Actually Does (Beyond Just Holding Panels)
Most people think the frame's only job is to keep the panels from sliding off the roof. That's the smallest part of its actual responsibility. A proper frame system does three distinct things.
Structural support. The frame transfers the weight of the panels and any snow or wind loads down through the roof structure. It distributes those forces evenly across multiple attachment points so no single spot takes all the stress.
Thermal management. Solar panels get hot. Really hot. The aluminum frame around each panel expands differently than the glass.
The mounting frame has to allow for that movement without pinching or distorting the panel. A rigid frame that locks everything in place is a frame that will eventually crack the glass.
Electrical safety. The frame provides the grounding path for the entire system. In the NEC, Article 690 requires that all metal parts of a PV system be bonded together and grounded. Many modern racking systems include integrated bonding washers or clips that eliminate the need for separate ground wires running between panels.
That's a labor saver, but it also means the frame itself becomes part of the electrical safety system.
There's a common confusion between the panel's own aluminum frame and the mounting frame you're buying. The solar module frame is the black or silver edge around the glass. The mounting frame is the rail system on your roof.
They work together, but they're two entirely different products.
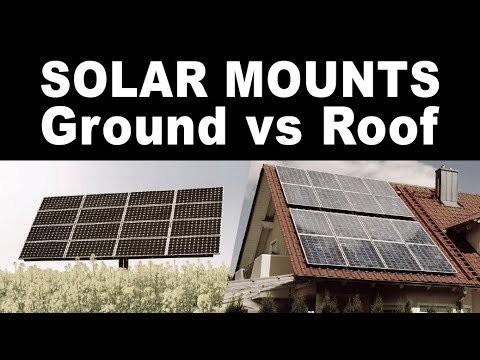
The Core Decision: Roof Mount vs Ground Mount Frame
This is the first fork in the road. Every other decision flows from this one.
Roof mount frames attach directly to your existing roof structure. They use flashing, L-feet, or standoffs that penetrate the roofing material and bolt into the rafters below. These systems are lighter, cheaper, and take up no yard space.
But they require a roof in good condition, with enough structural capacity, and they limit your panel orientation to whatever angle your roof already has.
Ground mount frames sit on your land, independent of any building. They use metal posts driven into the ground, often with concrete footings. You can orient them at the perfect angle for your latitude.
You can adjust the tilt seasonally if you choose an adjustable system. Access for cleaning and maintenance is easier. The trade-off is higher material cost, more labor for excavation, and the need for usable land.
In our research, the deciding factor is usually roof age. If your roof is more than 10 years old and you plan to stay in the house for another 10 years, a roof mount frame is a risky bet. You'll likely need to remove and reinstall the entire system when you replace the roof.
A ground mount avoids that problem entirely. If you're exploring panel options, it makes sense to look at the different types of solar panels first so you know what size and weight your frame will need to support.
| Factor | Roof Mount | Ground Mount |
|---|---|---|
| Typical cost | $0.50–$0.80 per watt | $0.80–$1.20 per watt |
| Installation time | 1–2 days for a crew | 2–4 days with excavation |
| Panel orientation | Fixed to roof slope | Adjustable to latitude |
| Roof replacement | Must remove system | No impact |
| Ground space needed | None | 150–400 sq ft for a typical home |
The Three Frame Systems You'll Actually Choose Between
If you're shopping for a frame system, you'll find three main approaches. Each one solves a different set of problems.
Rail-based systems are the industry standard. Two or three parallel aluminum rails run horizontally across your roof. The panels sit on top of these rails and get clamped down at each corner and between panels.
This is what most professional installers use. The rails distribute weight across multiple attachment points, and the design is well understood by building inspectors. Brands like IronRidge and Unirac dominate this space.
You'll see them on most residential installations.
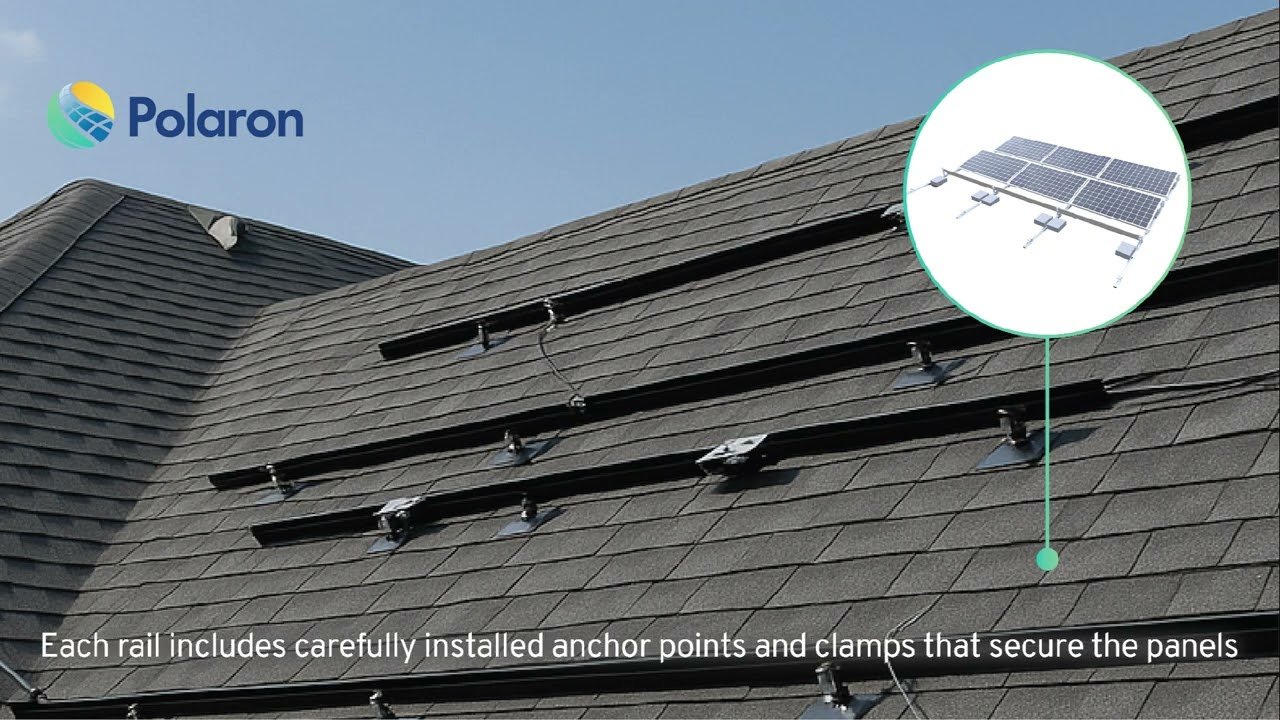
Image source: YouTube / Polaron Solar Energy (YouTube thumbnail (fair-use with source credit))
Rail-less or shared rail systems eliminate the horizontal rails. Instead, the panels clamp directly to the mounting feet, with each row of panels sharing a single structural connection. These systems use fewer parts, which means less hardware to order and faster installation.
They work best on standing seam metal roofs where you can use S-5! clamps that attach directly to the standing seam without any roof penetration. On shingle roofs, rail-less systems are less common because the attachment points are more concentrated and can create higher stress on individual flashings.
Ballasted flat roof frames are for commercial flat roofs. Instead of penetrating the roof membrane, these systems use concrete blocks or pavers to weigh the frame down. The panels sit at a tilt angle of about 10 to 15 degrees, which is enough for good production but not optimal.
The key advantage is zero roof penetrations. No leaks. No flashing failures.
The downside is the weight. A ballasted system can add 4 to 8 pounds per square foot to the roof load, and some older buildings can't handle that.
What Your Frame Needs to Handle (Loads, Wind, Snow, and Corrosion)
Every frame system has a rated load capacity. That number isn't for decoration. It's the maximum force the frame can safely resist, and it needs to match or exceed the loads in your area.
Wind uplift is the most misunderstood load. Wind flowing over a solar array creates low pressure on top of the panels, which sucks them upward. This is called uplift, and it's the primary reason panels fail in storms.
The frame's resistance to uplift comes from the strength of the attachment points and the spacing of the clamps. A frame rated for 120 mph wind in an open exposure is different from one rated for 150 mph in a hurricane zone. Check your local building code's basic wind speed map before buying anything.
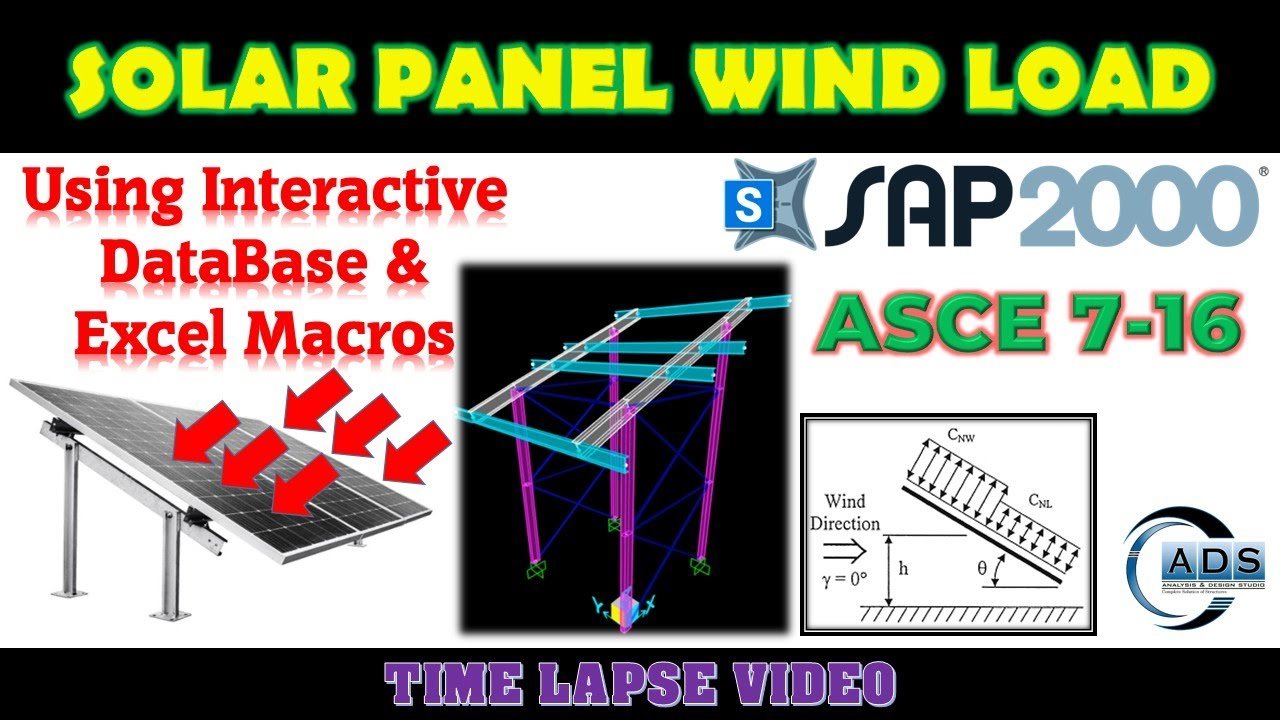
Image source: YouTube / Analysis & Design Studio (YouTube thumbnail (fair-use with source credit))
Snow load is straightforward. Snow is heavy. A foot of wet snow can weigh 30 to 40 pounds per square foot.
Standard aluminum rails are usually rated for 60 to 80 psf, which covers most of the US. But if you live in a mountain area with heavy, wet snow, you need to check the specific rating. Overloading the frame can bend the rails and crack the panels.
Corrosion resistance depends entirely on where you live. In most inland areas, standard anodized aluminum rails will last 30 years without issue. In coastal zones within a mile of salt water, the same aluminum can pit and corrode in half that time.
Coastal installations need frames with thicker anodizing, powder coating, or stainless steel hardware at every connection point. The same applies to agricultural environments where ammonia from livestock can accelerate corrosion.
Thermal expansion might seem minor, but it's a real headache. Aluminum expands about 13 micro-inches per inch per degree Fahrenheit. A 20 foot long rail can grow or shrink by nearly a quarter inch between a cold winter morning and a hot summer afternoon.
If your clamps are too tight, that expansion has nowhere to go. It either bends the rails or cracks the panel glass. Quality frame systems include slotted holes and specified torque values that allow the panels to move slightly without losing grip.
Manufacturer specifications indicate that most systems require leaving a 1/4 to 1/2 inch gap between panels to accommodate this movement.
The National Electrical Code (NEC) outlines the grounding and bonding requirements that affect how the frame connects to the rest of the system. You can read Article 690 directly from the NFPA for the full details on code compliance.
Here's the bottom line on loads. Don't guess. Don't assume the standard kit from a big box store covers your area.
Get the wind speed and snow load data for your specific address from your local building department. Then match your frame to those numbers. It's the difference between an installation that lasts and one that gets flagged at final inspection.
Aluminum vs Steel vs Custom Frames – Which Material Works Where
You have three main material options for the frame rails and hardware. Each one trades off weight, strength, corrosion resistance, and cost.
Aluminum 6005-T5 is the default for residential solar. It's light enough to carry up a ladder. It doesn't rust.
It handles salt spray reasonably well with a good anodized finish. The strength-to-weight ratio is excellent. Most racking brands use this same alloy, which means replacement parts are easy to find.
For 95% of home installations, aluminum is the right call.
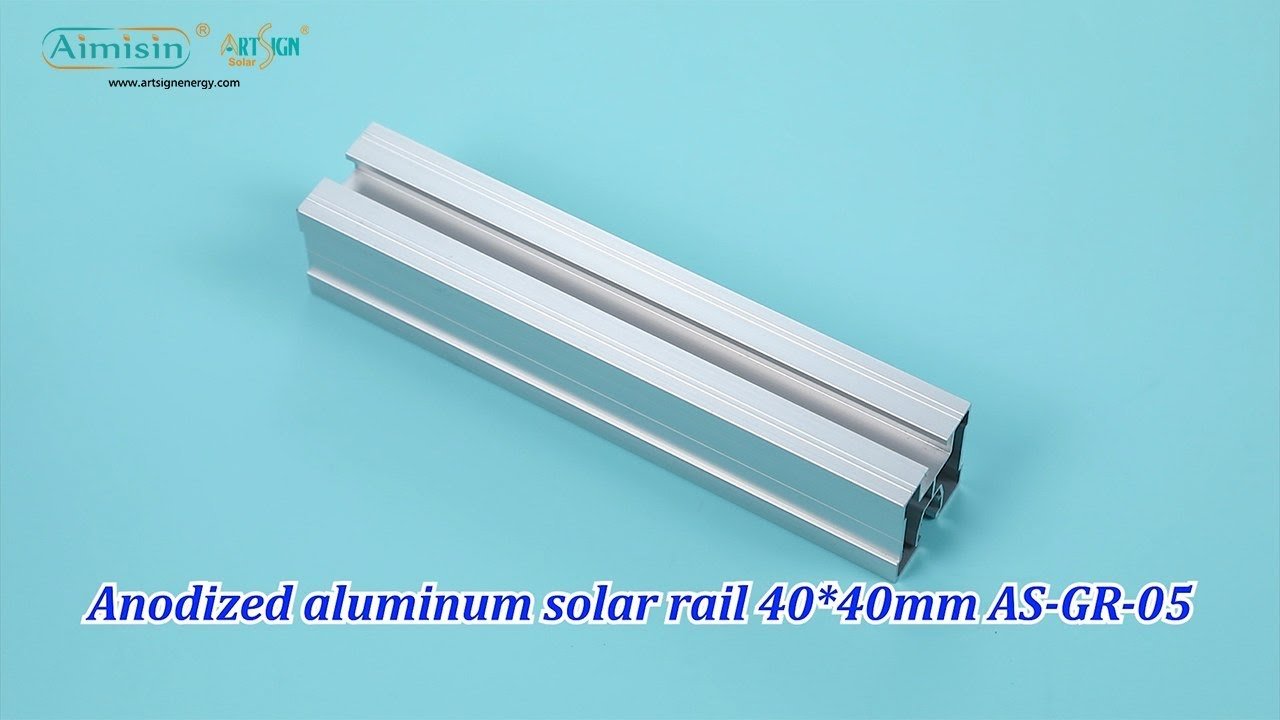
Image source: YouTube / ART SIGN ENERGY (YouTube thumbnail (fair-use with source credit))
Galvanized steel is stronger and cheaper per pound. You see it mostly in large ground mount arrays where weight isn't a concern because the frame sits on concrete piers. The problem is corrosion.
Even with hot-dip galvanizing, steel will eventually rust in coastal or humid environments. Plan on a shorter lifespan than aluminum if you go this route.
Stainless steel is overkill for most people. It's expensive and heavy. But if you're building a marine installation or a frame within a mile of the ocean, stainless hardware at every connection point is the only way to avoid galvanic corrosion between dissimilar metals.
Use it for bolts, washers, and clamps. Don't use it for the main rails unless you have a specific reason.
Wood frames show up in DIY ground mount systems. They're cheap and easy to build. But wood rots, warps, and burns.
It also expands and contracts with humidity in ways that don't match the solar panel's aluminum edge. Our research suggests wood frames are a temporary solution at best. Budget for replacing them within 5 to 7 years.
The frame material needs to match your panel type too. If you're using bifacial panels, the frame should avoid blocking light to the rear. Understanding the different panel constructions helps.
You can get a solid overview of your options by exploring the various types of solar panels available.
How to Know If Your Roof Can Handle the Frame (And Your Framer)
This is the part most homeowners skip, and it's the part that causes the most regrets. Your roof has a maximum load it can safely carry. A solar array adds weight.
The frame hardware plus panels typically adds 2.5 to 4.5 pounds per square foot. Snow can add 40 pounds per square foot or more on top of that.
Your roof structure needs to handle that total load. The key numbers are rafter size and spacing. Standard 2×6 rafters spaced 24 inches apart can usually handle a solar array in moderate climates.
But if you have 2×4 rafters or 16 inch spacing, or if you're in a heavy snow zone, you may need a structural engineer to run the numbers.
When do you absolutely need an engineer? If you have a flat roof with a ballasted frame system, the added weight is significant. If you have an older roof with questionable trusses. If you're mounting on a tile roof where the tiles themselves add weight.
And if your local building department requires stamped engineering drawings for the permit. That's common in high wind zones.
Aggregate reviews from installers confirm that the most common project delay is an underspecified roof structure. The homeowner buys the frame, the crew shows up, and then the inspector says the rafters aren't strong enough. That's a weeks long setback.
Get the roof assessed before you buy anything.
The overall viability of solar on your home depends on several factors beyond just the frame. A thorough review of the advantages and disadvantages of solar panels can help you decide if the investment makes sense.
The Frame Installation Process (What Should Happen Step-by-Step)
The installation sequence matters as much as the parts themselves. Skip a step or rush a detail, and you create a failure point that won't show up for years. Here's what a proper install looks like.
Step 1. Roof mapping and rafter location. The crew marks every rafter location using a stud finder or by measuring from an attic access point. Each mounting foot must land on a rafter.
No exceptions. The frame's load path goes through the foot, into the rafter, and into the building structure.
Step 2. Flashing installation. For shingle roofs, the flashing slides under the shingle above the attachment point and sits on top of the shingle below. This creates a watertight seal.
The screw goes through the flashing and into the rafter with a rubber gasket under the screw head. For tile roofs, the tile gets cut or lifted and replaced with a specialized flashing pan.
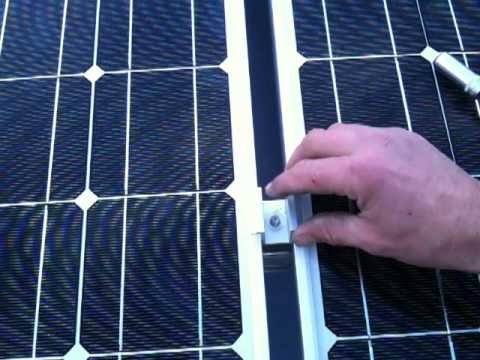
Image source: YouTube / truesolartime (YouTube thumbnail (fair-use with source credit))
Step 3. Rail cutting and splicing. Rails come in standard lengths. The crew cuts them to match the row length of your array.
If the row is longer than a single rail, they use a splice kit to join two sections. The splice must be positioned over a mounting foot or between two feet with proper support.
Step 4. Clamp placement. End clamps go on the outer edge of the first and last panel in each row. Mid clamps go between panels, sharing the load across two panel edges.
Torque specifications typically range from 30 to 50 inch pounds. Too tight cracks the glass. Too loose lets the panel slide or lift.
Step 5. Grounding and bonding. The frame system must provide a continuous electrical path from every metal component back to the inverter ground. Many modern systems use integrated bonding washers or clips.
The crew tests continuity with a multimeter before moving on.
Step 6. Final inspection. The installer reviews every clamp torque, every flashing seal, every ground connection. They walk the roof edge to check for loose parts or debris.
Then they submit photos and documentation for the building permit closeout.
Understanding the full installation helps you appreciate how solar panels generate electricity. The frame is the foundation, and everything else builds on top of it. You can trace the energy path from the panel through the wiring to your home by reviewing how solar panels work.
Common Frame Mistakes That Lead to Leaks, Cracks, or Code Fails
These mistakes show up in inspection reports and homeowner forums more than any others. They're all avoidable.
Over-torquing clamps. The clamp crushes the panel frame and transfers stress to the glass. The panel doesn't crack immediately. It develops microcracks over months of thermal cycling.
One day you look up and see a spiderweb of fractures. The torque wrench is not optional.
Under-torquing clamps. The panel shifts in high wind. The edges rub against the clamps. The anodized coating wears away, and corrosion starts.
Or the panel lifts completely and the whole row fails. Loose clamps are a safety hazard.
Wrong flashing for your roof type. Asphalt shingle flashing is different from tile flashing. Using the wrong type leaves a gap that water finds. The leak may not show up inside the house for months, but by then the roof deck is rotting.
Missing thermal expansion gaps. Panels need space to move. If you butt them tight against each other or against the end clamps, the aluminum forces the glass to absorb the expansion. Glass doesn't flex.
It breaks.
Improper grounding. A missing bonding jumper or a corroded connection creates an open ground path. The system passes initial testing but fails over time. The fire risk is real.
The National Electrical Code requires continuous bonding of all metal parts.
Ignoring local wind and snow load requirements. The frame manufacturer provides a load rating. The local building code specifies minimums. If the frame rating is lower than the code minimum, the installation fails inspection.
You cannot argue your way past this. The numbers are the numbers.
How Much You'll Pay for a Quality Solar Panel Frame
Frame pricing varies by system type, material, and brand. Here's a realistic breakdown for a typical 6 kW residential system with 18 to 20 panels.
| Component | Price Range | Notes |
|---|---|---|
| Rails (aluminum, per linear foot) | $3 – $6 | 6005-T5, 2.25 inch profile |
| L-feet / standoffs (each) | $4 – $8 | Includes flashing |
| Mid clamps (each) | $2 – $4 | Packs of 10 typical |
| End clamps (each) | $3 – $5 | One pair per row end |
| Grounding hardware | $1 – $3 per clamp | Integrated bonding vs separate |
| Ground mount posts (each) | $15 – $30 | 8 foot galvanized steel |
| Concrete per pier | $10 – $20 | Ready mix or bagged |
Total frame cost for a roof mount: $800 to $1,500 for materials on a typical home. That's the frame only, excluding panels, inverter, wiring, and labor.
Total frame cost for a ground mount: $1,500 to $3,000 for materials. The extra cost comes from posts, concrete, and longer structural spans.
Where you can save without cutting safety. Buy from established solar supply distributors rather than big box retailers. Look for bundle deals that include rails, clamps, and flashing as a kit. Avoid generic unbranded hardware.
The cost difference is small, and the quality difference is large.
Where you should never save. Flashing, clamps, and grounding hardware. These are the parts that prevent leaks and fires. Cheap clamps strip out at the wrong torque.
Cheap flashing cracks or lifts. Cheap grounding connectors corrode. Spend the extra 15% here.
If you're still comparing options, the full solar panel buying guide covers frame selection alongside inverter and panel choices. It's worth reading through before you commit to a specific racking system.
Do You Need a Professional Installer or Can You DIY This Job?
If your roof has any pitch above a flat surface, hire a professional. Roof mounted frames require precise rafter location, proper flashing, and fall protection. One mistake can cause a leak that damages your ceiling and your drywall.
Ground mount frames are more DIY friendly. You need basic construction skills and the ability to dig post holes. The biggest challenge is getting the posts perfectly plumb and aligned.
A misaligned post throws off the entire rail system.
The permit process is the real gatekeeper. Most jurisdictions require stamped engineering drawings for roof mounted systems. A professional installer includes those in their quote.
A DIY builder pays for them separately or risks failing inspection.
Quick Reference: Which Frame Is Right for Your Situation
| Your Situation | Recommended Frame | Why |
|---|---|---|
| Asphalt shingle roof, moderate climate | Aluminum rail with L-feet and flashing | Standard, proven, easy to repair |
| Tile roof, any climate | Tile specific flashing with aluminum rail | Prevents cracked tiles and leaks |
| Standing seam metal roof | Rail-less clamp system (S-5! type) | Zero penetrations, fastest install |
| Flat commercial roof | Ballasted aluminum frame | No roof penetrations, protects membrane |
| Open land, no shade | Galvanized steel ground mount | Stronger, cheaper, longer spans |
| Coastal location (within 1 mile) | Aluminum with stainless hardware | Corrosion resistance is mandatory |
Your Safety Checklist Before You Buy or Install
Verify the frame system has UL 2703 certification. This covers fire rating, structural strength, and grounding. Without it, your insurance may not cover damage or injury.
Check your local building department's wind speed and snow load requirements. Match them against the frame manufacturer's load rating. If the numbers don't line up, the frame will fail inspection.
Confirm your roof's structural capacity. A quick attic check of rafter size and spacing tells you a lot. If you see 2×4 rafters or wide spacing, call a structural engineer before buying anything.
Frequently Asked Questions
How long does a solar panel frame last?
A quality aluminum frame lasts 25 to 40 years. The frame should outlast the panels themselves. Replace any corroded hardware during panel replacement.
Can I use any frame with any solar panel?
Most frames work with standard 60 cell and 72 cell panels. Check the panel width against the rail spacing. Bifacial panels may need a specialized frame that doesn't block rear light.
Does the frame affect the solar panel warranty?
Yes. Using a non certified frame can void the panel manufacturer's warranty. Always use a frame from the panel maker's approved list or a UL 2703 certified system.
Can I install a frame on an old roof?
You can, but it's risky. If the roof needs replacement within 10 years, you'll pay to remove and reinstall the entire array. Replace the roof first, then install the solar frame.
What tools do I need to install a frame?
A torque wrench, socket set, drill, level, chalk line, and fall protection harness. For ground mounts, add a post hole digger and concrete mixing tools. Rent a torque wrench if you don't own one.
How much does a replacement frame cost?
A replacement frame for a single panel costs $50 to $150. A full system replacement runs $800 to $3,000 depending on roof type and system size. The frame is one of the cheaper components to replace.
Final Recommendation
Start with your roof's condition and your local climate. Those two factors will tell you whether to go roof mount or ground mount, and which material and system type to pick. Buy UL 2703 certified hardware from a known manufacturer.
Never cut corners on flashing, clamps, or grounding. And if your roof is pitched, let a professional handle the install. A solid frame is invisible.
A bad one is a problem you'll deal with for decades.

Similar Posts