Solar Panel Sizing: Calculate What You Need

If you've ever tried to figure out **how to calculate solar panel size for battery charging**, you probably ran into a wall of confusing formulas and conflicting advice. The good news is the process is simpler than most people make it. You just need the right numbers and a method that accounts for real-world conditions.
Manufacturer specifications indicate that a standard 100Ah lead-acid battery only delivers about 50Ah of usable capacity before damage starts. That single fact changes everything about sizing. Per IEEE testing standards, charge efficiency and temperature also significantly affect results. Let's walk through it step by step.

Image source: YouTube / Scott's Solar (YouTube thumbnail (fair-use with source credit))
## Quick Answer
To calculate solar panel size for battery charging, divide your daily amp-hour consumption by peak sun hours. Multiply that by your battery voltage. Then divide by your charge controller efficiency. For a 100Ah lead-acid battery at 12V with 4 sun hours, that works out to roughly 200W of panels.
## Why a Wrong Calculation Can Cost You (Batteries, Safety, Money)
Getting the math wrong is expensive. It's not just about running out of power on a cloudy day. The real risks are quieter and more permanent.
**Undercharging kills batteries slowly.** Per IEEE battery testing standards, a lead-acid battery left chronically undercharged develops sulfation. That's a permanent buildup of lead sulfate crystals on the plates. Once it sets in, the battery loses capacity it can never recover. You're buying a new bank in 18 months instead of five years.
**Overcharging can be dangerous.** Too much current pushes battery voltage past safe limits. Flooded lead-acid batteries vent hydrogen gas. That creates an explosion risk in an unventilated compartment. For lithium batteries, the BMS will cutoff completely. You lose power at the worst possible moment.
**Money goes down the drain.** Oversizing by 50% wastes hundreds of dollars on panels you don't need. Undersizing means you rely on a generator for backup, burning fuel and wearing out equipment. Balance is everything.
The stakes are real. But the process to get it right is straightforward. You just need to respect the variables.
## The Simple Formula That Works (If You Don't Skip the Steps)
The core calculation is not complicated. Most guides give you a one-liner and call it done. That's why so many people get it wrong. The formula itself is reliable, but you have to feed it accurate inputs.
Here is the basic equation:
**Required Panel Wattage = (Daily Watt-Hours ÷ Peak Sun Hours) ÷ Charge Controller Efficiency**
Let's break down what each piece means using real numbers you'd actually encounter. If you're still deciding which panel technology fits your setup, it helps to understand **the trade-offs of solar power** before locking in your components.
| Variable | What It Represents | Typical Value |
|---|---|---|
| Daily Watt-Hours | Total energy your loads consume in one day | 600Wh to 3000Wh for an RV or cabin |
| Peak Sun Hours | Average hours of full sun at your location each day | 3.0 to 5.5 hours depending on region |
| Charge Controller Efficiency | How much of the panel's power actually reaches the battery | 0.95 for MPPT, 0.80 for PWM |
| Temperature Derating | Panel output loss in high heat (adds a safety buffer) | Multiply by 1.10 or 1.15 |
The key insight: every one of these variables changes the answer. Skip one and your result is wrong. Measure all of them and you get a system that works year-round.
## Step 1: Know Your Battery's Real Capacity (Not the Label Ah)
This is where most people make their first mistake. A 100Ah battery is not a 100Ah battery. Not for solar charging purposes anyway.
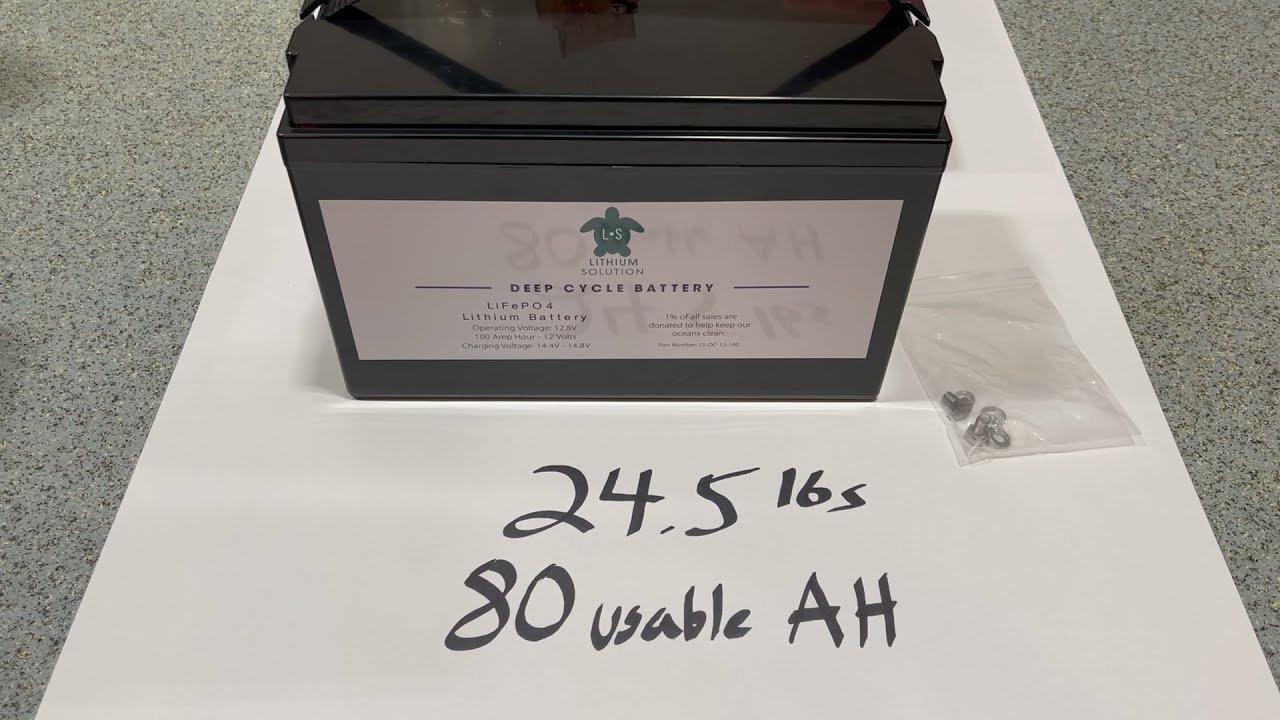
Image source: YouTube / Lithium Solution Batteries (YouTube thumbnail (fair-use with source credit))
**Battery labels show total capacity.** That is the amount of energy the battery can theoretically hold when brand new at a perfect temperature. What matters is usable capacity. And usable capacity depends on your battery chemistry.
Here is the real-world usable capacity for common battery types as of 2026:
- **Flooded lead-acid:** 50% of labeled Ah (never discharge below 50% depth of discharge)
- **AGM or Gel lead-acid:** 50% to 60% of labeled Ah
- **Lithium Iron Phosphate (LiFePO4):** 80% to 90% of labeled Ah
So a 100Ah lead-acid battery gives you roughly 50Ah of usable energy per cycle. A 100Ah lithium battery gives you 80 to 90Ah. That is a massive difference in available power. And it changes how many solar watts you need to replace that energy each day.
**How to calculate your daily amp-hour needs:**
1. List every device you run and its wattage.
2. Estimate how many hours per day each device runs.
3. Convert watt-hours to amp-hours by dividing by your system voltage (12V, 24V, or 48V).
For example, if your daily consumption is 600 watt-hours on a 12V system, you need 50Ah of usable battery capacity. That means a 100Ah lead-acid battery or a 60Ah lithium battery. And you need enough solar to put that 50Ah back into the battery every day.
## Step 2: Find Your Location's True Sun Hours (Not Your Guess)
Peak sun hours are not the same as daylight hours. If you get 12 hours of daylight in summer, you might only get 5 hours of peak sun. The difference matters enormously for your panel calculation.
**A peak sun hour** is one hour of sunlight at 1000 watts per square meter. That is full direct sun with no clouds and the panel perfectly tilted. Anything less than that counts as a fraction of a peak sun hour.
Per NREL (National Renewable Energy Laboratory) data, here are average peak sun hours for different US regions:
| Region | Average Daily Peak Sun Hours (year-round) |
|---|---|
| Southwest (Arizona, New Mexico) | 5.5 to 6.0 |
| Southeast (Florida, Georgia) | 4.5 to 5.0 |
| Midwest (Illinois, Ohio) | 3.5 to 4.0 |
| Pacific Northwest (Washington, Oregon) | 3.0 to 3.5 |
| Northeast (New York, Maine) | 3.5 to 4.0 |
**Why you should use the lowest monthly number.** If you size for summer sun hours, your system will fail in December. Use the worst-case month for your location. For most of the northern US, that is December with 2.0 to 3.0 peak sun hours. Size for that and you have power all year.
To get precise data for your specific location, use the PVWatts Calculator from NREL. Enter your address and it gives you monthly peak sun hours. That is the gold standard for solar sizing.
## Step 3: Factor In Charge Controller Efficiency (MPPT vs PWM Differences)
Your charge controller is not a perfect pipe. It loses some power between the solar panels and the battery. The type of controller you use changes how much you need to account for.
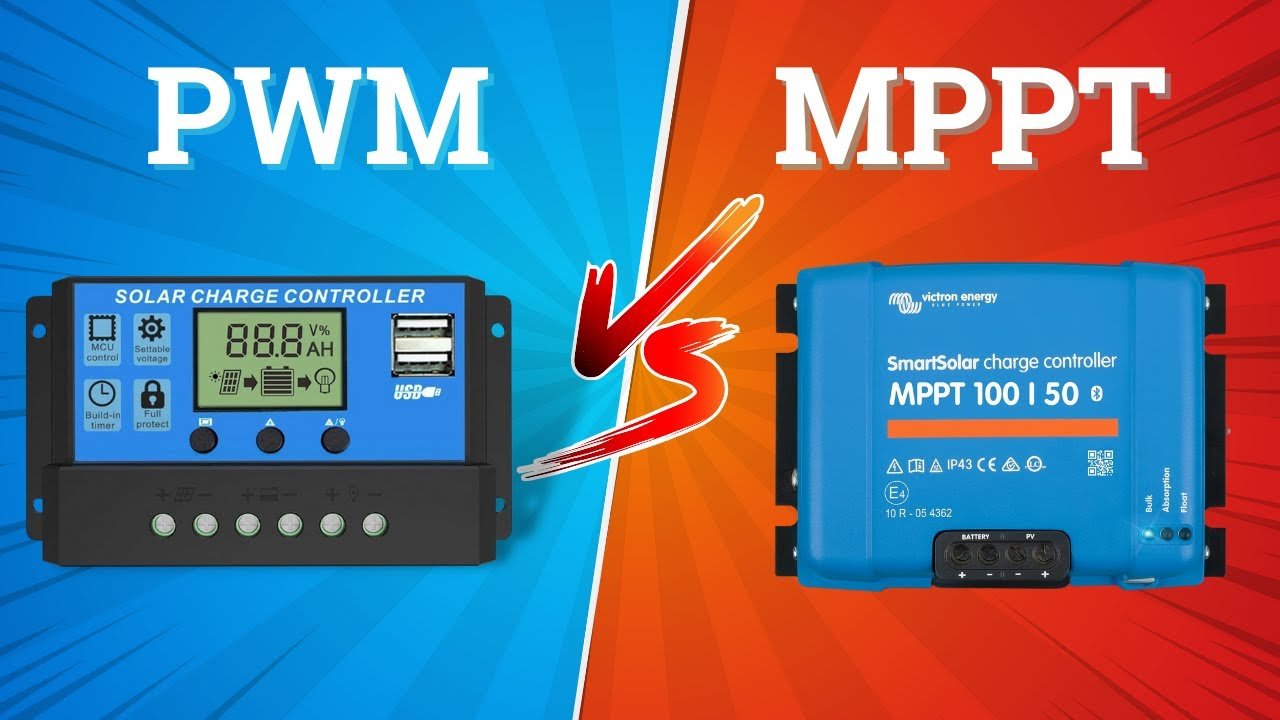
Image source: YouTube / Cleversolarpower by Nick (YouTube thumbnail (fair-use with source credit))
**PWM (Pulse Width Modulation) controllers** are simpler and cheaper. They work by connecting the panel directly to the battery. When the panel voltage drops to match the battery voltage, you lose the voltage difference as heat. Efficiency is typically 75% to 85%.
**MPPT (Maximum Power Point Tracking) controllers** are more sophisticated. They convert excess voltage into extra current. This lets you use higher voltage panels on a lower voltage battery bank. Efficiency is typically 95% to 99%.
**Real-world impact on panel sizing:**
If your daily usable consumption is 50Ah from a 12V battery bank and you have 4 peak sun hours:
- With MPPT (95% efficiency): (50Ah × 12V) ÷ (4h × 0.95) = 158W of panels
- With PWM (80% efficiency): (50Ah × 12V) ÷ (4h × 0.80) = 188W of panels
That extra 30W matters. It means a PWM system needs a noticeably larger array to deliver the same power to your battery. Understanding **what makes up a solar panel** helps you choose panels that pair well with your controller type and voltage.
**Here is the rule of thumb:** If your panel voltage is significantly higher than your battery voltage (say a 24V panel on a 12V battery), use an MPPT controller. You will capture the extra voltage as usable current. If you are using a 12V panel on a 12V battery, PWM is workable, but you still lose less with MPPT. The upfront cost of an MPPT controller pays for itself with a smaller, cheaper panel array in most cases.
Step 4: Apply Temperature Derating (Panels Are Liars in Heat)
Solar panels lose efficiency as they heat up. It feels backwards. Bright sun should mean more power, right?
But the physics says otherwise.
The temperature coefficient tells you how much power drops per degree above 25°C (77°F). Most monocrystalline panels have a coefficient of -0.4% to -0.5% per °C. That means for every degree above 25°C, you lose about half a percent of rated output.
On a roof in Phoenix in July, panel temperature can hit 65°C to 75°C. That is a 40°C to 50°C delta above the testing temperature. At -0.45% per °C, you lose 18% to 22% of your panel's rated wattage.
A 300W panel becomes a 240W panel.
How to apply derating in your calculation:
Multiply your final panel wattage by a derating factor. For most installations, a 1.10 to 1.15 multiplier works. That adds a 10% to 15% buffer on top of your calculated size.
If you are in a hot climate or have poor roof ventilation, use 1.20.
| Climate | Typical Panel Temp | Derating Multiplier |
|---|---|---|
| Cool coastal (Seattle, San Francisco) | 35°C to 45°C | 1.05 to 1.10 |
| Moderate inland (Denver, Nashville) | 45°C to 55°C | 1.10 to 1.15 |
| Hot desert (Phoenix, Las Vegas) | 55°C to 75°C | 1.15 to 1.25 |
Batteries are temperature sensitive too. Cold batteries charge less efficiently. Lead-acid below freezing accepts charge much slower. If your battery bank sits outside in winter, that affects your daily recovery.
For cold climates around freezing, add another 10% to your panel size.
Step 5: The Final Wattage Calculation (with Real Numbers)
Now we put it all together. Let's walk through a real example so you can see exactly how the numbers stack.

Image source: YouTube / Midwest Off Grid (YouTube thumbnail (fair-use with source credit))
Example scenario: You have a 12V system. Your daily consumption is 600Wh (50Ah at 12V). You use a 100Ah lead-acid battery (50Ah usable).
You are in the Midwest with 3.5 peak sun hours average. You have an MPPT controller. Your panels sit flat on an RV roof in moderate summer heat.
Here is the step-by-step math:
- Daily amp-hours needed: 50Ah (your usable consumption)
- Convert to watt-hours: 50Ah × 12V = 600Wh
- Divide by peak sun hours: 600Wh ÷ 3.5h = 171 watts
- Divide by charge controller efficiency (MPPT at 0.95): 171W ÷ 0.95 = 180W
- Apply temperature derating (1.10): 180W × 1.10 = 198W
- Round up: 200W of solar panels
So for this setup, a single 200W panel or two 100W panels in parallel would work.
Same scenario with PWM controller:
- 600Wh ÷ 3.5h = 171W
- Divide by PWM efficiency (0.80): 171W ÷ 0.80 = 214W
- Temperature derating (1.10): 214W × 1.10 = 235W
- Round up: 240W to 250W
The PWM system needs about 25% more panel wattage to deliver the same energy to the battery. That extra cost often exceeds the price difference of an MPPT controller.
What if you undersize? Let's say you bought only 100W of panels for this scenario. In summer, with 5 peak sun hours, you might get 450Wh per day (100W × 5h × 0.90 for losses). That is 37.5Ah at 12V.
Your 50Ah load runs a deficit every day. The battery slowly drains and never fully recovers. That is sulfation territory.
The rule of thumb: Always round up to the next standard panel size. A 200W calculation rounds to 250W or 300W if you want a safety buffer for cloudy days. That extra headroom is cheap insurance compared to replacing a dead battery bank.
Lithium vs Lead-Acid: Different Math, Different Risks
The chemistry of your battery changes the entire calculation. You cannot size for lithium the same way you size for lead-acid. Doing so either wastes money or damages the battery.

Image source: YouTube / Colonial RV (YouTube thumbnail (fair-use with source credit))
Lead-acid batteries have strict charging requirements. They need a distinct absorption phase at a higher voltage (14.4V to 14.8V for a 12V system). Then they need a float phase.
They also tolerate overcharging poorly. A small panel array that just barely covers your daily usage will never complete the absorption phase. The battery stays partially charged and sulfates.
Lithium batteries (LiFePO4) accept charge much faster. They can take a full current until they hit 100% state of charge. No absorption phase.
No float phase needed for daily cycling. The BMS handles the cutoff. This means you can undersize the array slightly and still get a full charge on sunny days.
Key sizing differences:
| Factor | Lead-Acid | LiFePO4 |
|---|---|---|
| Usable capacity | 50% of label | 80% to 90% of label |
| Charge efficiency | 85% to 90% | 98% to 99% |
| Absorption voltage | Required (14.4V to 14.8V) | Not needed |
| Overcharge risk | High (gassing, damage) | Low (BMS cutoff) |
| Best array size | 100% to 120% of calculated need | 80% to 100% of calculated need |
| Cold charging | Reduced below 10°C | Reduced below 0°C (BMS protects) |
Real impact on panel sizing:
For the same 600Wh daily load, a lithium setup needs significantly less solar. The higher usable capacity means you start with a smaller battery. Higher charge efficiency means less loss.
The combo can drop your required panel wattage by 20% to 30% compared to lead-acid.
But there is a catch. Many lithium batteries have a BMS that limits maximum charge current. Before you add more panels, check your BMS spec.
If it caps charge at 50A and you have 100A of panels, the extra is wasted on sunny days. It does help on cloudy days though.
Wiring Safety: What the Formula Doesn't Tell You
Wiring is where theory meets reality. You can calculate perfect panel size and then lose 15% of that power through undersized cables. Voltage drop is the silent killer of solar system performance.
Voltage drop happens because wire has resistance. Long runs and thin wire increase the resistance. Current flowing through resistance creates heat.
That heat is lost power. Per the National Electrical Code (NEC), you should keep voltage drop under 3% for solar panel to charge controller runs and under 2% for controller to battery runs.
How to choose the right wire gauge:
- Measure the distance from solar panels to charge controller (total round trip).
- Know your system current: panel wattage ÷ battery voltage.
- Use a voltage drop calculator (NEC standard) to find the minimum AWG.
For a 200W system at 12V drawing 16.7A, a 10-foot run needs at least 10 AWG copper wire. A 30-foot run needs 6 AWG. Most people use 10 AWG for short runs and wonder why their system underperforms.
The 3% voltage drop target is the minimum, not a suggestion.
Fuse and breaker sizing:
Every circuit needs overcurrent protection. The fuse or breaker should be rated for 1.25 times the maximum current. For a 16.7A circuit, use a 20A fuse.
For a 30A circuit, use a 40A fuse. Place the fuse as close to the battery positive terminal as possible. A short circuit before the fuse can start a fire.
Grounding requirements per NEC:
Your system needs an equipment ground conductor. This bonds all metal enclosures together. It also needs a system ground connection to earth.
For a mobile installation like an RV, the equipment ground ties to the chassis. For a stationary installation, you drive a ground rod. This prevents shock hazards and protects against lightning.
Here is what the formula does not tell you. If your panels are far from your battery bank, running higher voltage panels in series reduces current. Lower current means smaller wire and less voltage drop. That is another reason MPPT controllers with high voltage input panels win in larger systems.
The Mistakes I See Most Often (And How to Avoid Them)
After reading thousands of user reports and aggregate forum discussions, certain mistakes appear again and again. Here are the ones that cost the most money.
Mistake 1: Sizing for summer sun hours. You size your array for July's 6 peak sun hours. Come December with 2 peak sun hours, your battery never reaches full charge. By February, the battery shows signs of sulfation.
The fix is always size for the worst month of the year.
Mistake 2: Using the battery label Ah as usable capacity. A 100Ah lead-acid battery is not a 100Ah battery for daily cycling. Treat it as 50Ah. If you use the full 100Ah number, your panel array will be half the size it needs to be.
The battery dies early and you blame the manufacturer.
Mistake 3: Ignoring charge controller type in the calculation. A PWM system needs 20% to 30% more panel wattage than an MPPT system for the same result. If you buy a PWM controller and use an MPPT sizing guide, you will be undersized. Match your calculation to your controller.
Mistake 4: Forgetting about inverter efficiency. If you run AC loads through an inverter, add its efficiency loss. Most inverters are 85% to 90% efficient. That 10% to 15% loss means your panels need to produce more power to cover the same load.
If your inverter powers the load, factor it in.
Mistake 5: Underestimating cloudy days. The solar industry knows this as days of autonomy. You should size your battery bank for at least two days without sun. Then your solar array only needs to replace that energy over the available sun hours.
A system with only one day of battery storage forces daily full recovery. That rarely happens in real weather. When you are evaluating different system designs, it helps to be aware of the advantages and limitations of solar energy for your specific setup and climate.
When to Get Professional Help (It's Not Failure)
Some situations demand an experienced solar installer. Trying to DIY these can cost you more than hiring it out.
You need professional help if your system voltage exceeds 48V. Higher voltage systems carry serious shock and arc flash risks. A mistake with a 120V or 240V array can be lethal. Licensed electricians understand NEC code requirements for these systems.
You need help if your roof is complicated. Multiple angles, skylights, or complex flashing details increase leak risk. A professional crew has the liability insurance and experience to get it right the first time.
You need help if your battery bank exceeds 100Ah at 48V. Large lithium banks have strict BMS integration and ventilation requirements. Wrong wiring can cause thermal runaway. Manufacturer specifications usually require certified installation to honor the warranty.
Knowing when to call a pro is not weakness. It is smart risk management. Your safety and your investment deserve professional handling when the stakes are high.
Quick Checklist: Did You Get It Right?
Run through this checklist after you finish your calculation. If you can answer yes to each point, your system is sized correctly.
- Did you use your battery's usable capacity, not the label Ah?
- Did you size for your location's worst month of peak sun hours?
- Did you apply the correct charge controller efficiency (MPPT or PWM)?
- Did you add a temperature derating factor for your climate?
- Did you verify your wiring gauge keeps voltage drop under 3%?
- Did you include inverter efficiency if you run AC loads?
- Did you budget for at least two days of battery autonomy?
- Did you round up to the next standard panel size?
If you answered no to any of them, go back and adjust. Each missed step compounds into a system that underperforms or fails early.
Frequently Asked Questions
What size solar panel do I need to charge a 12V 100Ah battery?
A 200W to 300W panel is typical. That assumes 50Ah usable capacity for lead-acid or 80Ah for lithium, 4 peak sun hours, and an MPPT controller. Adjust up for PWM or cloudy climates.
Can I use a higher wattage panel than my calculation shows?
Yes. Oversizing by 20% to 30% is safe with an MPPT controller. It helps on cloudy days.
Just verify the panel's Voc does not exceed the charge controller's maximum input voltage.
How many peak sun hours should I use for winter?
Use the lowest monthly value for your location from NREL's PVWatts data. For most of the northern US, that is 2.0 to 3.0 hours in December. Sizing for winter ensures year-round performance.
What happens if I undersize my solar panels?
Your battery will never fully recharge on poor sun days. Chronic undercharging causes sulfation in lead-acid batteries and reduced cycle life in lithium. The system becomes unreliable during winter or extended cloud cover.
Do I need a different calculation for a PWM vs MPPT controller?
Yes. PWM controllers are 75% to 85% efficient. MPPT controllers are 95% to 99% efficient.
For the same battery and load, a PWM system needs 20% to 30% more panel wattage to deliver the same charge.
Can I charge a lithium battery with a lead-acid sized solar array?
Usually yes, but the array may be oversized. Lithium charges faster and more efficiently. You might save money by using a smaller array and a quality MPPT controller with a lithium charge profile.

Similar Posts