How Many Solar Panels Fit on My Roof?

Let's be honest. If you're asking how many solar panels fit on my roof, you're probably knee-deep in numbers, trying to figure out whether solar even makes sense for your home. It's a smart first question, but the answer isn't as simple as dividing roof square footage by panel size.
Understanding the basics of how solar panels work helps frame the math.
Here's a reality check. A typical U.S. home has about 1,500 to 2,000 square feet of roof area. But you can only use roughly 50 to 70 percent of that after you account for vents, chimneys, skylights, and mandatory fire setbacks.
So before you grab a tape measure, you need to understand what you're actually measuring and why it matters. Let's walk through the process step by step.
Image source: Openverse / U.S. Department of Energy
Why "How Many Panels Fit?" Isn't a One-Answer Question
Every roof is a unique puzzle. The number of panels you can fit depends on three main variables: your roof's usable area, the shape and orientation of each roof plane, and the specific solar panel model you choose. There's no universal answer because your roof is different from your neighbor's.
Online calculators can give you a ballpark, but they often miss critical details like setbacks and obstructions. A professional site survey is the gold standard, but you can get a pretty accurate estimate yourself if you follow the right process. Understanding the key variables upfront saves you from surprises later.
For instance, the size of the panel itself varies. Most residential panels are about 65 inches by 39 inches, but some are larger or smaller. The specific panel you choose affects how many can fit on your roof.
You can read more about the different panel sizes and types in our guide to the types of solar panels.
The 3 Numbers That Actually Determine Your Panel Count
These three factors are the foundation of your estimate. Ignore any one of them, and your count will be off.
| Factor | What to Know |
|---|---|
| Usable roof area | Your total roof square footage minus all obstructions, setbacks, and walkways required by local fire codes |
| Panel dimensions | A typical 400W residential panel is about 65" x 39", covering roughly 17.5 sq. ft. |
| Roof pitch | A slanted roof has more surface area than its footprint; steeper pitches increase usable area |
1. Usable roof area. This is your total roof square footage minus all the space taken up by obstructions, setbacks, and walkways. It's the single most important number.
2. Panel dimensions. Not all solar panels are the same size. A typical residential 400W panel is about 65 by 39 inches, covering roughly 17.5 square feet.
But you might choose smaller 60-cell panels or larger commercial-sized ones. Your choice directly affects how many you can fit.
3. Roof pitch. A slanted roof has more actual surface area than a flat roof of the same footprint. The steeper the pitch, the more area you have to work with, but it also changes how you calculate space.
If you're looking for more detail on how panels are constructed and why they come in different sizes, our breakdown of the main components of a solar panel offers helpful context.
Once you have these three numbers, you can start the real work. Let's go step by step.
Step 1: Measure Your Roof Planes the Right Way
Start by measuring each roof plane separately. A roof plane is a continuous flat section. Do not combine different faces of your roof.
Measure each one individually.
You'll need a tape measure, a notebook, and maybe a helper. If you can't safely access your roof, use satellite imagery from a tool like Google Maps to get approximate measurements. But be careful.
Satellite images can distort perspective.
For each plane, measure the length and width at the eaves and ridge. Multiply them to get the square footage. If your roof has a complex shape with hips and valleys, break it down into rectangles and triangles.

Image source: YouTube / Voltaic Energy Systems VES
This measurement gives you the gross area. The next step is to subtract everything that makes that space unusable.
Step 2: Hunt Down Every Obstruction (Vents, Skylights, Chimneys)
Now it's time to get specific. Walk your roof, or study your satellite view carefully, and mark every single obstruction. This includes plumbing vents, bathroom exhaust vents, skylights, chimneys, dormers, and HVAC units.
Even a small vent takes up space and forces you to shift panels.
A good rule of thumb is to subtract at least one square foot for each small vent, and more for larger features. You'll also need to leave a small gap between panels for mounting hardware, typically 1 to 2 inches.

Image source: YouTube / BonnRoofCareSalem
Every obstruction creates a no-go zone. The goal here is to map out the clear, open areas where panels can be placed without interruption. If you have a complex roof with many penetrations, your usable area can drop significantly.
For a closer look at how panels generate electricity and how the layout matters, our explanation of how do solar panels work is a good resource.
Step 3: Don't Forget Fire Code Setbacks and Walkways
This is the step most homeowners miss. Local fire codes require clear pathways on your roof for firefighters. These setbacks vary by jurisdiction, but common requirements include an 18-inch clearance from the ridge, 18 inches from the eaves, and a 3-foot wide walkway along one side of the roof or across a section.
Some areas require a 36-inch setback from hips and valleys. The purpose is to allow firefighters to move across the roof safely.
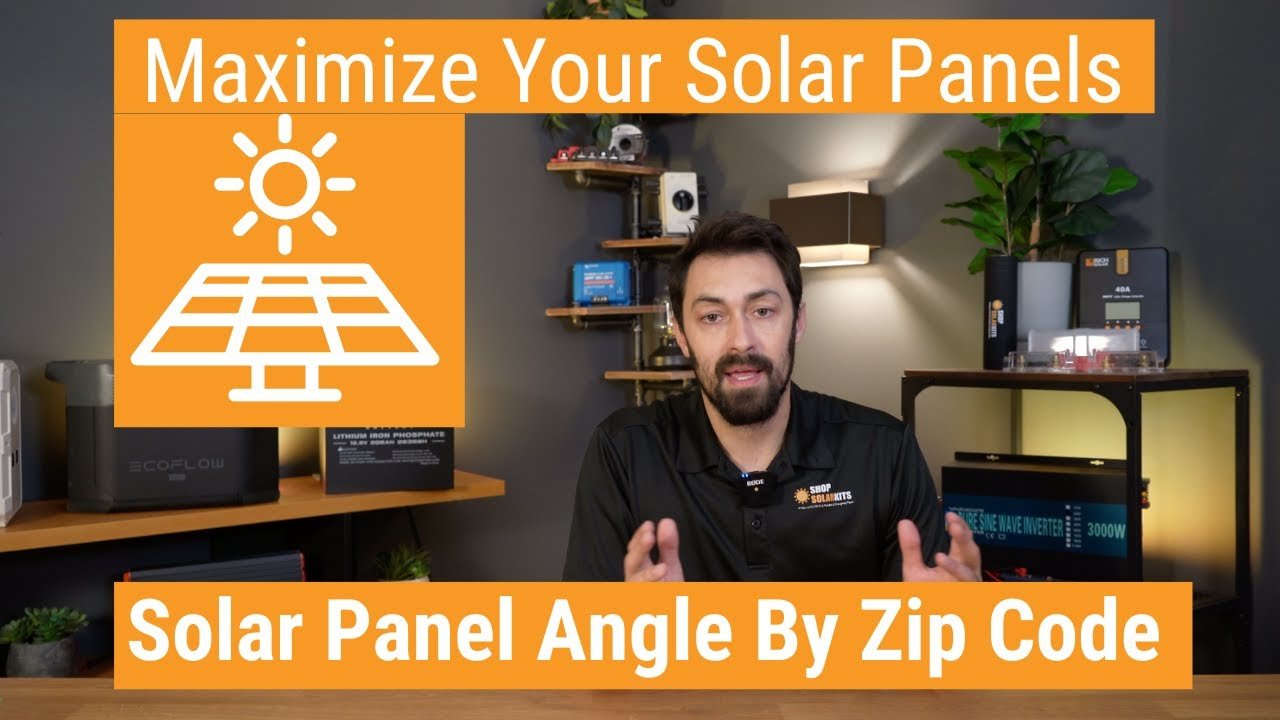
Image source: YouTube / ShopSolar
You need to subtract these setback areas from your usable square footage. This can easily remove 10 to 20 percent of your roof's potential panel area. Check your local building department or the National Fire Protection Association (NFPA) for specific requirements in your area.
Weighing the pros and cons of these placement restrictions can help you plan a more efficient layout. Our article on the advantages and disadvantages of solar panels covers what to consider during planning.
Step 4: Adjust for Roof Pitch — Flatter Isn't Always Better
Roof pitch changes everything. A steeper roof has more actual surface area than a flat one with the same footprint. If you measure your roof from the ground using a satellite view, you're only getting the horizontal footprint.
The true surface area is larger.
To find your roof's pitch, measure the vertical rise for every 12 inches of horizontal run. A 4/12 pitch rises 4 inches per foot. An 8/12 pitch rises 8 inches.
You can use a pitch gauge app, a level and ruler, or check your original house plans.
The pitch correction factor is straightforward. Multiply your measured roof plane area by the factor below to get the true surface area.
| Roof Pitch | Correction Factor | Example: 200 sq. ft. footprint becomes |
|---|---|---|
| 2/12 to 3/12 (low slope) | 1.02 to 1.03 | ~204 sq. ft. |
| 4/12 to 5/12 (common) | 1.05 to 1.08 | ~210 to 216 sq. ft. |
| 6/12 to 8/12 (moderate) | 1.12 to 1.20 | ~224 to 240 sq. ft. |
| 9/12 to 12/12 (steep) | 1.25 to 1.41 | ~250 to 282 sq. ft. |
This extra area matters. A 200-square-foot footprint on a 9/12 pitch gives you 250 square feet of actual roof. That might fit two or three more panels.
If you want a deeper explanation of how panels turn that roof space into power, our article on how solar panels generate electricity breaks down the conversion process.
One warning here. Steep roofs are harder to walk on and install. Your installer might charge more for labor.
But you do get more real estate for your array.
Step 5: Choose Your Panel Size and Run the Math
Now you have your adjusted usable area. The next variable is the panel itself. You need to pick a specific model to get its exact dimensions.
A typical 400-watt residential panel is roughly 65 by 39 inches. That covers about 17.5 square feet. But many manufacturers now offer 72-cell panels that are longer, around 77 inches.
They cover closer to 21 square feet. Higher wattage panels in the 450 to 500 watt range are also becoming common as of 2026.
Here is how the math works out:
Usable square feet ÷ panel square footage = maximum panel count (before orientation)
For example, if your usable area is 350 square feet and you choose a standard 17.5-square-foot panel, you get 350 ÷ 17.5 = 20 panels. That is a 8.0 kW system with 400W panels.
But you cannot just divide and call it done. You also need to account for small gaps between panels for mounting clamps. Plan for 1.5 to 2 inches between each row.
This reduces your count slightly.
If your roof is small or oddly shaped, you might consider higher-efficiency panels. They produce more watts per square foot, so you need fewer of them for the same output. Our solar panel buying guide covers how to match panel specs to your available space.
Step 6: Check Portrait vs. Landscape Fit on Each Roof Plane
This is where the layout gets real. Panels can be installed vertically (portrait) or horizontally (landscape). The orientation affects how many fit on each roof plane.
Portrait orientation works well on narrow roof planes. A standard panel in portrait is about 39 inches wide and 65 inches tall. Landscape orientation uses the longer side horizontally, so the width is 65 inches and the height is 39 inches.
For a roof plane that is 20 feet wide and 10 feet tall, portrait gives you more rows. You can fit about 6 panels across if each is 39 inches wide plus a 2-inch gap. That is about 20.5 feet total.
Landscape would only fit about 3 panels across at 65 inches each.
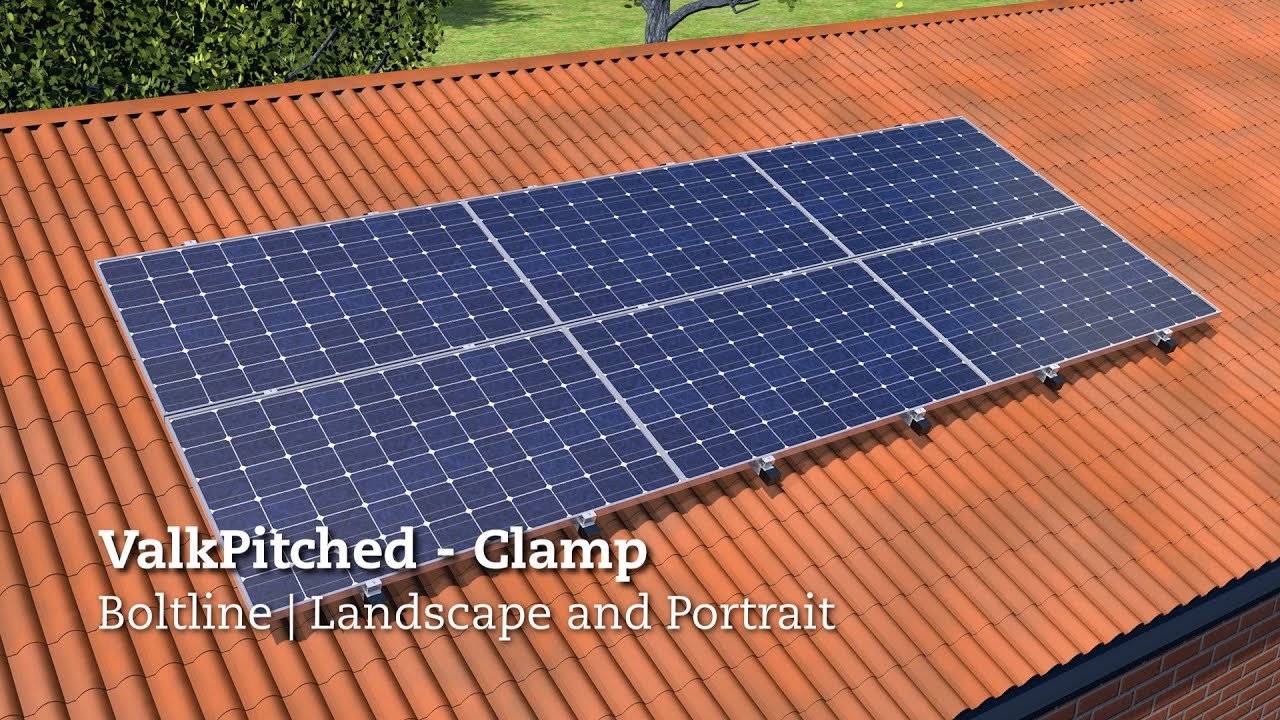
Image source: YouTube / Van der Valk Solar Systems
The best choice depends on your roof's proportions. Long and narrow planes favor portrait. Wide and shallow planes favor landscape.
Some installers will mix orientations on different roof sections.
Run both scenarios with your measurements. The orientation that fits more panels often wins, but also consider wiring efficiency and aesthetics. Most homeowners prefer a symmetrical layout.
What to Do With a Small, Shaded, or Complicated Roof
Not every roof is a perfect solar canvas. If your usable area is under 200 square feet, you are looking at maybe 8 to 10 panels. That is a 3.2 to 4.0 kW system.
That can still offset part of your bill, but it might not be worth the installation cost.
Shading is another killer. Even partial shade on one panel can drag down the whole string if you use a standard string inverter. Microinverters or power optimizers solve this.
They let each panel operate independently. You can still fit panels on parts of the roof that get sun, even if other sections are shaded.
For complicated roofs with multiple facets and hips and valleys, the layout becomes a puzzle. Your installer will use design software to optimize placement. Sometimes you end up with odd numbers of panels, like 17 instead of a clean 20.
If your roof truly cannot support a meaningful system, look into ground-mounted solar or community solar subscriptions. Those bypass roof constraints entirely. For understanding the full picture of what you are working with, our primer on what is a solar panel explains the technology behind each module.
Flat Roof Solar: A Totally Different Fit Calculation
Flat roofs require a different approach. You are not mounting panels flush to the surface. Instead, you tilt them up on racks to face the sun.
That changes the spacing calculation completely.
On a flat roof, panels are typically tilted at 10 to 15 degrees. That angle helps them shed rain and snow and increases production. But tilted panels cast shadows on the ones behind them.
You need to space rows apart to prevent self-shading.
The rule of thumb is to space rows at 2 to 3 times the panel height. For a standard panel tilted at 15 degrees, the shadow length is about 3 to 4 feet. That means a 300-square-foot flat roof might hold fewer panels than a pitched roof of the same total area.
Flat roof mounting systems are usually ballasted with concrete blocks. No roof penetrations needed. That simplifies waterproofing but adds weight.
Your roof must be able to support the added load. Check with a structural engineer before proceeding.
Another option on flat roofs is to use east-west facing rows. Panels face opposite directions. This reduces row spacing because each row shades the other less.
It also spreads production across the day rather than peaking at noon. This can be a smart trade-off if space is tight.
5 Common Panel Count Mistakes That Cost You
These errors pop up again and again. Avoid them, and your estimate will be much closer to reality.
Mistake 1: Forgetting roof pitch. Measuring from satellite footage gives you the footprint, not the actual roof area. As we covered earlier, a 6/12 pitch adds about 12 percent more surface. Skip the correction, and you'll shortchange yourself by several panels.
Mistake 2: Ignoring small obstructions. A single plumbing vent or a chimney might seem small. But it can block an entire row of panels. Every obstruction forces you to shift the layout.
Map them all before you run the numbers.
Mistake 3: Not accounting for fire code setbacks. This is the most common surprise. Local codes often require 18 to 36 inches of clearance from the ridge, eaves, and hips. That can cut your usable area by 20 percent or more.
Check with your local building department or the National Fire Protection Association (NFPA) for specifics.
Mistake 4: Assuming all panels are the same size. A 72-cell panel is about 12 inches longer than a 60-cell panel. That difference changes how many fit across a roof plane. Pick your panel model first, then calculate the count.
Mistake 5: Overlooking future roof work. If your roof is more than 10 years old, you might need to replace it before solar panels go on. Removing and reinstalling panels later costs thousands. Plan for a roof replacement first, or at least budget for it.
The Quick Decision Guide: When to DIY the Count vs. Hire a Pro
You can get a solid estimate on your own. If your roof is simple, with one or two large rectangular planes and few obstructions, your DIY count will be close. Use the steps in this guide, run the math, and you'll have a reliable number.
But some situations call for a professional site survey. Consider hiring an installer or solar designer if:
- Your roof has multiple planes, hips, valleys, and dormers
- You have heavy shading from trees or nearby buildings
- You are considering a flat roof with tilted racking
- Your roof is steep (over 8/12 pitch) and difficult to access safely
- You want a binding quote for financing or permits
A professional will use design software like Aurora or Helioscope. They will generate a precise layout with stringing plans and electrical specs. That level of detail is hard to match with a tape measure and a notebook.
For most homeowners, a DIY estimate is a good starting point. It helps you understand what is possible. Then you can bring that number to an installer and compare it with their professional assessment.
If the numbers are close, you are in good shape.
Frequently Asked Questions
What is the average number of solar panels that fit on a typical home roof?
Most U.S. homes can fit between 15 and 25 panels. That depends on roof size, orientation, and setbacks. A 2,000-square-foot roof with a simple layout might hold 20 to 24 panels.
A smaller or more complex roof might hold only 10 to 14.
How much roof space do I need for a 10 kW solar system?
A 10 kW system typically requires 25 to 30 panels. At roughly 17.5 square feet per panel, you need about 440 to 525 square feet of usable roof area. That is before accounting for pitch and setbacks.
Can I mix different panel sizes on the same roof?
Yes, but it is not ideal. Different panel sizes can complicate wiring and mounting. Most installers recommend using the same model across the entire array for consistency and aesthetics.
How accurate are online solar panel calculators?
They are useful for ballpark estimates but often miss fire code setbacks and small obstructions. A DIY measurement using the steps in this guide will be more accurate. A professional site survey is the most reliable.
What happens if my roof is too small for the system I want?
You have options. You can install a smaller system, use higher-efficiency panels to fit more wattage in less space, or add a ground-mounted array. Some homeowners also choose community solar programs instead.
Do I need to replace my roof before installing solar panels?
If your roof has less than 10 to 15 years of life left, replacing it first is usually smarter. Removing and reinstalling panels later costs $3,000 to $6,000. A new roof under solar panels means you won't have to touch them for decades.

Similar Posts