How to Charge a Battery with a Solar Panel
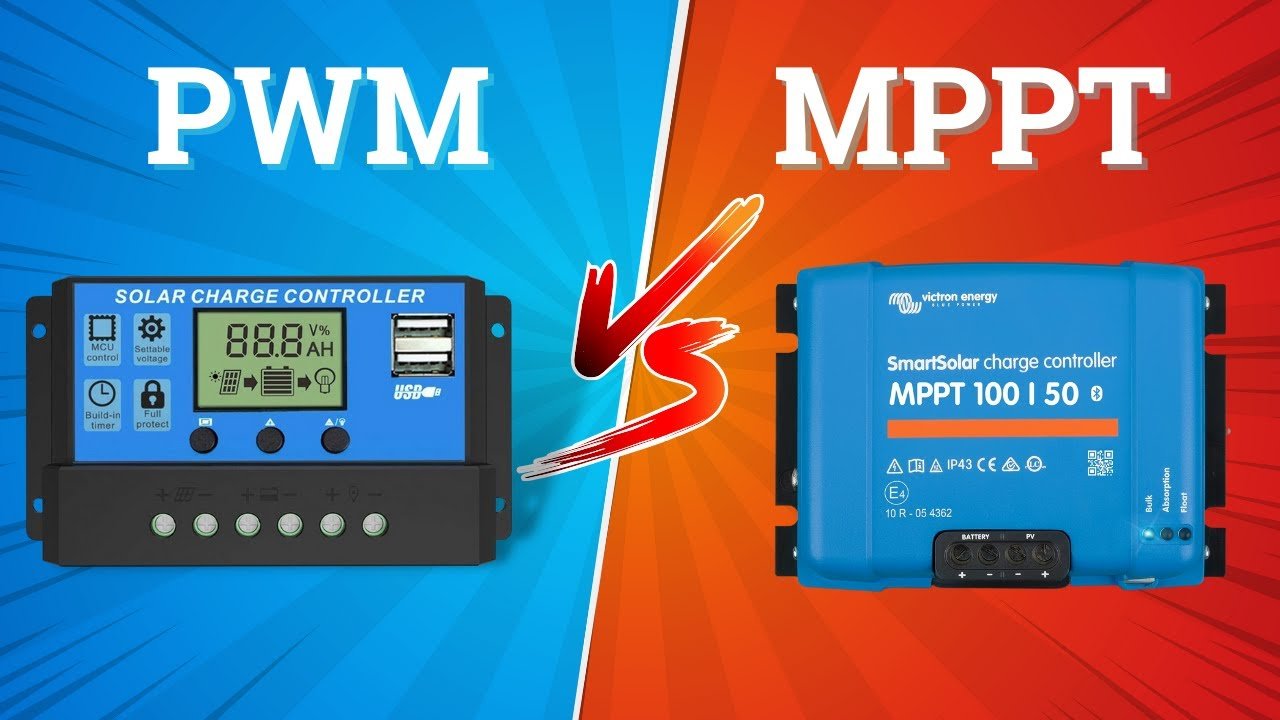

Image source: Wikimedia Commons / Eyetech Securities (CC BY)
You've probably seen the setup before. A solar panel on an RV roof. A small portable panel in a campsite.
Maybe you've wondered exactly how do you charge a battery with a solar panel without frying it or starting a fire. It's a fair question. The answer isn't as simple as just clipping wires together.
Get it wrong, and you can ruin a battery in a matter of hours.
But here's the good news. The process is straightforward once you understand three things: the components you need, the order you connect them, and what each piece does. As of 2026, millions of people are running off-grid systems safely, from tiny shed setups to whole-home battery banks.
You can too. You just need a clear plan and the right gear.
Quick Answer
Connect a charge controller to the battery first. Then connect the solar panel to the charge controller. Never connect a solar panel directly to a battery without a controller.
The controller stops overcharging. It prevents reverse current at night. It also matches the voltage.
That is the safe way to charge any battery with a solar panel.
How Solar Battery Charging Really Works (the Simple Physics)
A solar panel creates DC electricity when sunlight hits its photovoltaic cells. That electricity has a voltage that depends on the panel's rating and how much sun it gets. A typical 100-watt 12-volt panel can produce around 18 to 22 volts in full sun.
But a fully charged 12-volt lead-acid battery only needs around 13.8 to 14.4 volts to reach its maximum safely.
That voltage difference matters a lot.
If you pump 22 volts into a battery that expects 14 volts, you force too much current through it. The battery overheats. It gasses (bubbles hydrogen and oxygen).
The electrolyte boils away. Over time, the plates warp and shed material. You get maybe 50 cycles out of a battery that should have lasted 500.
The charge controller sits between the panel and the battery and manages that voltage. It drops the panel's voltage down to what the battery needs at each stage of charging. It also handles the transition from bulk charge to absorption charge to float charge, which is how you get a full, healthy battery without cooking it.
The Three Essential Components You Can't Skip
You need exactly three things to charge a battery safely with solar:
- A solar panel sized to your battery and your daily energy use.
- A charge controller rated for the panel's wattage and the battery's voltage.
- A battery that matches your system voltage (12V, 24V, or 48V).
It sounds obvious. But people skip the controller all the time. They think a small panel won't hurt.
They are wrong.
Why a Charge Controller Isn't Optional
Even a tiny 10-watt panel can overcharge a small battery on a sunny day if there is no regulation. The panel keeps pushing current as long as the sun shines. The battery keeps accepting it until its voltage rises past safe limits.
The charge controller cuts off the current when the battery is full. It also blocks reverse current at night. Without that blocking, your battery slowly drains through the solar panel after dark.
For a deeper look at the parts of a solar system, our breakdown of the main components of a solar panel system is worth a read. It covers what each piece does and how they interact.
Choosing the Right Charge Controller: PWM vs MPPT
This is where most people get stuck. You have two main options: PWM (pulse width modulation) and MPPT (maximum power point tracking). They do the same job in different ways.
One is cheaper. One is more efficient. Picking the wrong one can cost you power or money.
PWM controllers work like a switch. They turn the panel on and off rapidly to hold the battery voltage steady. The panel voltage gets pulled down to match the battery voltage.
That means you lose the extra voltage the panel could produce. In practical terms, a 100-watt panel running into a 12-volt battery through a PWM controller will only deliver about 70 to 80 watts of useful power.
MPPT controllers are smarter. They track the panel's maximum power point and convert the extra voltage into extra current. So that same 100-watt panel through an MPPT controller delivers close to 100 watts to the battery.
The efficiency gain is real. It is especially noticeable in cold weather, when panel voltage rises, or when your battery voltage is far from the panel's voltage.
Here is how they compare side by side:
| Feature | PWM Controller | MPPT Controller |
|---|---|---|
| Typical efficiency | 70 to 80 percent | 93 to 97 percent |
| Best for | Small, simple systems | Large or year-round systems |
| Panel voltage | Must match battery voltage | Can be higher than battery voltage |
| Temperature performance | Loses efficiency in cold | Gains efficiency in cold |
| Cost | Low ($15 to $50) | Higher ($60 to $300+) |
| When to choose | 12V panels on 12V batteries only | Any system over 200W or with voltage mismatch |
Which one should you pick? If you have a small portable setup like a 50-watt panel charging a 12-volt battery on a camping trip, PWM is fine. If you have a 200-watt or larger system on an RV, cabin, or boat, MPPT pays for itself in extra energy every season.
Image source: YouTube / Cleversolarpower by Nick (fair-use thumbnail)
Matching Your Solar Panel to Your Battery Type
Not all batteries charge the same way. A flooded lead-acid battery wants a different voltage profile than an AGM, a gel, or a lithium iron phosphate (LiFePO₄) battery. If you set the wrong profile on your charge controller, you can undercharge or overcharge the battery.
Most modern charge controllers let you select the battery type with a button or a dip switch. Always set this before you start charging. Running a lithium profile on a lead-acid battery will leave it chronically low.
Running a lead-acid profile on a lithium battery can overcharge it and trigger its BMS protection.
Lead-Acid, AGM, Gel — What Each One Expects
These are the three common types of lead-acid batteries. They all use the same basic chemistry but have different charge limits.
- Flooded lead-acid (wet cell): Requires an absorption voltage around 14.4 to 14.8 volts and a float voltage around 13.2 to 13.6 volts. It also needs occasional equalization at a higher voltage to break up sulfate crystals.
- AGM (absorbent glass mat): Similar voltages but slightly lower. Absorption around 14.2 to 14.6 volts. Float around 13.2 to 13.4 volts. No equalization needed. Too high a voltage damages the internal mats.
- Gel: The most sensitive. Absorption voltage should not exceed 14.1 to 14.3 volts. Float around 13.1 to 13.3 volts. Gel batteries are easy to ruin with overvoltage because the gel cracks and leaves voids between the plates.
Lithium (LiFePO₄) — the Differences That Matter
Lithium iron phosphate batteries are not the same as the lithium-ion batteries in your phone. They are safer. They last longer.
But they charge differently.
LiFePO₄ wants a constant current / constant voltage profile. The absorption voltage is typically 14.2 to 14.6 volts for a 12V system. But the key difference is that lithium batteries can accept a much higher charge current.
A 100Ah lithium battery can often take 50 amps or more, while a lead-acid battery of the same size might only handle 20 to 30 amps.
Lithium batteries also do not need a float stage. Holding them at a constant 13.5 volts degrades the cells over time. Most charge controllers have a lithium setting that turns off charging once the battery reaches full voltage.
If you are building a larger system, you should also understand the different solar panel types and their efficiency characteristics. Panels with higher voltage output are often a better match for MPPT controllers and modern lithium batteries.
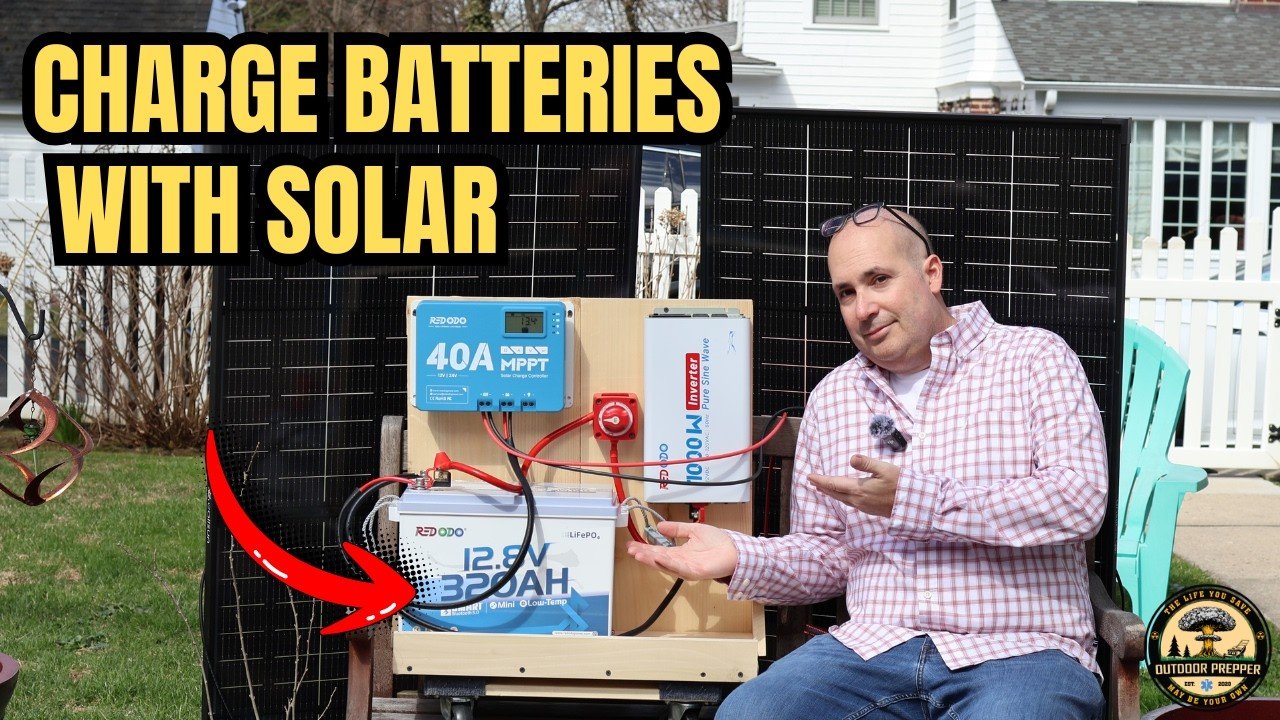
Image source: YouTube / Outdoor Prepper (fair-use thumbnail)
Step-by-Step: How to Safely Connect a Solar Panel to a Battery
The order you connect things matters more than most people think. Connect the panel first and the battery second, and you risk a voltage spike that can damage the charge controller. Connect the battery backwards and you can blow the controller's reverse polarity protection instantly.
Here is the safe sequence, step by step.
Step 1: Mount and position the solar panel.
Place it in full sun with no shade. Angle it toward the sun at roughly your latitude. For a temporary ground setup, make sure it is stable and not at risk of tipping over in wind.
Step 2: Connect the charge controller to the battery first.
Run wires from the battery terminals to the charge controller's battery terminals. Red to positive. Black to negative.
Make sure the controller detects the battery voltage and turns on. This is your chance to confirm the polarity is correct before you add solar power.
Step 3: Set the battery type on the charge controller.
Before you connect the panel, configure the controller for your battery chemistry. Lead-acid, AGM, gel, or lithium. If you skip this step, the controller will use a default profile that might not match.
Step 4: Connect the solar panel to the charge controller.
Run wires from the panel to the controller's solar input terminals. The controller will recognize the solar voltage and begin charging if there is enough light. Many controllers show the charging status on an LCD display or through flashing LEDs.
Step 5: Verify the charging.
Check the display or use a multimeter to confirm the battery voltage is rising. A 12V battery at rest should show around 12.5 to 12.7 volts. During charging, you should see 13.5 to 14.5 volts depending on the stage.
Step 6: Add fuses between the battery and controller.
Install an inline fuse rated for the wire gauge and the system current. Put it as close to the battery positive terminal as possible. This protects the wire from overheating if something shorts downstream.
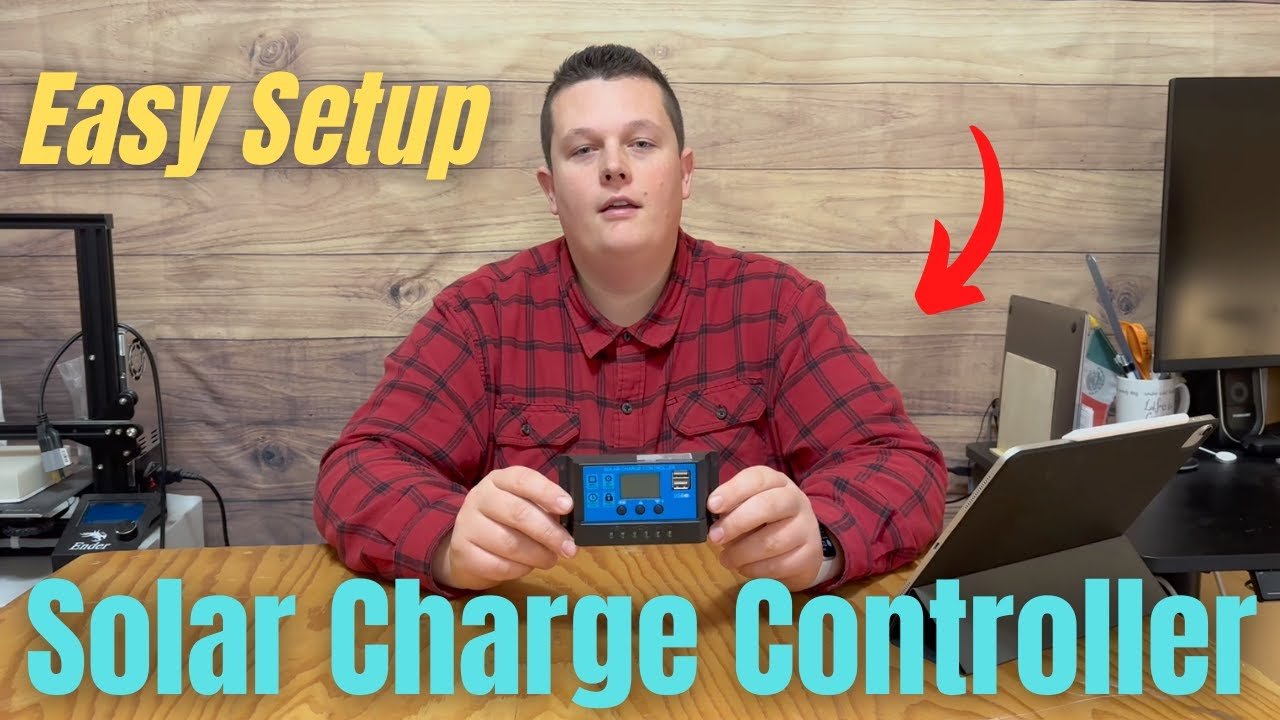
Image source: YouTube / Scott's Solar (fair-use thumbnail)
Wiring Order That Prevents Sparks and Damage
One more thing about wiring order. Always connect the charge controller to the battery before the panel. The controller needs battery power to operate its internal electronics.
If you connect the panel first, the controller might not have enough voltage to turn on correctly, or it might send unfiltered panel voltage straight to the battery terminals for a split second.
A spark when you connect the battery wires is normal. It means the controller's capacitors are charging. A spark when you connect the solar panel is also normal if the sun is bright.
But a persistent spark or a melted terminal means something is wrong. Stop immediately and check your connections.
For a complete overview of how a solar energy system comes together, including the wiring path from panel to battery to inverter, take a look at how solar panels generate electricity. It connects the dots between the physics and the practical installation.
Sizing Your System — Panel Wattage and Battery Capacity
One of the most common questions we see is "what size solar panel do I need to charge a 100Ah battery?" The answer depends on how fast you want to charge and how much sun you get.
A simple rule of thumb works well. Take your battery's amp-hour capacity and divide by the number of peak sun hours you get per day. That tells you the charge current you need.
Multiply that by your system voltage, and you get the panel wattage.
Here is an example. Let us say you have a 100Ah 12V lead-acid battery. You get about 5 peak sun hours where you live.
You want to fully recharge from 50 percent depth of discharge, so you need to replace about 50Ah.
- 50Ah divided by 5 sun hours equals 10 amps of charge current.
- 10 amps times 12 volts equals 120 watts.
- Add a buffer for real-world losses (say 20 percent), and you land at around 150 watts of panel.
For a lithium battery, you can charge faster because they accept higher current. A 100Ah lithium battery can often take a 200-watt or even 300-watt panel without issue, as long as the charge controller and BMS are rated for it.
| Battery Size | Depth of Discharge | Sun Hours | Recommended Panel Wattage |
|---|---|---|---|
| 50Ah lead-acid | 50 percent (25Ah) | 4 hours | 90 to 100W |
| 100Ah lead-acid | 50 percent (50Ah) | 5 hours | 150 to 200W |
| 100Ah lithium | 80 percent (80Ah) | 5 hours | 200 to 300W |
| 200Ah lead-acid | 50 percent (100Ah) | 4 hours | 300 to 400W |
Remember that these numbers assume full sun with no shade. Partial shade can cut your panel output by 50 to 80 percent depending on how much of the panel is covered. If your setup will be in a partly shaded location, oversized your panel by at least 30 percent.
As we covered in the table earlier, an MPPT controller will recover some of that lost efficiency. But the best approach is to avoid shade in the first place. Even a small branch shadow on one corner of a panel can drop total output more than you would expect.
Common Mistakes That Damage Batteries or Start Fires
We have seen the same handful of mistakes show up over and over in online forums and verified buyer feedback. Some are expensive. Some are dangerous.
All of them are avoidable.
Mistake 1: Connecting the panel before the battery.
If you connect the solar panel to the charge controller before the battery, the controller may not power on properly. In some cases, it sends raw panel voltage toward the battery terminals. That can damage the controller or create a spark at the battery connection.
Always connect battery first.
Mistake 2: Using the wrong wire gauge.
Thin wire creates voltage drop. Voltage drop means less power reaches your battery. For a 20-amp, 12-volt system running 15 feet, you need at least 10 AWG wire.
Using 16 AWG in that scenario could drop your voltage by 5 percent or more, which wastes energy and can cause the wire to heat up under load.
Mistake 3: Skipping the fuse.
A short circuit in your wiring can draw hundreds of amps. Without a fuse, the wire becomes a heating element. It melts insulation.
It can start a fire. The fuse should be placed as close to the battery positive terminal as possible and rated for about 125 percent of your system's maximum current.
Mistake 4: Mixing old and new batteries.
When you connect multiple batteries in parallel or series, they should be the same age, same type, and same capacity. Mixing a new battery with an old one causes the new battery to work harder to compensate. The older battery drags down the whole bank.
The result is reduced lifespan for both.
Mistake 5: Overcharging a lead-acid battery.
Setting the wrong absorption voltage on your charge controller can boil the electrolyte out of a flooded battery. For AGM and gel batteries, overvoltage can cause permanent internal damage. Always double check the manufacturer voltage specs before you set the controller.
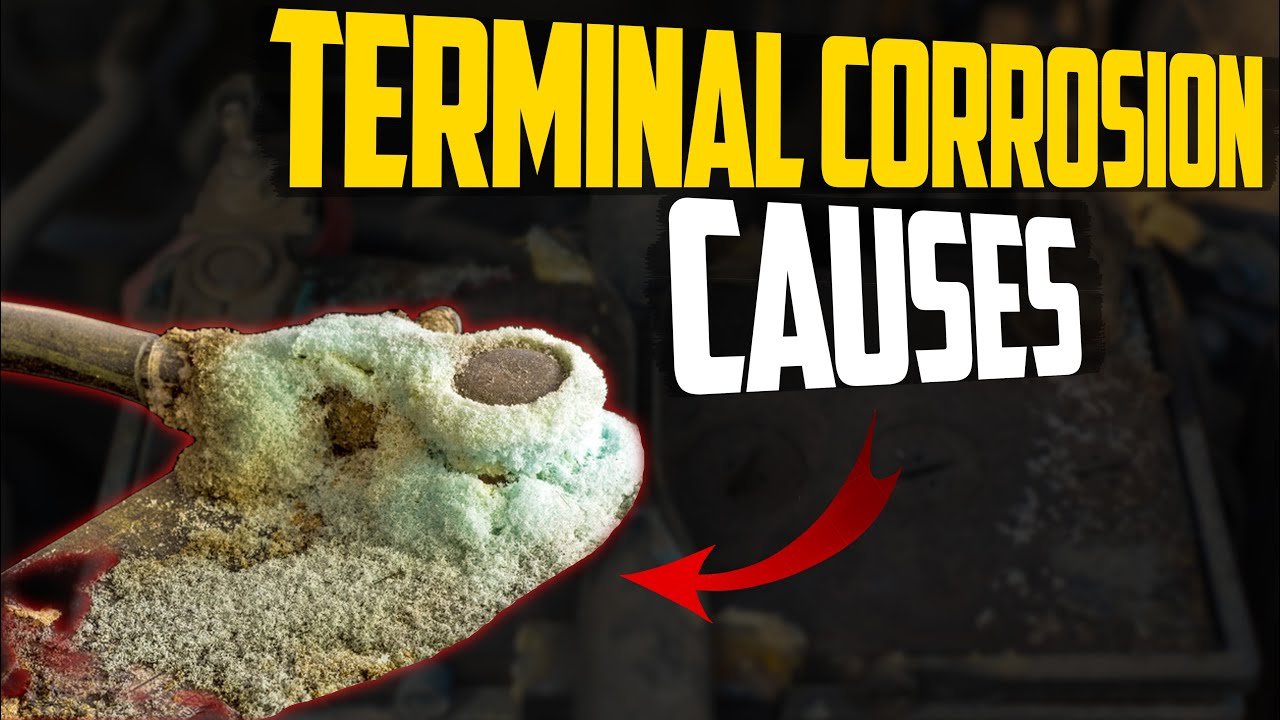
Image source: YouTube / car PROblems (fair-use thumbnail)
Safety Checklist Before You Power Up
Before you flip any switches or plug in your panel, run through this checklist. It takes five minutes. It can save your battery, your equipment, or your property.
- Fuse installed and correctly rated. Check the fuse rating against your wire gauge and maximum current. The fuse should be the weak link in the system, not the wire.
- All connections tight. Loose connections create resistance. Resistance creates heat. Heat melts terminals and starts fires. Give every connection a gentle tug to confirm it is seated.
- Polarity verified. Double check that positive goes to positive and negative goes to negative. Reverse polarity on a charge controller can blow the internal protection fuse or destroy the controller entirely.
- Battery type set on controller. Do not assume the factory default is correct. Many controllers ship set to a generic lead-acid profile that may not match your specific battery.
- Panel wiring secure. Make sure MC4 connectors are fully clicked together. Exposed connectors can short against metal surfaces or create arcing.
- Ventilation adequate. Flooded lead-acid batteries produce hydrogen gas during charging. That gas is explosive. The battery compartment must be vented to the outside. Lithium batteries are safer in this regard but still generate some heat.
- No flammable materials nearby. Keep the battery and charge controller away from gasoline, propane, paper, or anything that burns easily.
For a deeper look at how a full solar system is wired and protected, our guide to the advantages and disadvantages of solar panels includes practical safety considerations for rooftop and ground mounted installations.
When to Call a Professional vs Doing It Yourself
Most small solar battery charging setups are perfectly safe for a confident DIYer. A 100-watt panel, a PWM controller, and a single 12V battery is about as simple as it gets. The wiring is straightforward.
The voltages are low. The risks are manageable with basic precautions.
But there are clear cases where you should hire a licensed electrician.
Call a professional if:
- Your system voltage is 48 volts or higher. Higher voltage systems carry greater shock risk and require more careful wire sizing and protection.
- You are connecting to grid power in any way. Grid tied systems require permits, inspections, and compliance with the National Electrical Code.
- You are installing panels on a roof that requires structural assessment. A solar panel adds weight and wind load. A roofer or engineer should confirm the roof can handle it.
- You have any doubt about your wiring or your safety knowledge. The cost of a professional consult is small compared to the cost of a fire or an electrocution.
DIY is fine if:
- You are working with a 12-volt or 24-volt system.
- You understand basic electrical safety, including using a multimeter and identifying correct polarity.
- Your installation is ground level or on a vehicle where mounting hardware is straightforward.
- You have read the charge controller manual and your battery manufacturer specifications.
The decision is not about pride. It is about matching your skill level to the risk. A small 12V camper van setup is a weekend project.
A 48-volt cabin system with six panels and a battery bank is a job for someone who has done it before.
Real Scenarios: RV, Boat, Off-Grid Cabin, Emergency Backup
Theory is useful. Examples are better. Here is how the same principles play out in four common situations.
RV solar setup.
A typical RV has 200 to 400 watts of rooftop panels feeding a 200Ah lithium battery bank. The owner uses an MPPT controller to maximize the limited roof space. Charging from 50 percent takes about four to six hours in full sun.
The system powers lights, a refrigerator, water pump, and phone charging. The key challenge is shading from roof air conditioners and vents, which requires careful panel placement or panel strings with bypass diodes.
Boat marine system.
Marine solar charging adds corrosion as a major factor. Salt air eats away at connectors. Terminals need to be coated with dielectric grease.
A typical sailboat installs 100 to 300 watts of panels on a bimini or stern arch. The battery bank is usually AGM or lithium because flooded batteries slosh and vent in rough seas. The charge controller must be marine rated with conformal coated circuit boards to resist humidity.
Off-grid cabin.
A cabin with a 400Ah battery bank and 600 watts of panels can run a small fridge, LED lights, a laptop, and a water pump. The panels are often ground mounted on a tilt rack so the owner can adjust them seasonally. In winter, when sun hours drop to two or three per day, the system relies on a backup generator or a larger panel array.
The battery type is usually flooded lead-acid because it is cheaper per amp-hour for stationary use.
Emergency backup.
A small 50-watt panel with a 20Ah lithium battery can keep a phone, a tablet, and a couple of USB lights running indefinitely during a power outage. This is the simplest and cheapest entry point. The panel folds into a case.
The battery is small enough to carry. The charge controller is built into the battery. It is not a whole house solution.
But for keeping communication devices alive, it is hard to beat.
Maintenance and Long-Term Optimization
A solar battery charging system is mostly set and forget. But a little maintenance goes a long way toward longevity.
Clean your solar panel surface every few months. Dust, bird droppings, and pollen block light and reduce output. A wet cloth and a gentle wipe are enough.
Avoid abrasive cleaners that scratch the glass.
Check battery terminals for corrosion twice a year. White or blue crusty buildup on lead-acid terminals means they need cleaning. A mixture of baking soda and water neutralizes the acid.
Scrub with a wire brush, rinse, dry, and apply a thin layer of petroleum jelly or terminal protectant.
For flooded lead-acid batteries, check the electrolyte level every month. If the plates are exposed, top up with distilled water only. Tap water contains minerals that accelerate sulfation and reduce battery life.
Monitor your system performance with a simple multimeter or a display on your charge controller. A sudden drop in charging current often points to a dirty panel, a loose connection, or a failing battery. Catching these issues early prevents a dead battery on a cloudy day.
Frequently Asked Questions
Can I connect a solar panel directly to a battery?
No. You risk overcharging and damaging the battery. A charge controller is required to regulate voltage and prevent reverse current at night.
How long does it take to charge a battery with a solar panel?
It depends on panel wattage, battery capacity, and sunlight. A 100W panel charging a 100Ah battery from 50 percent depth of discharge takes roughly 5 to 7 hours in full sun.
Do I need a charge controller for a small trickle charger?
Yes. Even a 5W panel can overcharge a small battery over multiple sunny days. A charge controller or a solar battery maintainer with built-in regulation is necessary for safety.
Can I mix different types of batteries on the same system?
No. Mixing chemistries or ages causes uneven charging and reduces overall battery life. All batteries in a bank should be the same type, capacity, and approximate age.
What happens if my solar panel is larger than my charge controller rating?
The controller will limit current to its maximum rated output. Excess panel capacity is wasted. Oversizing a controller for future expansion is fine, but the panel wattage should match the controller's maximum input rating.

Similar Posts