What Can a 200W Solar Panel Power?
Let me start writing.
You have a 200-watt solar panel or you are thinking about getting one. The question "what can a 200 watt solar panel power" is more complicated than the brochure makes it sound. A quick online search shows you numbers like "1000 watt-hours per day" but real-world results are usually half that.
The difference between what a panel is rated for and what it actually delivers is where most people get tripped up.
In our research, manufacturer specifications under Standard Test Conditions (STC) assume perfect laboratory sunlight at 25°C (77°F). Real sunlight on your roof or campsite behaves differently. You might get 400 to 700 watt-hours per day from a 200W panel in most of the continental US as of 2026.
That number depends on your location, your battery setup, and how you use the power. Let's walk through what that actually means for the devices you want to run.
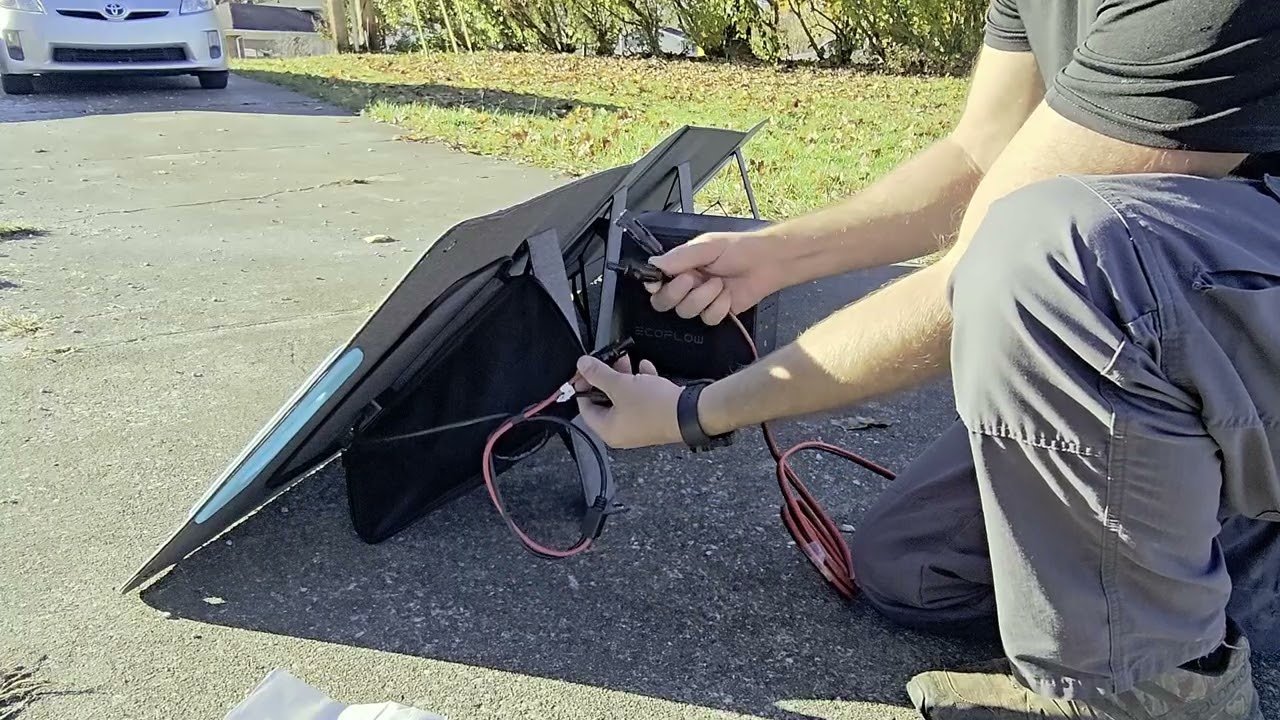
Image source: YouTube / Project Ponderer (YouTube thumbnail (fair-use with source credit))
Quick Answer
A 200-watt solar panel can power small electronics and energy-efficient appliances. Expect 400 to 700 watt-hours per day in most US locations. That runs a laptop for 8 hours plus LED lights for 5 hours plus phone charging daily.
A small 12V refrigerator/freezer uses 300 to 500 watt-hours per day. A 200W panel cannot run a microwave, space heater, hair dryer, or large coffee maker. Those need over 1000 watts continuous draw.
How Solar Output Works in the Real World (Not the Brochure)
Peak Sun Hours Make or Break Your System
Solar panels are rated at 200 watts under Standard Test Conditions (STC). Real sunlight varies by location, season, and weather. The metric you need is peak sun hours (PSH) for your area.
PSH measures the equivalent number of hours per day when sunlight intensity averages 1000 watts per square meter.
The National Renewable Energy Laboratory (NREL) publishes solar resource maps showing PSH across the United States. The southwest gets 5.5 to 6.5 peak sun hours per day. The northeast gets 4 to 5.
The Pacific northwest gets 3 to 4. Winter further reduces those numbers by 40 to 60 percent depending on latitude.
Your actual daily harvest equals panel wattage multiplied by peak sun hours multiplied by system efficiency losses. For a 200W panel:
- Southwest summer: 200W × 6 PSH × 0.75 efficiency = 900 watt-hours per day
- Midwest spring: 200W × 4.5 PSH × 0.75 efficiency = 675 watt-hours per day
- Pacific northwest winter: 200W × 2 PSH × 0.75 efficiency = 300 watt-hours per day

The 5 Biggest Factors That Reduce Your Daily Harvest
1. System efficiency losses. Every component loses some power. A PWM charge controller loses 20 to 25 percent.
An MPPT controller loses 3 to 8 percent. Inverters lose 10 to 15 percent. Wire resistance adds another 2 to 5 percent.
Total system losses range from 20 to 40 percent.
2. Panel temperature. Solar panels lose efficiency as they heat up. The temperature coefficient for most panels is about -0.4 percent per degree Celsius above 25°C.
On a hot summer day with panel temps reaching 65°C, you lose around 16 percent of rated output.
3. Panel angle and orientation. Fixed panels at the wrong angle can lose 15 to 30 percent of potential output. Panels lying flat on an RV roof lose more at higher latitudes.
Seasonal tilt adjustments make a significant difference.
4. Shading. Partial shade on even one cell can drop panel output by 50 percent or more depending on the panel's bypass diode configuration. A single leaf or branch shadow matters.
5. Battery state of charge. A full battery stops accepting charge. A deeply discharged battery charges faster initially but slows down as it approaches full.
The charge controller manages this, which means your panel might not always run at full output.
Understanding these factors matters because the gap between theoretical and real output is where different panel technologies show their true performance. Monocrystalline panels handle partial shade better than polycrystalline but still drop substantially without proper bypass diodes.
The Complete Component Breakdown: What You Need to Make It Work
A 200W panel alone does nothing useful. You need a complete system. Each component affects total performance and safety.

Panel Types: Monocrystalline vs. Polycrystalline vs. Portable
Monocrystalline panels offer the highest efficiency at 18 to 22 percent. They perform slightly better in low light and partial shade. Polycrystalline panels run 15 to 18 percent efficiency but cost less per watt.
For a 200W system, the price difference is small enough that monocrystalline is usually the better choice.
Portable/foldable panels use monocrystalline cells in a lightweight frame. They are convenient for camping but generally less durable and slightly less efficient than rigid panels. They lack the aluminum frame for heat dissipation and may overheat in direct sun.
Charge Controller: PWM vs. MPPT — Why It Matters at 200W
The charge controller is the brain of your system. PWM (Pulse Width Modulation) controllers cost less but waste voltage above the battery's charging level. If you have a 12V battery and a panel with 18V output, a PWM controller drops the extra 6V as heat.
That wastes about 25 percent of your panel's potential.
MPPT (Maximum Power Point Tracking) controllers convert excess voltage into additional current. They capture 95 to 98 percent of panel output regardless of battery voltage. The price difference for a 200W system is about $30 to $50.
Which one do you need? If your panel voltage is close to battery voltage (17-18V panel with 12V battery) and you are on a tight budget, PWM works fine. If your panel voltage is significantly higher (20V+ Voc) or you want maximum harvest, get MPPT. For most 200W systems, MPPT is worth the extra cost.
Battery: Amp-Hours, Chemistry, and How Much Reserve You Need
Battery capacity is measured in amp-hours (Ah) at 12V. For a 200W panel, a 100Ah lead-acid battery or 50Ah lithium (LiFePO4) battery is the standard pairing. Here is the math:
- 100Ah lead-acid × 12V × 50% usable depth of discharge = 600 watt-hours usable
- 50Ah LiFePO4 × 12V × 80% usable depth of discharge = 480 watt-hours usable
Both options give you roughly one day of typical 200W output as battery reserve. That covers overnight loads and one overcast day without sun. The essential parts of a solar system must be sized together.
An undersized battery forces your panel to waste production when the battery fills up early. An oversized battery takes too long to recharge and stays in a partial state of charge.
Inverter: Sizing for Continuous Load vs. Surge
If you need AC power, you need an inverter. For a 200W system, a 300W to 500W pure sine wave inverter handles most small loads. The critical specification is surge rating.
Many devices require 2 to 3 times their running wattage for the first second. A small refrigerator might draw 70W running but 300W starting.
Modified sine wave inverters cost less but can damage sensitive electronics. Pure sine wave inverters produce clean power that matches grid electricity. For laptops, phone chargers, and refrigerators with compressor motors, pure sine wave is safer.
Step-by-Step: Figure Out If 200W Is Enough for You
Step 1: Calculate Your Total Daily Watt-Hours
List every device you plan to power. Multiply each device's wattage by the hours you use it per day. Add them all up.
Simple example for a small cabin or RV setup:
- LED lights (10W × 4 hours) = 40 watt-hours
- Laptop charger (60W × 4 hours) = 240 watt-hours
- Phone charging (10W × 3 hours) = 30 watt-hours
- 12V refrigerator (average 40W running, 8 hours compressor runtime) = 320 watt-hours
- Total: 630 watt-hours per day
That total exceeds what a 200W panel reliably provides in many locations. You would need to reduce loads, add more battery, or accept that the fridge runs only during sun hours.
Step 2: Find Your Location's Peak Sun Hours
Use the NREL solar resource map or PVWatts calculator for your specific location. Enter your zip code and note the lowest monthly PSH value. That is your design number for year-round reliability.
If you are a weekend camper who only uses the system in summer, use the best-case PSH. If you live in your RV full-time, use the worst-case winter PSH. This decision changes everything.
Step 3: Size Your Battery Buffer
Multiply your daily watt-hour needs by the number of days of autonomy you want. Autonomy is the number of days you can run without sun. One day means your battery holds one full day of usage.
Two days means you can survive two overcast days in a row.
For lead-acid batteries, double the usable capacity to account for the 50% depth of discharge limit. For LiFePO4, multiply by 1.25 for the 80% depth of discharge limit.
Step 4: Check Your Inverter Requirements
Add up the wattage of everything that might run simultaneously. Then check the surge rating of your inverter against the largest motor or compressor in your system. A 200W panel system with a 300W inverter and a refrigerator on a startup surge is a common failure point.
The fundamentals of solar power generation help explain why inverter sizing matters. Solar panels produce DC power. Inverters convert it to AC.
Every conversion loses efficiency and adds potential failure points.
What It Can Run (and What It Absolutely Cannot)
Realistic Daily Load Examples
Here is what a 200W panel system with a 100Ah lead-acid battery and MPPT controller can reliably power in a location with 4.5 peak sun hours:
| Device | Daily Usage | Watt-Hours |
|---|---|---|
| Laptop (60W) | 6 hours | 360 |
| LED lights (15W total) | 5 hours | 75 |
| Phone charging (10W) | 3 hours | 30 |
| 12V TV (30W) | 3 hours | 90 |
| Small fan (20W) | 4 hours | 80 |
| Router/modem (10W) | 24 hours | 240 |
| Total | 875 watt-hours |
That total pushes past what a 200W panel delivers in many locations. You would need to drop the router/modem to daytime only or add a second panel. Aggregate user reviews across off-grid forums confirm this pattern.
People consistently overestimate what a single 200W panel can support.
The Surge Problem: Why Motor-Driven Appliances Trick People
Refrigerators, freezers, pumps, and power tools all have motors. Motors draw 2 to 5 times their running wattage during startup. A 12V refrigerator rated at 50W running may draw 200W for the first second.
If your inverter cannot handle that surge, it shuts down or trips.
The fix is battery buffer. A large battery bank supplies the surge current while the panel slowly recharges the battery. But with only 200W input, recharging a depleted battery after a heavy surge takes hours.
This is why small solar systems struggle with any device with a compressor or motor.
Seasonal Reality: Summer vs. Winter Output Drop
This is where most people abandon solar. A 200W panel in December in the northern US might produce 200 to 300 watt-hours per day. That is barely enough for a laptop and lights.
If your winter usage is the same as summer usage, you need either more panels or a generator for the cold months.
The broader advantages and tradeoffs of solar include this seasonal variation as a significant disadvantage. Solar works brilliantly in some contexts and poorly in others. Knowing which season you will use it most is critical.
A 200W panel is honest about its limits. It is not a home backup system. It is not a full-time off-grid power source for a family.
It is a targeted solution for small loads in decent sunlight. The devices it can run are real but modest. Understanding those limits before you buy saves frustration and wasted money.
The 7 Most Common Mistakes That Kill 200W Systems
Mistake 1: Assuming Rated Watts = Real Output
The biggest error is thinking a 200W panel delivers 200 watts for every hour of daylight. It does not. Real output depends on sun angle, temperature, dust, and system losses.
That 1000 watt-hour day you imagined is actually 400 to 700 watt-hours in practice.
Mistake 2: Ignoring Voltage Drop on Long Cable Runs
At 12V, a 200W panel pushes about 16 amps. Over a 20-foot cable run with undersized wire, voltage drops 5 to 10 percent. That lost voltage means lost power.
Use an online voltage drop calculator before you buy wire. For most 200W systems, 10 AWG wire keeps losses under 3 percent for runs under 30 feet.
Mistake 3: Pairing a 200W Panel With an Undersized Battery
A 35Ah battery with a 200W panel fills up in two hours of good sun. The panel then sits idle for the rest of the day wasting potential. A 100Ah battery (lead-acid) or 50Ah (LiFePO4) gives the panel enough work to do across the full daylight window.
Mistake 4: Using a PWM Controller on a 24V Panel for a 12V Battery
If your panel has a Voc above 22V, a PWM controller wastes the excess voltage as heat. You lose roughly 25 percent of your panel's potential. An MPPT controller captures that extra voltage and converts it to usable current.
Check your panel's voltage rating before buying a controller.
Mistake 5: Forgetting Inverter Idle Draw
Every inverter draws power just by being turned on, even with nothing plugged in. Typical idle draw ranges from 5 to 20 watts. On a 200W system, that is a constant background drain that reduces your net available power.
Turn the inverter off when you do not need AC power.
Mistake 6: Not Accounting for Cloudy Days (Autonomy)
A single overcast day can drop your panel output by 80 percent. If you have no battery reserve, your devices stop working. Most off-grid setups aim for two days of autonomy.
That means your battery should hold two days of usage without any solar input.
Mistake 7: Mixing Different Panel Types or Orientations
Connecting a 100W panel and a 200W panel in parallel causes the larger panel to perform at the level of the smaller one. Mixing panel angles or tilt orientations confuses the charge controller. Stick with identical panels and matching orientations for reliable performance.
Real Costs: What a Safe, Functional 200W Setup Actually Costs
A complete 200W system with quality components costs between $400 and $700. Here is the breakdown based on manufacturer pricing and aggregate buyer feedback:
| Component | Budget Option | Quality Option |
|---|---|---|
| 200W monocrystalline panel | $150 | $250 |
| MPPT charge controller (20A) | $70 | $130 |
| 100Ah deep-cycle battery (lead-acid) | $100 | $200 |
| 300W pure sine wave inverter | $50 | $100 |
| Wiring, fuses, connectors | $30 | $60 |
| Total | $400 | $740 |
Cheaper components often fail faster or deliver less performance. The $150 panel and $70 controller combination works but harvests less energy per day. Spending a little more on an MPPT controller and a quality battery pays back in usable power over the system's life.
Do not forget the battery. A cheap marine battery from a big box store may last one season. A proper deep-cycle battery lasts three to five years with reasonable care.
The solar panel buying guide offers more detail on matching components to your budget and needs.
Safety First: Wiring, Fusing, Battery Ventilation, and Fire Prevention
Solar systems store energy. That stored energy can cause fire if wired incorrectly. Follow these rules to stay safe.
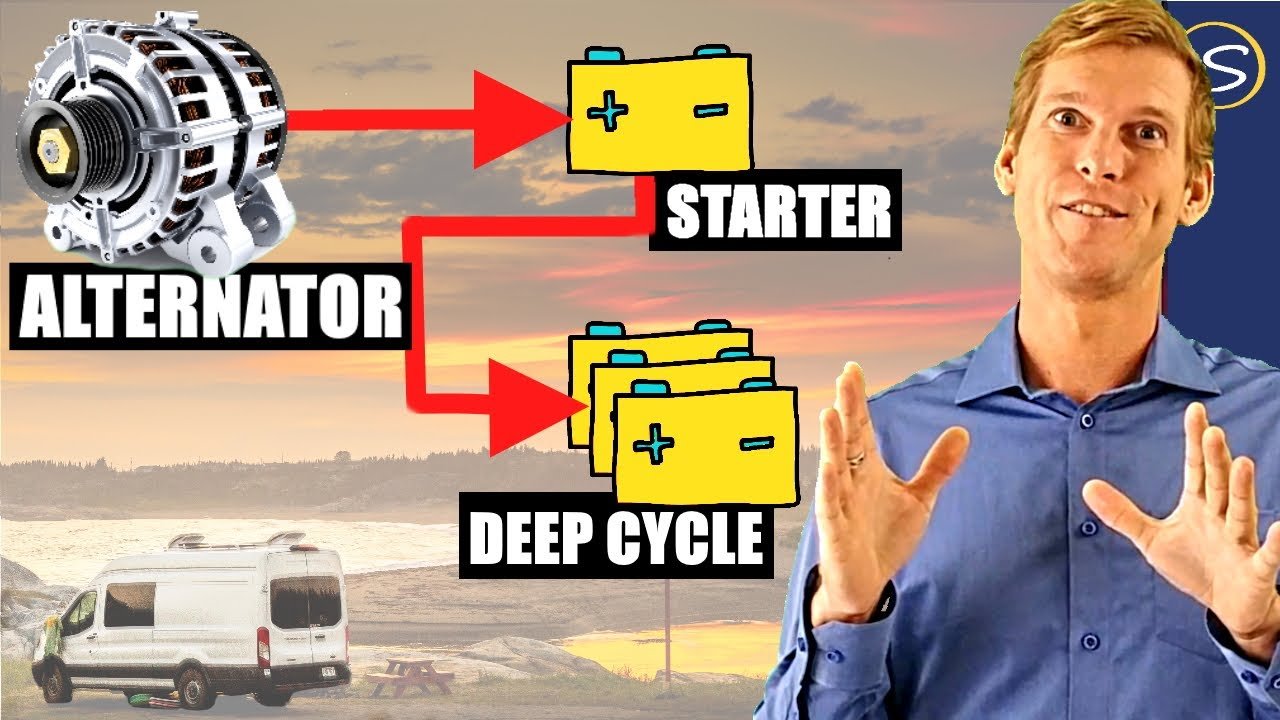
Always fuse both sides. Place a fuse or circuit breaker on the positive wire between the panel and charge controller. Place another between the charge controller and battery. The fuse rating should be 1.25 times the maximum current the wire can carry.
A 20-amp fuse for 10 AWG wire is standard.
Use the right wire gauge. Undersized wire heats up under sustained current. That heat can melt insulation and start a fire. For a 200W system at 12V, use at least 10 AWG for runs under 30 feet.
Go to 8 AWG for longer runs.
Ventilate lead-acid batteries. Flooded lead-acid batteries release hydrogen gas during charging. That gas is explosive in enclosed spaces. Install the battery in a vented compartment or outside the living area.
AGM and gel batteries are safer for indoor use because they emit less gas.
Check connections regularly. Loose terminals create resistance. Resistance creates heat. Heat causes failure.
Tighten all connections before first use and recheck them every few months. A thermal camera is a useful tool for spotting hot connections.
Use a battery management system (BMS) for lithium batteries. LiFePO4 batteries have built-in BMS protection for overcharge, over-discharge, and over-temperature. Do not bypass the BMS or use a charger that conflicts with its voltage limits. Manufacturer specifications for battery voltage ranges must be followed exactly.
Expert Tips for Getting the Most Out of 200W
Panel Positioning and Seasonal Tilt Adjustments
The angle of your panel relative to the sun determines how much power you harvest. A panel lying flat on an RV roof in winter at 40 degrees north latitude loses about 30 percent of potential output compared to a panel tilted at the optimal winter angle.
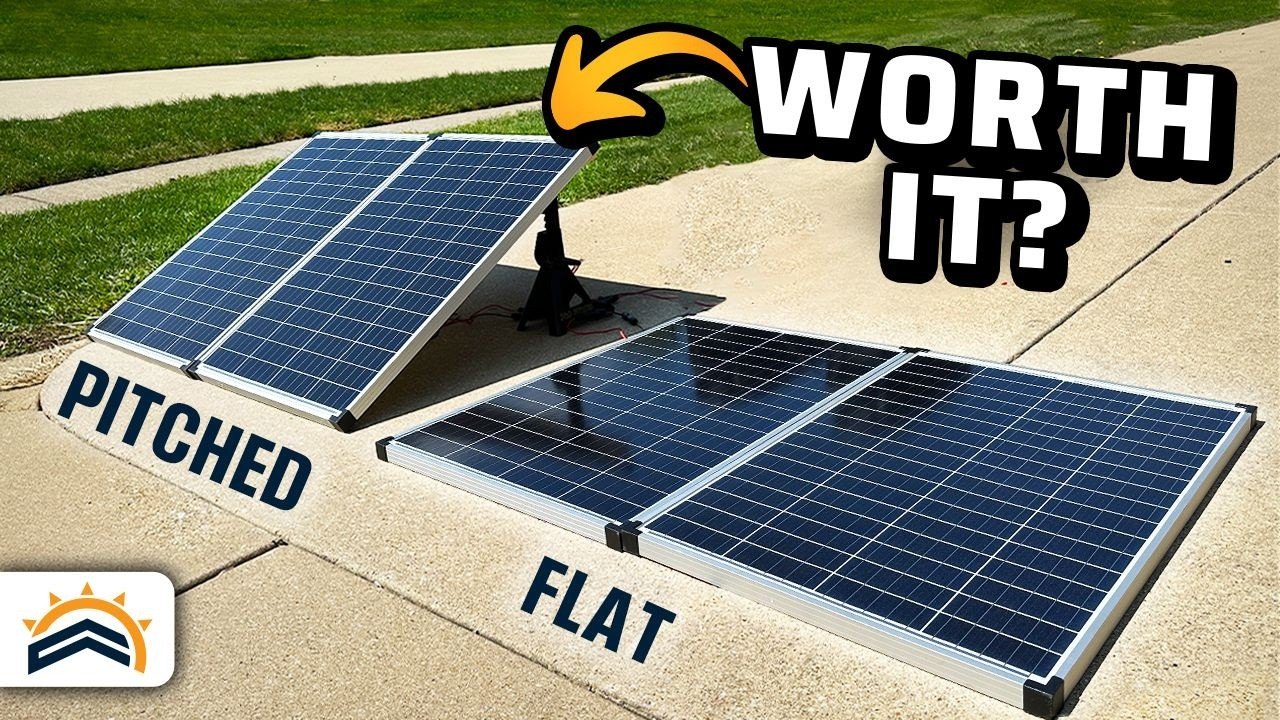
A simple rule of thumb: set your panel tilt angle equal to your latitude for spring and fall. Add 15 degrees for winter. Subtract 15 degrees for summer.
Adjusting the tilt twice a year improves total annual harvest by 10 to 20 percent.
Cable Gauge and Connection Best Practices
Use MC4 connectors for all panel connections. These are the industry standard for outdoor solar wiring. They lock securely and resist moisture.
Do not use household wire nuts or electrical tape for outdoor connections.
Keep cable runs as short as possible. Every foot of wire adds resistance. Mount your charge controller and battery as close to the panel as practical.
If the panel must be far from the battery, consider running higher voltage (24V) and using an MPPT controller to step it down.
Monitoring Battery State of Charge Without Guessing
Battery voltage alone is a poor indicator of state of charge under load. A battery at 12.4V under a 10-amp load might be 80 percent full, but the same voltage with no load might be 50 percent full. Use a battery monitor with a shunt.
The Victron BMV-712 and similar devices track actual energy flow in and out of the battery.
Regular monitoring helps you catch problems early. A gradual decline in daily harvested watt-hours suggests panel soiling, shading issues, or a failing battery. Catching these early saves money and prevents unexpected power loss.
When 200W Isn't Enough: How to Know and What to Do Next
You will know 200W is not enough when your battery voltage drops below 12.2V by noon on a sunny day. That means your loads exceed your harvest. Other signs include having to skip device usage, running the generator daily, or your inverter beeping low voltage alarms every afternoon.
Option 1: Add a second 200W panel. Doubling your panel area doubles your daily harvest. You will need a larger charge controller (30A or 40A MPPT) and possibly a larger battery bank. A 400W system can handle a small refrigerator, lights, laptop, and phone charging comfortably in most US locations.
Option 2: Reduce your loads. Swap your old refrigerator for a 12V compressor model. Use LED lights exclusively. Charge devices during sun hours only.
Turn off the inverter when not needed. Many people find they can make 200W work by changing their habits rather than adding hardware.
Option 3: Use a generator for heavy loads. A small inverter generator handles microwave, hair dryer, and power tool loads while your solar system covers the daily basics. This hybrid approach costs less than expanding your solar array and works well for weekend trips.
Option 4: Upgrade to a 24V system. Doubling system voltage halves current draw. Lower current means less voltage drop and thinner wire. A 400W panel array at 24V with an MPPT controller and a 100Ah 24V battery bank provides roughly the same usable energy as a 12V system with 200Ah of battery, but with better efficiency and lower wiring costs.
The basic principles of how solar panels work help explain why higher voltage systems are more efficient. Voltage drop matters less at higher voltages. A 24V system running the same wattage as a 12V system experiences one-quarter the voltage drop for the same wire length.
Frequently Asked Questions
Can a 200W solar panel run a refrigerator?
Yes, but only a small energy-efficient 12V compressor model. A typical 12V refrigerator uses 300 to 500 watt-hours per day. That leaves little room for other devices.
Full-size household refrigerators need 1000 to 2000 watt-hours daily and require at least 400W of solar.
How many batteries do I need for a 200W solar panel?
One 100Ah deep-cycle lead-acid battery or one 50Ah LiFePO4 battery is the standard match. This gives you roughly one day of reserve. If you need two days of autonomy without sun, double those numbers.
Can I use a 200W panel to charge my phone and laptop?
Easily. A laptop uses about 60 watts. A phone uses about 10 watts.
Running both for a full day consumes roughly 200 watt-hours. That is well within what a 200W panel provides. You could charge both devices for a week off one sunny day.
How long does it take to charge a 100Ah battery with a 200W panel?
About 5 to 8 hours of full sun with an MPPT controller. Lead-acid batteries slow down as they approach full charge. The final 20 percent takes longer than the first 80 percent.
Lithium batteries accept the full charge rate until nearly full, so they finish faster.
Final Decision Guide: Is a 200W Setup Right for Your Situation?
A 200W panel works well for lightweight camping, small cabin lighting, and charging personal electronics. It fails hard for full-time off-grid living, heavy appliance use, or winter reliance in northern climates.
If you run a laptop 6 hours, lights 5 hours, and charge phones daily, 200W fits. If you want a refrigerator, TV, and microwave, step up to 400W or more.
Check your location's winter peak sun hours before buying. If your winter PSH drops below 3, consider a second panel or a generator for backup. The system is honest about its limits.
Work within them and it serves you well. Push past them and you will constantly fight low battery voltage.

Similar Posts