Solar Panel Size Guide: Choose the Best Fit
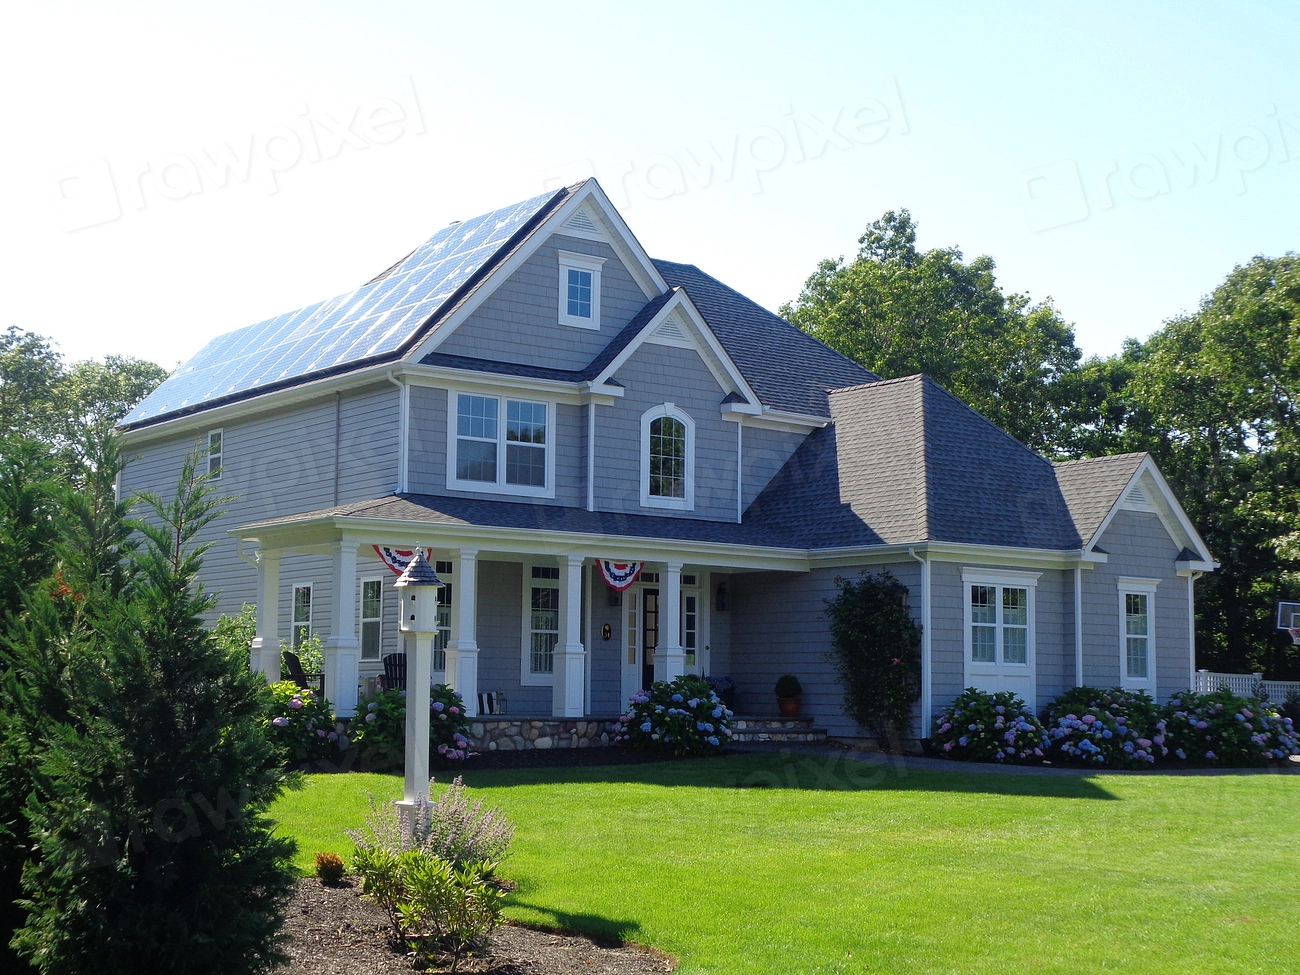
Getting the right solar panel size for your home isn't about grabbing the biggest panels you can find. This Solar Panel Size Guide breaks down the exact numbers you need to match panels to your roof and your electric bill. Get it wrong and you'll either leave money on the table or pay for capacity you can't use.
The average US home uses about 886 kWh per month. That translates to a system size of roughly 5 to 10 kW depending on where you live. You're looking at somewhere between 13 and 27 standard residential solar panels.
Let's walk through the math so you can nail your own number.
Image source: Openverse / U.S. Department of Energy
Quick Answer
Your solar panel size depends on three things: your daily energy use, your local peak sun hours, and your available roof area. Start with your monthly electric bill. Divide by 30 to get daily kWh.
Then divide that by your area's peak sun hours. The result is the system kilowatts you need. Divide by the wattage of the panels you are considering.
Why Panel Size Matters More Than You Think
You might think bigger panels mean more savings. That is not always true. Panel size affects three things: your energy offset, your roof fit, and your inverter compatibility.
If you pick panels that are too small, you will not generate enough power. Your utility bill stays higher than expected. You will need more panels to make up the difference.
That means more racking, more labor, and more roof space used.
If you pick panels that are too large, you might overshoot your energy needs. Without good net metering, you give that extra power to the grid for free. Plus larger panels are heavier.
Your roof structure needs to support them.
Physical size matters too. A panel that is too long for your roof section can cause shading issues. It might not fit between the ridges and vents.
You end up with a layout that looks awkward and generates less.
The goal is a balanced match. You want enough capacity to cover your usage. You want panels that fit your roof without wasted space.
And you want compatibility with your inverter's voltage range.
If you want to dig deeper into evaluating your setup, our solar panel buying guide covers the full decision process.
What "Panel Size" Actually Means: Wattage vs. Physical Dimensions
People often confuse two things when they talk about panel size. There is the electrical size measured in watts. And there is the physical size measured in inches.
You need to care about both.
The wattage tells you how much power one panel can produce under standard test conditions. A 400-watt panel will produce 400 watts of DC power in full sun. Higher wattage means fewer panels needed for the same total system size.
That is the number most people focus on.
The physical dimensions determine whether that panel actually fits on your roof. Most residential solar panels follow a standard width of about 39 inches. The length varies by cell count.
A 60-cell panel is roughly 65 inches long. A 72-cell panel is about 77 inches long.
The weight falls somewhere between 40 and 50 pounds per panel. That adds up fast across a full array. Your roof needs to handle roughly 3 to 4 pounds per square foot for a typical installation.
Why does this matter for you? If you have limited roof space, you want higher wattage panels that are physically smaller. That means choosing premium efficiency modules.
If you have plenty of roof space, standard panels work fine and cost less per watt.
The 3 Numbers You Need Before You Do Any Math
Before you calculate anything, gather three pieces of data. These are the inputs that determine your perfect panel size. Without them you are guessing.
Number 1: Your average daily energy use. Look at your electric bills from the last 12 months. Add up the kilowatt-hours and divide by 365. That gives you your daily average.
The typical US home uses about 30 kWh per day. Your number might be higher if you have an electric vehicle or lower if you are already efficient.
Number 2: Peak sun hours for your location. This is not the same as total daylight hours. Peak sun hours measure when the sun is strong enough for panels to produce at full rated power. It varies by state and season.
Arizona averages 6 to 6.5 peak sun hours. Ohio averages 3.5 to 4. You can find your specific number using the PVWatts Calculator from the National Renewable Energy Laboratory.
Number 3: Your usable roof area. Walk your roof and measure the sections that face south, east, or west. North-facing roof sections are less effective in the US. Subtract areas taken up by vents, skylights, chimneys, and required fire setbacks.
You typically need about 75 to 100 square feet per kilowatt of solar.
These three numbers form the foundation of every sizing decision. Write them down before moving to the formula.
The Simple Formula: How Many Panels Do You Really Need?
Once you have those three numbers, the math is straightforward. Let me walk you through it step by step.
Step 1: Calculate your system size in kilowatts.
Formula: Daily kWh divided by peak sun hours equals system kW.
Example: You use 30 kWh per day. You live in a location with 5 peak sun hours. That gives you 30 divided by 5 equals 6 kW system.
Step 2: Convert system size to watts.
Multiply by 1000. A 6 kW system is 6000 watts.
Step 3: Divide by the panel wattage you want to use.
Most modern residential panels range from 350 to 450 watts. Let us say you are considering 400-watt panels. 6000 divided by 400 equals 15 panels.
That tells you need 15 panels for a 6 kW system. But you also need to check if 15 panels physically fit on your roof. We will cover that in the next section.
As of 2026, panel wattages have crept upward. You can find 420W and 440W standard residential panels easily. Higher wattage means fewer panels for the same system.
That can save on racking and labor costs.
Step 4: Check your inverter compatibility.
Your inverter has a maximum input voltage and current. Your panels need to match that range when wired together in strings. This is where working with a professional or using a string sizing tool matters.
A mismatch here can shut down your entire system.
60-Cell vs 72-Cell vs High-Wattage Panels: Which One Fits Your Roof?
Now you know how many watts you need. Now you need to pick the right physical panel size. Here is how the main options stack up.
| Panel Type | Cell Count | Typical Wattage | Physical Size | Weight | Best For |
|---|---|---|---|---|---|
| Standard Residential | 60-cell | 300W-370W | 65" x 39" | ~40 lbs | Large roofs, budget builds |
| Commercial / Large Res | 72-cell | 370W-450W | 77" x 39" | ~50 lbs | Ground mounts, wide open roofs |
| High-Efficiency Premium | 60-66 cells (half-cut) | 400W-470W | ~67" x 40" | ~45 lbs | Limited roof space, max output per sq ft |
Decision rules based on your situation
If you have plenty of open roof space, 60-cell standard panels offer the best value. They are cheaper per watt and easier to handle during installation. This is the most common choice for residential homes.
If your roof is tight or oddly shaped, go with high-wattage premium panels. You will install fewer of them and use less roof area. They cost more per panel but save on racking and wiring.
You can also explore the different types of photovoltaic modules to see what fits your layout best.
If you are installing on a ground mount or large commercial building, 72-cell panels are the standard choice. They are more efficient to install in large arrays. Just remember they are heavier and longer.
For smaller projects like an RV or shed, you want even smaller panels. Those typically use 36-cell or 48-cell configurations. They are lighter and fit narrow roof surfaces.
Choosing the right option depends on your specific situation. That is the core of this guide. Match the panel to your space, not the other way around.
How to Check If Those Panels Will Physically Work on Your Roof
You know you need 15 panels. Now you need to see if they actually fit. This step is where most DIY plans fall apart.
Start by measuring your roof sections. Use a tape measure for length and width. Multiply them to get the square footage of each usable face.
Subtract 18 inches from each roof edge for fire setback requirements under the NEC. Also subtract space around vents, skylights, and chimneys.
Now do a quick fit check. Lay out the panel dimensions on paper. A 400-watt 72-cell panel is 77 inches long.
That is over 6 feet. If your roof section is only 12 feet wide, you can fit at most two panels side by side before accounting for racking gaps.
Roof orientation efficiency factors
| Orientation | Production Factor | Best for |
|---|---|---|
| South-facing | 100% | Maximum year-round output |
| East-facing | 80-85% | Morning production |
| West-facing | 85-90% | Afternoon and peak rate periods |
| North-facing | 60-70% | Avoid if possible in US |
Multiply your available square footage by these factors. That gives you your effective solar roof area. Then divide by the square footage per panel including racking gaps.
A typical panel with mounting hardware needs about 18 to 22 square feet of roof space. For a 6 kW system with 15 panels, you need roughly 270 to 330 square feet of clear roof. That is about a 15 by 20 foot section.
If your roof space falls short, you have two choices. Use higher wattage panels that pack more power into the same footprint. Or add ground-mounted panels to supplement your roof array.
Sizing for Off-Grid, RVs, Boat, and Home Add-Ons
The formula changes when you go off-grid. You need more than just daily consumption. You need storage, backup generation, and a significant buffer for cloudy days.
For off-grid systems, multiply your daily energy use by 3 to 5 days of autonomy. That becomes your battery bank target. Then size your solar array to fully charge that battery bank in one good sun day.
Most off-grid homes run 1.5 to 2 times the array size they would need for grid-tied.
For RVs and boats, roof space is extremely limited. You are working with maybe 30 to 60 square feet. That means high-efficiency panels are almost mandatory.
Look for panels in the 100W to 200W range for smaller vehicles. Larger RVs can fit three or four 200W panels if you plan the layout carefully.
Flexible thin-film panels are an option for curved surfaces. They weigh less and conform to RV roofs. They also degrade faster and produce less per square foot.
Our research shows rigid panels are still the better choice if your roof can handle the weight.
For home add-ons, you are expanding an existing system. This requires careful matching. Your new panels should have similar voltage characteristics to your existing ones.
Mixing panel sizes on the same string creates mismatched current and reduced output. You are better off adding a separate inverter or using microinverters for the new panels.
5 Sizing Mistakes That Almost Everyone Makes

Image source: Openverse / Halflants and Pichette Architects
Mistake 1: Using annual average sun hours instead of seasonal lows.
Your panels need to work in December too. If you size for the yearly average sun hours, you will fall short in winter. Use the lowest monthly peak sun hours for your location.
That ensures year-round coverage.
Mistake 2: Ignoring panel degradation.
Panels lose output over time. The industry standard is 0.5 to 0.7 percent per year. A 400W panel will produce roughly 360W after 25 years.
If you size your system for today's needs, you will undershoot in year 15. Add a 10 to 15 percent buffer.
Mistake 3: Forgetting about shading.
One shaded panel can drag down the whole string if you are using a string inverter. Even partial shade from a vent or chimney can cut production by 30 percent. Microinverters or power optimizers fix this.
Or you can rearrange the layout to avoid shade entirely.
Mistake 4: Not accounting for roof pitch and direction.
A south-facing roof at 30 degrees pitch is ideal. Your roof might face southeast at 20 degrees. That changes the production number.
Use the NREL PVWatts tool with your exact roof parameters to get accurate output.
Mistake 5: Buying panels before measuring access paths.
Can you get the panels to the roof? A 77-inch panel does not fit through a standard attic access hatch. You will need to carry it up an exterior ladder.
Make sure your pathways are wide enough for the panel dimensions.
Expert Tips for Getting the Size Exactly Right
Future-proof your system.
Energy needs change. You might buy an electric vehicle next year or add a heat pump. Plan for that now.
If you expect to add 6000 kWh per year for an EV, increase your array size by about 5 to 6 kW. It is cheaper to install extra panels upfront than to expand later.
Leave room on your roof for expansion.
Do not fill every square inch. Leave a section clear for future panels. This is especially important if you plan to add a battery system later.
Batteries often require additional panels to stay charged.
Use a string sizing calculator.
Your inverter has a voltage window. Each panel has a voltage spec. Wire too many panels in series and you exceed the inverter's maximum voltage.
Too few and you fall below the startup voltage. A free string sizing tool from the inverter manufacturer prevents this.
Check your local utility limits.
Some utilities cap how much solar you can install. Others limit net metering credits. You might only get credit for 100 percent of your annual usage.
Oversizing beyond that point becomes less economical. Check your utility's interconnection agreement before finalizing your panel count.
Plan for snow in northern climates.
Snow slides off panels and can pile up at the roof edge. That blocks lower panels if they are too close. Leave extra space between rows for snow clearance.
Higher tilt angles help snow slide off faster.
Your Decision Guide: What Size Solar Panel Is Best for You?
Here is the final decision checklist based on your situation.
| Your Situation | Recommended Panel Size | Panel Type |
|---|---|---|
| Large south-facing roof, budget conscious | 350W-370W | 60-cell standard |
| Limited roof space, want max output | 420W-470W | High-efficiency premium |
| Ground mount or large commercial roof | 400W-450W | 72-cell standard |
| RV or small vehicle | 100W-200W | Small rigid or flexible |
| Off-grid with battery system | 400W+ premium | Any high-wattage panel that fits |
If your roof is small and you need 6 kW: Go with 420W premium panels. You will need about 14 panels instead of 16 or 17 with standard panels. That saves on racking and wiring.
If your budget is tight and you have plenty of roof: Go with 350W standard panels. You will install more of them but pay less per watt. Your installation cost will be slightly higher.
If you are building an off-grid cabin: Oversize your array by 30 to 50 percent. Panels are cheap compared to the inconvenience of running a generator. Include room for future battery expansion.
If you are adding panels to an existing system: Match voltage specs closely. Use microinverters if you cannot match exactly. This avoids the production losses from mismatched strings.

Similar Posts