Portable Solar Panels: How They Work & What to Know
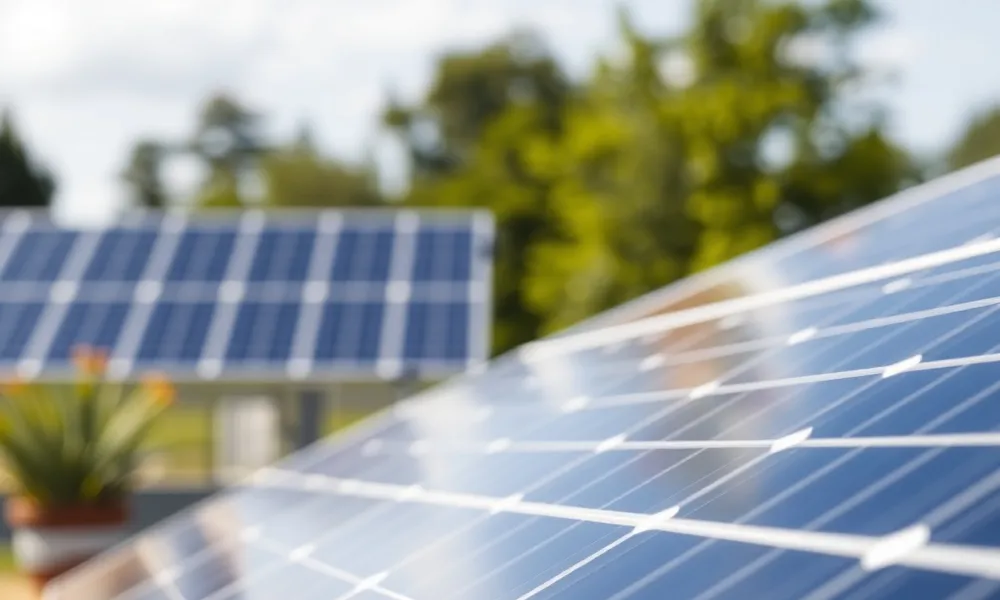
You've seen the ads. You've watched friends power their laptops from a campsite or run a fridge during a power outage. Portable solar panels seem like magic, but they're really just a simple technology that turns sunlight into electricity you can actually use.
In this guide, Portable Solar Panels Explained covers everything from how they work to which one fits your situation.
According to the National Renewable Energy Laboratory, a standard 100-watt portable panel in decent sun can generate roughly 300 to 500 watt-hours per day, enough to charge a phone fifteen times or keep a small cooler running. The trick is matching the panel to what you actually need. Let's break it down so you can decide with confidence.
Quick Answer
Portable solar panels are compact, transportable solar modules that convert sunlight into DC electricity. You set them up on the ground, on a vehicle, or at a campsite. They plug into a power station, battery, or directly into devices.
Output depends on panel wattage, sun strength, and panel angle. They give you silent, fuel-free power wherever you go.
What Exactly Are Portable Solar Panels? (And Who Actually Needs Them)
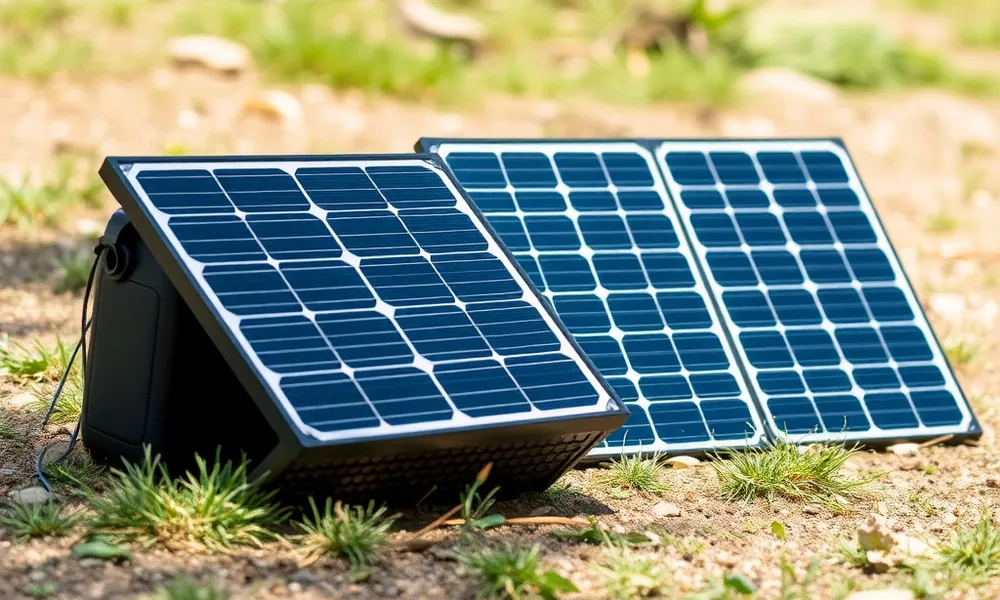
At their simplest, portable solar panels are photovoltaic panels built for mobility instead of permanent roof mounting. They come in three main physical styles: foldable suitcases, flexible rollable mats, and rigid framed panels with handles. All of them do the same basic job, catch sunlight and turn it into usable electricity.
The big difference between portable panels and rooftop solar is the tradeoff. Rooftop panels are fixed, always exposed, and wired into your home. Portable panels are temporary.
You drag them out when you need power, aim them at the sun, and pack them away when you're done. That flexibility is exactly why they've exploded in popularity.
Who really needs one? Think about your situation. Are you a weekend camper who wants to keep phones and lights charged without running a noisy generator?
Do you live in a van or travel full-time in an RV? Maybe you just want a quiet backup option for power outages at home. Each of these scenarios calls for a different kind of portable panel.
Understanding the different types of solar panels available helps you match the technology to your actual use case.
The people who get the most value are the ones who need power in places where there's no wall outlet. That includes car campers, overlanders, boat owners, off-grid cabin users, and emergency preppers. If you've ever run extension cords across a field or burned through disposable batteries on a trip, you're the right audience.
How Portable Solar Panels Work (The Simple Version)
Solar panels work because of a physical property called the photovoltaic effect. When sunlight hits the silicon cells inside the panel, it knocks electrons loose. Those electrons flow as direct current (DC) electricity.
That's it. No moving parts, no fuel, no noise.
A portable panel is really just a collection of these solar cells wired together inside a protective outer layer. The panel outputs DC power through a cable. From there, things branch out depending on what you're charging.
- If you're charging a power station: the panel's cable plugs directly into the power station's solar input port. The power station's internal charge controller manages the voltage and current, so you don't need an external controller.
- If you're charging a 12V battery directly: you need an external charge controller between the panel and the battery. Without one, the panel can overcharge and damage the battery.
- If you're charging small devices via USB: many portable panels now come with built-in USB ports. You just plug your phone or tablet straight in. But be aware, USB output is usually limited to 10-20 watts, so charging is slow compared to using a power station.
The panel's wattage rating tells you its maximum output under perfect conditions (full sun, panel aimed directly at the sun). In real-world use, you rarely get that full number. Cloud cover, shade, panel angle, and temperature all reduce actual output.
The 3 Main Types: Foldable, Flexible, and Rigid
Here's where most people get confused. You walk into a store or scroll through listings and see panels that look completely different, all claiming to be portable. Which one should you pick?
It depends on how you plan to carry and use it.
Foldable / Suitcase-Style Panels
This is the most common type you'll see. The panel is built in two or four hinged sections that fold together into a suitcase shape. You unclip it, open it flat, and use the built-in kickstand legs to angle it toward the sun.
Best for: car campers, RV owners, and anyone who drives to their campsite. They're heavier than flexible panels (a 100W suitcase weighs around 8-10 pounds) but much more durable. The rigid backing protects the cells from flex damage.
Watch out for: the hinges. Cheap suitcase panels often have plastic hinges that break after repeated folding. Look for metal hinges or reinforced joints if you plan to use it often.
Flexible / Rollable Panels
These panels are thin and bendable. They use lightweight materials like ETFE coating instead of tempered glass. You can roll them up into a tube for storage or lay them flat on a curved surface like an RV roof.
Best for: backpackers, hikers, and anyone carrying a panel over long distances. A 100W flexible panel weighs roughly 4-5 pounds, half the weight of a foldable panel. They're also great for mounting on van roofs or boat decks where a rigid panel won't fit.
Watch out for: durability. Flexible panels are more prone to microcracks if you step on them or fold them too tightly. Their lifespan is typically shorter (5-8 years) compared to rigid panels (10-15 years).
They also run hotter because they lack air gap underneath, which reduces efficiency slightly.
Rigid Portable Panels
These are essentially the same panels used on residential rooftops, but with a handle bolted on and sometimes a foldable stand attached. They're framed in aluminum with a tempered glass front.
Best for: stationary use where you don't move the panel often. Think emergency backup at home, cabin setups, or a deck or balcony installation. They're the most efficient and longest-lasting portable option.
Watch out for: weight and bulk. A rigid 100W panel weighs 15-20 pounds. That's fine for carrying from your garage to your yard, but not for a hiking trip.
| Type | Weight (100W) | Durability | Best Use Case | Typical Lifespan |
|---|---|---|---|---|
| Foldable / Suitcase | 8-10 lbs | Good (with metal hinges) | Car camping, RV, overlanding | 8-12 years |
| Flexible / Rollable | 4-5 lbs | Fair (prone to microcracks) | Backpacking, curved surfaces, weight-sensitive | 5-8 years |
| Rigid Portable | 15-20 lbs | Excellent (aluminum frame, tempered glass) | Home backup, cabin, stationary | 10-15 years |
Per manufacturer specifications, rigid panels also produce the highest efficiency (around 20-22%) compared to foldable (18-20%) and flexible (15-18%). That efficiency gap matters if you're working with limited space or need maximum power from a small footprint.
Key Specs You Actually Need to Understand
Manufacturers love throwing numbers at you. Here's what matters and what you can safely ignore.
Wattage: What 100W vs 200W vs 400W Really Means
Wattage is the panel's maximum power output under ideal conditions. But here's the catch, that rating is measured in a lab at 25°C with sunlight at 1000 watts per square meter. Real sun is rarely that perfect.
A 100W panel in good midday summer sun produces about 70-85W in practice. In winter or cloudy conditions, that drops to 30-50W. So when you're planning, size up.
If you think you need 100W, buy a 150W panel.
What do different wattages actually run?
- 50-100W: phones, tablets, lights, small fans, laptop charging
- 150-200W: portable fridge/freezer, CPAP machine, moderate device charging
- 300-400W: larger fridges, power tools, multiple devices, small appliance use
Voltage: Why 12V and 18V Matter
Most portable panels are labeled as "12V panels," but their actual output voltage is higher, usually around 18-22V. This is intentional. The higher voltage compensates for voltage drop in the cable and allows the charge controller to do its job properly.
Important: if you're connecting a portable panel to a 12V battery, the higher panel voltage is fine. The charge controller steps it down to the correct charging voltage (around 14.4V for a 12V lithium battery). If you're plugging into a power station, just match the station's input voltage range, most accept 12-24V without issue.
Charge Controllers: PWM vs MPPT (Don't Skip This)
This is the single most overlooked spec in portable solar. The charge controller sits between the panel and the battery (or is built into the power station) and regulates the charging process.
- PWM (Pulse Width Modulation): simpler and cheaper. Works fine in hot conditions but wastes 15-30% of the panel's potential power in cool or overcast weather. If you're using a 100W panel in Florida summer, PWM is acceptable. In the Pacific Northwest in April, it's leaving power on the table.
- MPPT (Maximum Power Point Tracking): more efficient. Extracts the maximum power the panel can produce at any moment. Gives you 15-30% more charge in low light, cool weather, or partial shade. Worth the extra cost if you use the panel year-round or in less-than-ideal sun.
The rule of thumb: if your panel is 100W or less and you're only using it in summer, PWM is fine. For anything larger or year-round use, get MPPT.
Connector Types: MC4, Anderson, SAE, and USB
This is where compatibility headaches start. Portable panels come with different output connectors, and not all power stations accept all connectors.
- MC4: the standard solar connector used on most panels. Reliable and waterproof. You'll need an adapter cable to connect to many power stations.
- Anderson PowerPole: common on high-end portable kits like those from Goal Zero and BougeRV. Push-to-connect, very durable.
- SAE: a simple two-pin connector often found on budget panels. Not weatherproof. Avoid if you plan to leave the panel outside in rain.
- USB-A/USB-C: built directly into the panel frame. Convenient for small devices but limited to 10-20W output.
Pro tip: buy panels with MC4 connectors and then get the appropriate adapter for your power station. MC4 is the most universal and easiest to repair or extend with longer cable runs.
Matching a Panel to Your Real-Life Situation
You can't pick the right panel until you're honest about how you'll actually use it. A 200W suitcase panel is great for car camping but miserable to carry on a hiking trail. A thin flexible panel might save weight but won't survive years of daily abuse on an RV roof.
Let's match the hardware to the lifestyle.
For Camping and Car Camping
You drive to your site. You have a car or truck with some cargo space. Weight isn't your main concern.
Durability and ease of setup are.
A foldable suitcase panel in the 100W to 200W range is your sweet spot. You can unfold it, angle the kickstand legs toward the sun, and plug it into a small power station. Aggregate user feedback suggests a 100W panel paired with a 300Wh power station covers phone charging, lights, and a fan for a weekend trip.
Go to 200W if you're running a portable fridge.
For Van Life and RVs
You live in your vehicle part-time or full-time. You need consistent power every day, not just on weekends. Space on the roof or ground is limited.
Here you have two paths. You can mount rigid or flexible panels permanently on the roof and combine them with a portable panel for backup or shade chasing. Or you can skip roof mounting entirely and use one large suitcase panel (200W to 400W) that you deploy at camp.
Many full-time van dwellers prefer a combined setup. A 200W roof array handles baseline loads. A separate 200W portable panel lets you park in the shade and still harvest sun.
For Emergency Prep and Power Outages
You want a panel that sits in your garage or closet until you need it. Setup must be fast. No fussing with stands or alignment.
A rigid portable panel with a handle and pre-attached cable works well here. Keep it paired with a charged power station. In our research, a 100W to 200W panel is the most popular choice for emergency backup.
It's enough to keep phones running, a few lights on, and a small fridge cycling. Look for a panel with MC4 connectors and a weatherproof junction box so it can handle rain if storms linger.
For Backpacking and Ultra-Light Travel
Every ounce matters. You're carrying the panel on your back for miles. You need the lightest option that still produces useful power.
Flexible rollable panels are your only real choice here. A 50W to 80W flexible panel weighs around 2 to 4 pounds. Pair it with a small power bank that has a solar input.
You won't run a fridge or laptop from this setup. You will keep your phone, GPS, and headlamp charged. Aggregated hiker reviews note that flexible panels need careful handling to avoid creasing the cells, so pack them in a tube, not folded flat.
The Decision Tree: What to Buy Based on Your Use Case
If you're feeling stuck, work through these branches. Each one ends with a clear recommendation.
Branch 1: You Camp a Few Times a Year
Get a 100W foldable suitcase panel with a built-in PWM charge controller. Pair it with a 300Wh power station. This combination costs roughly $250 to $400 total.
It's simple, takes two minutes to set up, and covers weekend trips. If you camp in mostly sunny places, this is all you'll ever need.
Branch 2: You Live in a Van or Travel Full-Time
Invest in a 200W to 300W foldable or suitcase panel with an MPPT controller. Use it with a 1000Wh or larger power station. Expect to spend $600 to $1,200.
The MPPT controller matters here because you'll be charging in varying conditions throughout the year. The extra 20-30% efficiency gain pays for itself within a season.
Branch 3: You Need Backup Power at Home
Buy a 200W rigid portable panel with MC4 connectors and a quality MPPT charge controller. Pair it with a 500Wh to 1000Wh power station. Total cost around $500 to $800.
Rigid panels store flat against a wall and deploy quickly. Keep the power station charged beforehand and use the panel to top it off during an outage.
Branch 4: You Hike and Need Ultra-Portable
Choose a 50W to 80W flexible rollable panel. Weight should be your primary filter. A panel under 3 pounds is worth the premium.
Skip the built-in USB ports if possible, they add failure points. Instead, plug the panel into a small power bank with an MPPT input. Total cost for panel and bank is around $150 to $300.
Common Mistakes That Kill Performance
Portable solar panels are simple devices. But simple mistakes can cut your usable power by half or more. Here are the ones we see most often in verified buyer feedback.
Wrong Angle or Shade Placement
This is the number one performance killer. A panel in shade produces drastically less power. Even partial shade from a tree branch across one corner can drop output by 50 to 80 percent.
Always position your panel in full direct sun. Use the built-in kickstand or prop it up at an angle roughly equal to your latitude for best results.
Undersizing Your Panel
People consistently buy panels that are too small for their actual usage. A 100W panel sounds like a lot. But in winter or cloudy conditions, it might only deliver 30 to 50 watt-hours per day.
That's barely enough to charge a laptop. Estimate your daily watt-hour needs first. Then buy a panel rated for at least 1.5 times that amount.
Mismatching Voltage and Connectors
You buy a panel with an SAE connector. Your power station accepts Anderson. Now you need an adapter, and every adapter is a potential failure point.
Worse, some budget panels run at odd voltages that confuse standard charge controllers. Stick with MC4 connectors and 12V nominal panels. They work with nearly every power station and controller on the market.
Skipping the Charge Controller
This one can actually damage your gear. If you connect a panel directly to a 12V battery without a charge controller, the panel will overcharge the battery. Lead-acid batteries will gas and lose water.
Lithium batteries will trip their protection circuit or suffer damage. Always use a charge controller between the panel and battery. If your panel feeds a power station, the station has one built in.
You're safe there.
How to Set Up a Portable Solar Panel (Step by Step)
Setting up a portable panel takes about two minutes once you've done it a few times. Here's the process that works regardless of panel style.
Find your spot. Look for an area with full, unobstructed sun from mid-morning to mid-afternoon. Avoid shadows from trees, buildings, or your own vehicle.
Unfold or unroll the panel. If using a suitcase panel, release the latches and open it flat. Extend the kickstand legs. If using a flexible panel, lay it flat on a clean, dry surface or drape it over a non-scratching support.
Angle the panel toward the sun. For best results, tilt the panel at an angle roughly equal to your latitude. Point it south if you're in the northern hemisphere, north if you're in the southern hemisphere.
Connect the cable. Plug the panel's output cable into your charge controller or power station. Confirm the connection is snug and weatherproof if rain is possible.
Check the display. Most power stations and charge controllers show incoming voltage and current. You should see voltage close to the panel's rated open-circuit voltage. Current will ramp up as the panel warms up and the sun hits it directly.
Adjust as the sun moves. If you're camping in one spot for hours, reposition the panel every two to three hours to keep it roughly perpendicular to the sun. This step alone can increase total daily harvest by 20 to 30 percent.
Maintenance and Storage for Long Life
Portable panels need less maintenance than rooftop systems, but they're not zero-maintenance. A few simple habits keep them producing for a decade or more.
Keep the surface clean. Dust, pollen, bird droppings, and tree sap block sunlight. Wipe the panel face with a soft cloth and water. Avoid abrasive cleaners or pressure washers.
Clean the panel at the start of each trip and after dusty days.
Store them properly. Fold or roll the panel gently. Avoid sharp creases, especially with flexible panels. Store in a dry place out of direct sunlight when not in use.
Prolonged UV exposure degrades the plastic coatings and backing material over time.
Check cables and connectors. Inspect the output cable for cuts, kinks, or fraying before each use. Corroded or loose connectors cause voltage drop and heat buildup. A little dielectric grease on MC4 connectors helps prevent corrosion in humid or coastal environments.
Respect the temperature limits. Most portable panels operate efficiently between 15°F and 120°F. Extreme heat can damage the cells or soften the encapsulation material. If you're in a desert climate during summer, try to lift the panel off hot surfaces to allow airflow underneath.
This cooling gap improves efficiency noticeably.
What You'll Actually Pay (Real Price Ranges)
Portable solar panel pricing varies more than you'd expect for what's essentially a sheet of silicon and wiring. Here's what verified listings show as of 2026.
Entry level (50W to 100W): $80 to $200. Expect a basic foldable or flexible panel with PWM controller included. Build quality is hit or miss.
Hinges and junction boxes are the weak points.
Mid range (100W to 200W): $200 to $450. Panels here use better cells, metal hinges, and include MPPT controllers or work seamlessly with popular power stations. This is the sweet spot for most campers and van dwellers.
Premium (200W to 400W): $450 to $1,200. You're paying for high efficiency monocrystalline cells, rugged build quality, longer warranties (3 to 5 years), and brand support. Suitcase panels in this range often include built-in MPPT controllers and Anderson or MC4 connectors.
A complete setup with panel, controller, cables, and a power station typically runs $400 to $1,000 for a practical system.
The Bottom Line: Which Portable Solar Panel Should You Get?
Start with your use case and work backwards. If you car camp occasionally, a 100W foldable panel with a small power station covers everything. If you live in a van, invest in a 200W+ suitcase panel with MPPT.
For emergency backup, a rigid 200W panel paired with a power station is reliable and stores easily.
Don't overthink the specs. Wattage, connector type, and charge controller quality matter most. Everything else is a distant second.
Frequently Asked Questions
What size portable solar panel do I need for camping?
A 100W panel paired with a 300Wh power station covers phone charging, lights, and a fan for a weekend trip. Add a portable fridge and you'll want 200W.
Can I leave portable solar panels out in the rain?
Most quality panels are rated IP65 or higher, meaning they handle rain without issues. Keep the connector junction dry. Unplug and store cables indoors during storms.
Do I need a charge controller with a portable solar panel?
Yes, if you're charging a battery directly. No, if you're plugging into a power station that has one built in. Never connect a panel to a battery without a controller.
How long do portable solar panels last?
Rigid panels last 10 to 15 years. Foldable panels average 8 to 12 years with proper storage. Flexible panels tend to degrade faster, around 5 to 8 years.
Can I use a portable solar panel through a car window?
Yes, but expect reduced output. Glass blocks some UV light. Tinted windows cut output by 30 to 50 percent.
Open the window or place the panel outside for full performance.
How do I clean a portable solar panel?
Use a soft cloth and plain water. Wipe gently to remove dust and debris. Avoid abrasive pads, chemicals, or pressure washers that can scratch the surface or damage the coating.

Similar Posts