How to Clean Under Solar Panels the Right Way
You've noticed a dip in your solar production. The monitoring app shows numbers that don't match last year’s output. Before you call a technician, consider what might be happening under the panels.
Learning how to clean under solar panels can restore your system's performance, but it's not a simple spray-and-go task.
Research from the National Renewable Energy Laboratory confirms that soiling losses typically range from 5 to 25 percent of total energy output depending on your region. That's a measurable hit to your return on investment. In some cases, debris under the panels causes even greater losses than dirt on the glass surface.
Let's walk through what you actually need to know.
Quick Answer
Clean under solar panels only when debris buildup affects performance. Use a soft brush with deionized water. Never use a pressure washer.
Shut down the system first. Work from a stable position, never on the panels.
Why Cleaning Under Solar Panels Matters (and When It Doesn't)
Not every solar setup needs under-panel cleaning. If your panels are mounted with a few inches of clearance and you live in a region with regular rainfall, rain might wash away most debris naturally. But that's not always the case.
When it matters:
- Bird activity. Pigeons and other birds love nesting under solar panels. Their droppings, feathers, and nesting material block airflow and create fire hazards.
- Leaf and pine needle accumulation. In forested areas, organic debris can pile up quickly, especially during autumn.
- Pollen and seed pods. Spring brings a layer of fine pollen that sticks to surfaces and attracts more dirt.
- Dust and sand. In arid climates, windblown particles can accumulate under the panels, reducing efficiency over time.
The way your system works plays a role here. To understand how dirt affects performance, it helps to know how solar panels generate electricity in the first place. When debris blocks airflow under the panels, the operating temperature rises, and hotter panels produce less power.
That's a basic rule of photovoltaic physics.
When it doesn't matter:
- Ground-mounted systems with good airflow. If your panels are on a ground rack with plenty of clearance, rain and wind usually keep things clean.
- Flush-mounted panels with sealed edges. Some modern racking systems leave almost no gap for debris to enter.
- Low-dust environments. If you rarely see dust or bird activity, annual inspection is probably enough.
A good rule of thumb: if you can see debris from the ground or your monitoring app shows a steady efficiency drop, it's worth investigating. If everything looks clean and production is stable, leave it alone.
The Real Risks: Safety and Panel Damage
This is the part most online guides gloss over. Cleaning under solar panels carries real dangers, and the cost of a mistake can be serious.
Fall risks
Roof work is the leading cause of injury in the solar industry. As of 2026, OSHA requires fall protection for any work at heights above six feet on residential roofs. That means a harness, anchor point, and proper ladder setup.
A simple slip on a wet roof can send you to the hospital.
Electrical hazards
Solar panels produce DC voltage whenever light hits them. Even with the system switched off at the inverter, the panels themselves are live. Touching damaged wiring or wet connectors can cause serious shock.
You must shut down the system at the breaker panel before you start.
Panel damage
Solar panels are tough but not indestructible. Walking on them can cause microcracks that aren't visible to the eye but reduce output permanently. The standard warranty for most panels, as outlined by Underwriters Laboratories (UL) testing, explicitly excludes damage from improper cleaning or foot traffic.
One wrong step and your warranty is void.
Roof damage
Sliding panels around or dragging hoses across shingles can loosen or damage roofing material. Water forced under shingles during cleaning can lead to leaks. The main components of a solar panel system include the mounting hardware that penetrates your roof.
Disturbing that seal is a quick way to create a leak.
The bottom line: if you're not comfortable working on a roof, don't do it. The money you save on a DIY cleaning is not worth a hospital visit or a new roof.
Does Your Setup Even Allow Cleaning Underneath?
Before you buy any equipment, look at your actual system. Not all solar arrays are designed for under-panel access.
Flush-mount systems
These panels sit close to the roof surface, often with less than two inches of clearance. You cannot physically reach under them with a brush or hose. If debris gets trapped, the only solution is professional removal of the panels.
That's a job for a certified installer.
Tilt-mount systems
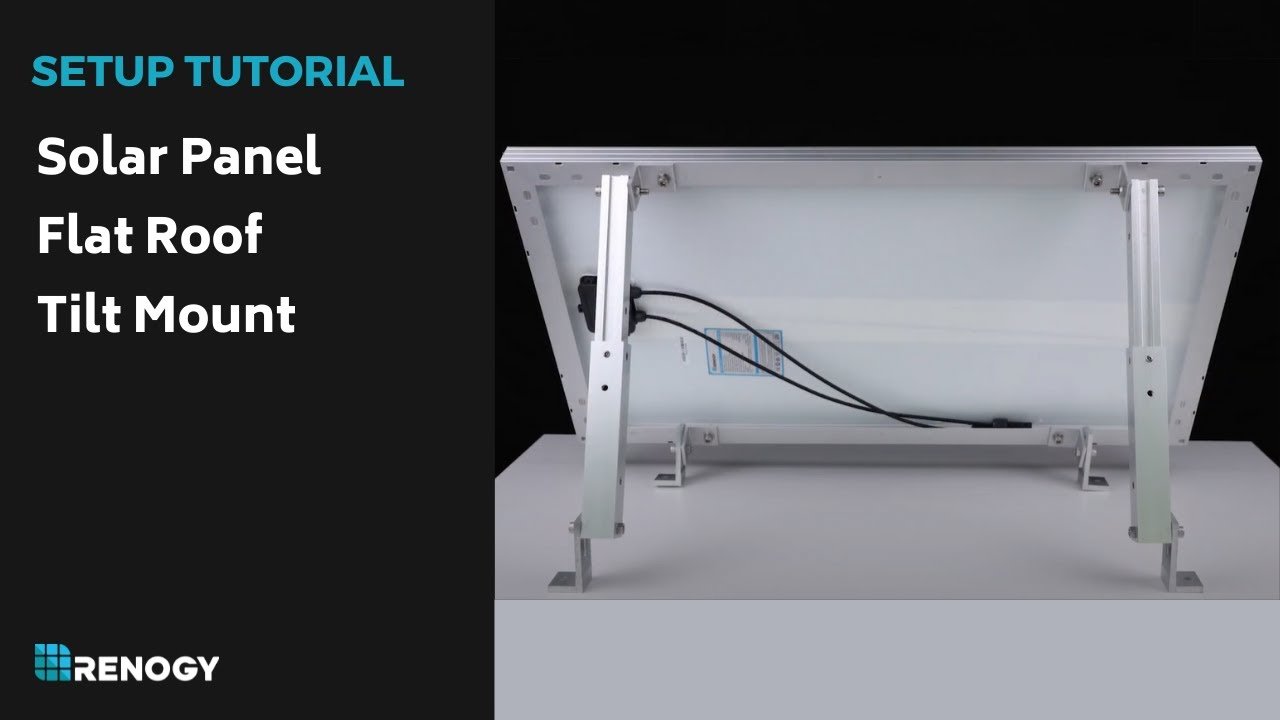
These panels sit on rails that elevate them several inches above the roof. The gap is usually enough to slide a soft brush or telescoping pole underneath. This is the most common residential setup and the easiest to clean safely.
Ground-mount systems
Ground racks offer full access from underneath. You can walk around the array, reach under easily, and clean without climbing. This is the safest configuration for DIY maintenance.
Roof pitch matters
A low-slope roof (under 4/12 pitch) is relatively safe to walk on with proper footwear. A steep roof (over 6/12 pitch) requires a harness and anchor system. If your roof is steep, hire a professional.
There is no safe way to clean under steep-roof panels as a DIY project.
The different types of solar panels available on the market also affect clearance. Some frameless panels sit lower than framed ones. Check your specific model's mounting specs before attempting anything.
Should You DIY or Hire a Pro?
This decision depends on three factors: your roof, your comfort level, and your system's design.
DIY is safe when:
- Your panels are ground-mounted or on a low-pitch roof with tilt mounts.
- You have a stable ladder and proper footwear.
- You can reach the gap without stepping on the panels.
- You have a helper to spot you and hold the ladder.
- Your system is less than 15 feet above ground level.
Hire a pro when:
- Your roof pitch exceeds 6/12.
- Your panels are flush-mounted with no gap.
- You have a two-story house or higher.
- You have no experience working on roofs.
- You see signs of bird nesting or animal damage.
- You're unsure about shutting down the system safely.
What to look for in a pro:
- Licensed and insured specifically for solar work.
- Familiar with your panel brand and mounting system.
- Uses deionized water and soft brushes.
- Provides a written estimate and warranty for their work.
A professional solar cleaning service typically costs between $150 and $400 for a residential system. That's a fraction of the cost of replacing a damaged panel or repairing a roof leak.
If you decide to go the DIY route, the next section covers the exact process. If you're hiring a pro, you can skip ahead to the maintenance tips.
Step-by-Step: How to Clean Under Solar Panels Safely
Follow these steps exactly. Skip nothing.
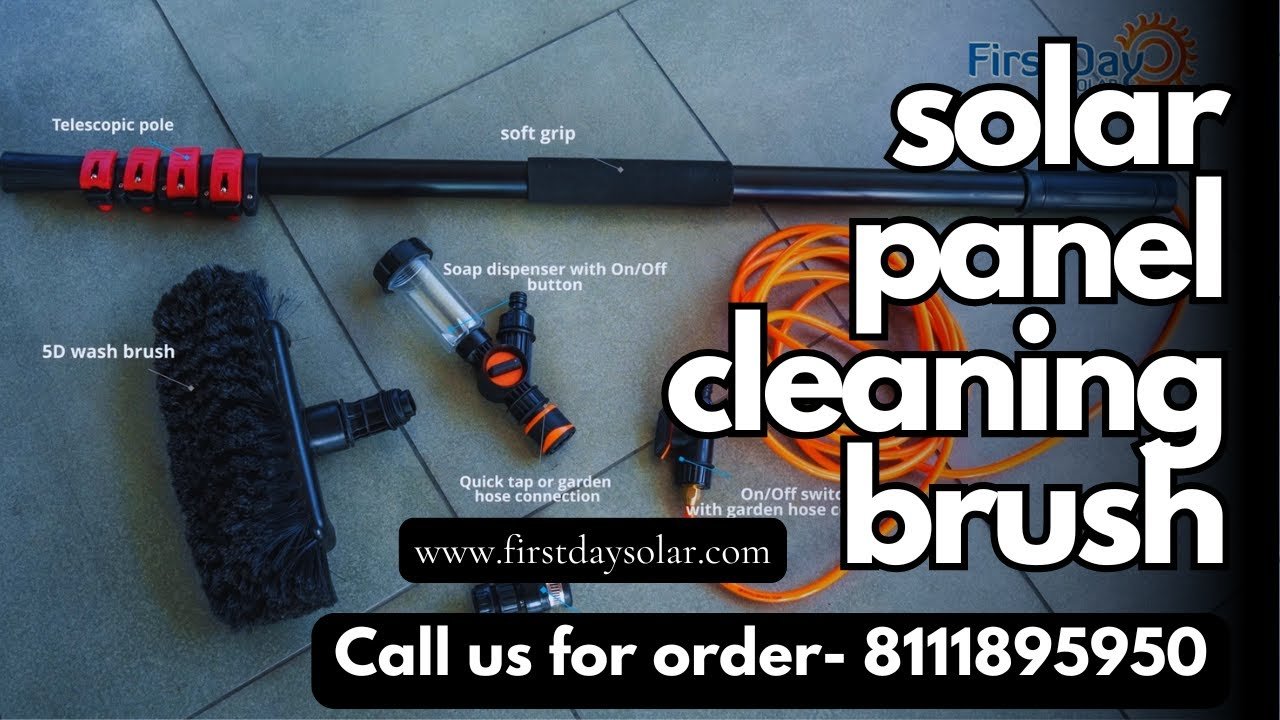
Tools and materials checklist:
| Tool | Purpose |
|---|---|
| Soft-bristle brush or foam brush | Non-abrasive cleaning |
| Telescoping pole (8 to 20 feet) | Reach under panels |
| Garden hose with spray nozzle | Gentle water flow |
| Deionized water or distilled water | Prevents mineral spots |
| Safety harness and anchor strap | Fall protection |
| Ladder with stabilizer | Roof access |
| Work gloves and safety glasses | Personal protection |
| Bucket | Mixing or carrying water |
Step 1: Shut down the system completely.
Turn off the inverter first. Then flip the AC breaker for the solar system. Wait a few minutes for capacitors to discharge.
Touching live DC wiring while wet is dangerous. Do not skip this step.
Step 2: Set up fall protection.
Anchor your harness to a fixed point on the opposite side of the roof. Use a roof anchor rated for at least 5,000 pounds. Position your ladder on level ground with a 1:4 slope ratio.
Have a helper hold the base.
Step 3: Remove loose debris first.
Use a leaf blower or a soft rake to clear dry leaves, pine needles, and bird nesting material from the gap under the panels. Do not push debris deeper under the array. Work from the edge inward.
Step 4: Wet the area gently.
Use a garden hose with a spray nozzle set to a wide, low-pressure pattern. Never use a pressure washer. The concentrated spray can force water into panel seals and damage the junction box.
Wet the surface to loosen stuck dirt.
Step 5: Brush from the edges.
Attach the soft brush to your telescoping pole. Reach under the panel from the side. Use long, straight strokes.
Do not scrub in circles. Work from one end of the array to the other. Rinse the brush frequently.
Step 6: Rinse with deionized water.
Tap water contains minerals that leave white spots on the glass. These spots attract more dirt and reduce efficiency. Deionized water leaves no residue.
If you cannot get deionized water, use distilled water from jugs.
Step 7: Inspect and reconnect.
Check for any visible damage, loose wiring, or animal nests. Once everything looks clean, remove your tools from the roof. Turn the breaker back on.
Restart the inverter. Monitor your production for the next week to confirm improvement.
Mistakes That Will Void Your Warranty or Break Your Panels
Manufacturer warranties are specific about what voids coverage. Knowing these rules can save you thousands.
Using a pressure washer.
This is the number one mistake. Pressure washers force water into the panel frame. The moisture causes corrosion inside the junction box.
It also damages the rubber seals around the edges. Most warranties explicitly exclude pressure washer damage.
Walking on the panels.
Panels are designed to withstand wind and snow loads, not concentrated foot pressure. Walking on them creates microcracks in the solar cells. These cracks reduce output by 5 to 30 percent.
They are invisible to the naked eye. A thermal camera inspection is the only way to find them.
Using abrasive brushes or harsh chemicals.
Scratching the glass surface creates shadow lines. Those shadows reduce the cells' ability to generate power. Ammonia-based cleaners degrade the anti-reflective coating.
Stick to plain water and a soft brush.
Not shutting down the system.
Working on a live system with wet tools is dangerous. The risk of electric shock increases significantly when water is present. Always disconnect the AC and DC sides before starting.
Cleaning on a hot day.
Hot panels expand. Spraying cold water on hot glass causes thermal shock. The rapid temperature change can crack the glass.
Clean early in the morning or late in the evening when panels are cool.
Forgetting to check the roof.
Dragging equipment across loose shingles can dislodge them. Heavy hoses can tear flashing. Inspect your roof after each cleaning session.
Repair any damage immediately.
Alternatives to Cleaning Under Panels (Bird Proofing, Gutter Guards, and More)
The best way to clean under solar panels is to prevent debris from getting there in the first place. These alternatives reduce or eliminate the need for regular cleaning.
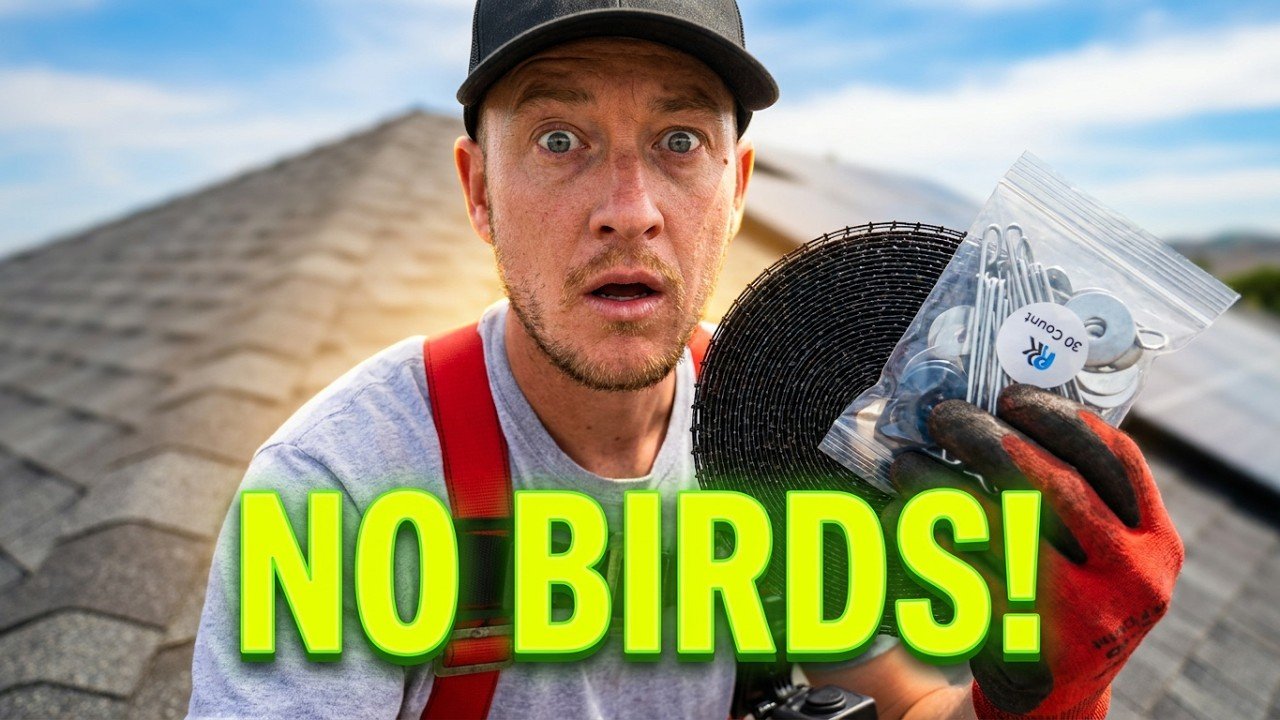
Bird proofing mesh.
This is a metal or plastic mesh that wraps around the perimeter of the array. It blocks birds, rodents, and leaves from entering the gap. Professional installation costs $200 to $500 for a typical residential system.
It pays for itself within a year or two by reducing cleaning frequency.
Gutter guards at the roof edge.
If your roof has gutters near the solar array, install gutter guards. They prevent leaves and debris from washing down the roof and accumulating under the panels. This is a simple DIY project for most homeowners.
Trim overhanging branches.
Trees near your roof drop leaves, seeds, and sap onto the panels. Trimming branches back at least 10 feet from the array reduces the debris load significantly. This also reduces the risk of branches scraping the panels during windstorms.
Elevated tilt mounts.
If you are installing a new system, consider tilt mounts that raise the panels higher off the roof. A 6 to 8 inch gap allows better airflow and easier access for cleaning. The higher clearance also reduces the chance of debris getting trapped.
Self-cleaning glass coatings.
Some modern panels come with hydrophobic coatings that repel water and dirt. These coatings are not a substitute for cleaning, but they extend the time between cleanings. They work best in regions with regular rainfall.
Rodent exclusion materials.
Small gaps around the array edges are entry points for squirrels and rats. Installing stainless steel mesh around the perimeter blocks them. Rodent damage to wiring is a common cause of system failure.
When to Call a Professional (and What to Look For)
Some situations are simply not safe for DIY work. Here is when you should hand the job to a pro.
Steep roofs.
If your roof pitch exceeds 6/12, do not attempt this yourself. The risk of falling is too high. Professionals have the equipment and training to work safely on steep slopes.
Flush-mounted systems.
If your panels sit flat against the roof with less than 2 inches of clearance, you cannot clean under them without uninstalling them. A certified solar installer can remove and reinstall the panels safely. This is a job for a professional, not a DIY project.
Two-story or higher roofs.
The height increases the danger of falling. It also makes it harder to reach the panels with a telescoping pole. Professionals use specialized equipment that extends to these heights safely.
Signs of animal infestation.
If you see bird nests, rodent droppings, or chewed wires, call a pro. Animal waste can carry diseases. Disturbing a nest during cleaning can cause adult birds to attack.
Professionals have the protective gear and experience to handle this.
What to look for in a professional.
Ask for proof of insurance and licensing. Look for companies that specialize in solar maintenance, not general roof cleaning. Request references from other solar owners in your area.
Ask about their cleaning methods. They should use deionized water and soft brushes. Avoid companies that offer pressure washing services.
How to Prevent Debris Buildup in the First Place
Prevention is easier than cleaning. A few simple habits can keep your system running efficiently.
Schedule seasonal inspections.
Check your panels visually every three months. Look for visible debris under the array. Walk around the ground and look up.
If you see leaves or nests, address them before they accumulate.
Monitor your energy production.
Most solar systems come with monitoring software. Track your daily output. If you notice a steady decline of 5 percent or more over several weeks, investigate the cause.
The monitoring app cannot tell you if debris is under the panels, but the efficiency drop is a clue.
Clean the top surface regularly.
Rain cleans the top of the panels in most climates. But if you live in a dry area, hose off the top surface once a month. This prevents dirt from washing down the sides and accumulating underneath.
Install gutter guards on your roof.
This is one of the most effective prevention measures. Leaves that wash down the roof often get trapped under the panels. Gutter guards stop them at the roof edge.
Trim vegetation annually.
Keep trees and bushes trimmed back from the roof. A single branch can drop thousands of leaves onto your array each season. This is a low-cost, high-impact maintenance task.
Address bird problems early.
If you see a few birds perching on the panels, take action quickly. Bird droppings are acidic and can damage the panel surface. Installing bird deterrents early prevents a full infestation.
FAQs: Common Questions About Cleaning Under Solar Panels
How often should I clean under my solar panels?
Once or twice a year is enough for most homes. If you live near trees or have heavy bird activity, check every three months. Rainfall does not clean underneath the panels.
You need to inspect the gap manually.
Can I use a pressure washer to clean under solar panels?
No. Pressure washers damage the panel seals and force water into the junction box. The concentrated spray can also crack the glass.
Stick to a garden hose with a low-pressure nozzle. The repair cost for a damaged panel far exceeds the cleaning cost.
What is the best tool for cleaning under solar panels?
A soft brush attached to a telescoping pole is the standard tool. Use a foam brush or microfiber brush to avoid scratching the glass. Combine it with deionized water to prevent mineral spots.
Avoid abrasive pads or metal brushes.
Will cleaning under the panels void my warranty?
It can if you do it wrong. Walking on the panels, using harsh chemicals, or using a pressure washer will void the warranty. Following the manufacturer's cleaning guidelines keeps your coverage intact.
Check your warranty documentation before starting.
Should I clean under the panels if they are flush mounted?
No. Flush-mounted panels have less than two inches of clearance. You cannot reach the gap without removing the panels.
Attempting to force a brush underneath can damage the mounting hardware. Call a professional installer for this setup.
How do I know if debris under the panels is hurting my production?
Monitor your daily energy output through your system's app. A steady 5 to 10 percent drop over several weeks suggests soiling losses. You can also check the gap visually with a flashlight from ground level.
If you see significant buildup, it is time to clean.

Similar Posts