Can You Put Solar Panels on a Mobile Home
If you own a mobile home and you've been looking at solar panels online, you've probably run into a wall of conflicting information. The short answer is yes, you can put solar panels on a mobile home, but the execution requires more care than a standard stick-built house. That's because your home is built to a different set of rules.
In our research, HUD Code 24 CFR Part 3280 sets strict limits on roof load capacities for manufactured homes. Most mobile home roofs are engineered for just 5 to 10 pounds per square foot of live load. A standard residential solar panel weighs about 40 pounds, so you can see the problem immediately.
Let's get the straightforward answer out of the way first.

Image source: Wikimedia Commons / Boyd Norton
Quick Answer
Yes, you can install solar panels on a mobile home. But you cannot use standard roof mounting methods. Structural reinforcement is often required.
Non-penetrating mounts are the safer choice. Flexible panels are a lightweight alternative.
Why Mobile Homes Are Different From Regular Houses
Mobile homes are built to HUD's Manufactured Home Construction and Safety Standards, not local building codes. This means your roof is lighter, your trusses are spaced wider, and your structural margins are thinner. The basic science behind solar power is the same, but how you attach the panels changes completely.
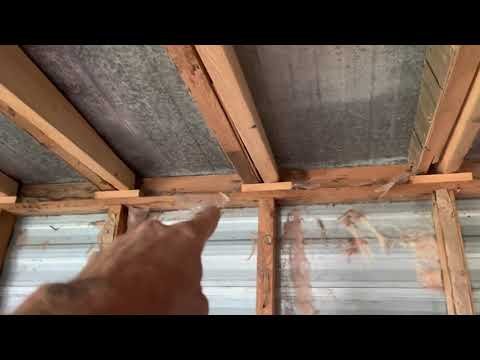
A typical site-built home has a roof deck made of plywood or OSB, supported by rafters spaced 16 or 24 inches apart. That deck can handle concentrated loads from standard racking systems. A mobile home roof, by contrast, often uses thin metal sheeting over lightweight trusses that span wider gaps.
The roof may also have a slight curve, especially on single-wide models.
Manufacturer specifications for mobile home roofs rarely include any allowance for solar panel weight. When we looked at the numbers, most homes in this category have a live load rating of just 5 to 10 psf. A traditional solar installation with racking and panels adds roughly 3 to 4 psf before you account for any snow or wind load.
That leaves almost no safety margin.
Another key difference is the roof material. Many mobile homes use standing seam metal, rolled roofing, or TPO membrane. Each of these materials responds differently to penetrations.
A single screw through a thin metal roof can create a leak path that is nearly impossible to seal long-term.
This is not to scare you off. It is to help you approach the project with clear eyes and the right plan. If you understand these differences from the start, you can make smart decisions about mounting, reinforcement, and panel selection.
The Three Biggest Risks You Can't Ignore
When you are working with a mobile home roof, three risks overshadow everything else. Here they are, plain and simple.
1. Roof load limits. Your roof was never designed to hold solar panels. Most mobile home roofs are engineered for 5 to 10 psf.
A standard solar panel system adds about 3 to 4 psf. That leaves almost zero room for snow, wind, or accidental loads. A structural engineer can confirm your exact limits.
2. Leaks from roof penetrations. Every screw or bolt that goes through your roof is a potential leak point. Mobile home roofing materials are thin and expand and contract with temperature changes.
Sealants degrade faster on these surfaces. A single failed seal can lead to rot in the trusses below.
3. Wind uplift. Mobile homes are lightweight structures. When you mount solar panels on the roof, you are adding sail area.
In high winds, the panels can catch air and try to lift off. The HUD code requires homes to meet wind zone ratings of 75 to 100 mph, but adding panels can exceed those design limits if not properly engineered.
Here is a quick summary of these risks:
| Risk | Why It Matters | What It Can Cost You |
|---|---|---|
| Roof overload | Structural failure or sagging | Roof replacement or truss repair |
| Penetration leaks | Water damage to ceiling and insulation | Mold remediation and structural rot |
| Wind uplift | Panels ripping off in a storm | Property damage and liability |
Each of these risks can be managed. But you cannot ignore any of them and expect a safe installation. This is where the project stops being a simple weekend DIY and becomes a serious home improvement.
What You Need to Check Before Buying Anything
Before you order a single panel, take these four steps to understand what you are working with.
Roof type. Look at what your roof is made of. Standing seam metal is the easiest to work with because you can use clamps that do not penetrate the surface. TPO or rubber roofs require adhesive mounts or careful flashing.
Asphalt shingles are rare on mobile homes, but if you have them, you still need lightweight solutions.
Roof pitch and curvature. Single-wide mobile homes often have a slight camber or curve in the roof. Standard racking systems assume a flat plane. If your roof is curved, you need adjustable brackets or flexible panels to follow the contour.
Truss spacing and condition. Get into your attic or ceiling cavity and measure the spacing. Mobile home trusses are typically 24 inches on center, but some are 16 inches. Look for sagging, cracked wood, or signs of water damage.
This is the moment to decide whether a complete solar panel buying guide gives you the confidence to proceed on your own or whether you need professional help.
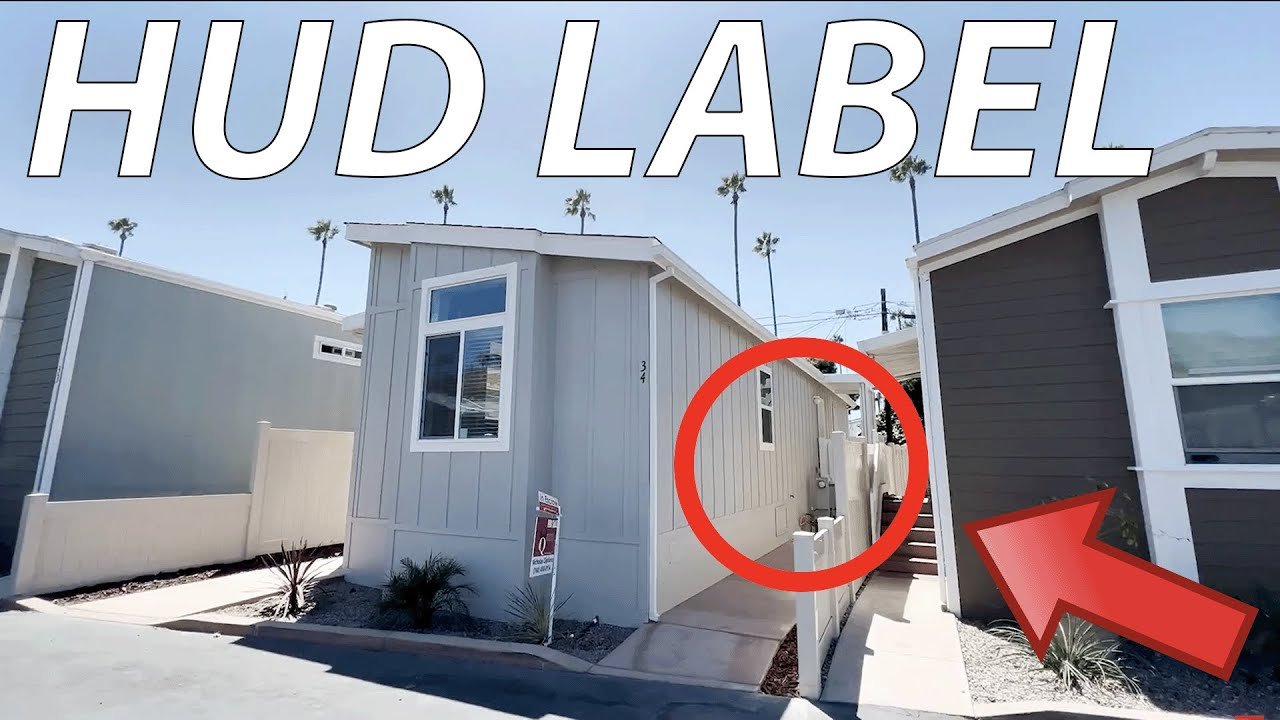
HUD compliance label. Every manufactured home has a data plate and a HUD label inside. This label tells you the wind zone, roof load rating, and original manufacturer. You can find it on the inside of a cabinet door, the electrical panel cover, or near the main breaker.
Write down the model and serial number.
If you have never done this kind of inspection before, consider hiring a structural engineer or a solar installer who specializes in manufactured homes. The weight of the panels, the roof composition, and the local wind zone all combine to determine whether your roof can safely support solar equipment.
Non-Penetrating Mounts: The Safer Approach
Once you understand your roof's limits, the next decision is how to attach the panels. Non-penetrating mounts are almost always the safer option for a mobile home. They avoid drilling holes through the roof, which eliminates the biggest source of leaks.
Adhesive-based mounting. These systems use high-strength urethane or VHB tape to bond the racking to the roof surface. They work well on TPO, rubber, and metal roofs. The key is surface preparation.
The roof must be clean, dry, and free of debris. Once applied, the bond is extremely strong.
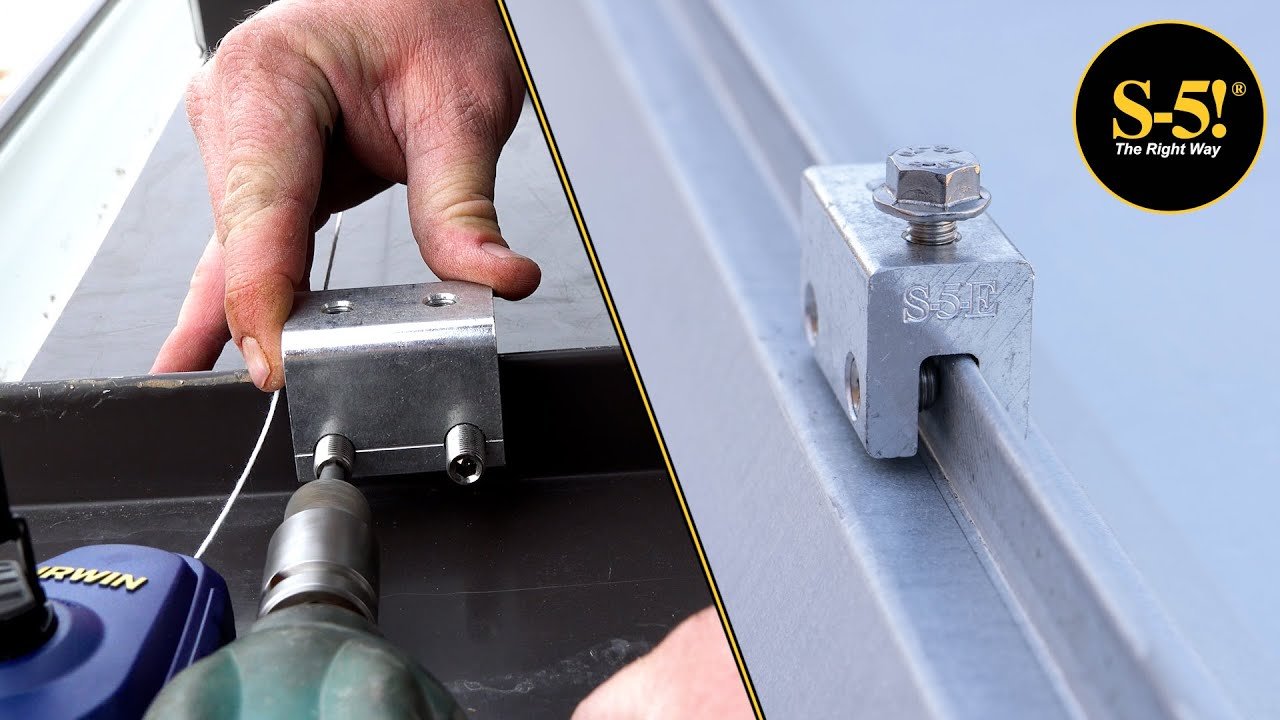
Clamp and compression mounts. For standing seam metal roofs, clamps like the S-5! clip attach to the seams without any penetrations. They grip the raised ribs of the metal roof and hold the racking securely. These are widely considered the gold standard for metal roofs because they distribute load evenly and allow for thermal expansion.
Flexible solar panels. A growing option for mobile homes is thin-film flexible panels. These panels weigh only 10 to 15 pounds each, compared to 40 pounds for a standard glass panel. They can be glued directly to a flat or curved roof surface without any racking.
The trade-off is lower efficiency and a shorter lifespan.
Our research shows that flexible panels degrade faster than their rigid counterparts. Their efficiency drops by 1 to 2 percent per year, and they typically last 10 to 15 years instead of 25 to 30. But they are easier to install and put less stress on the roof.
When weighing the pros and cons of these approaches, your roof type and load capacity should drive the decision. If your roof can handle the weight and you want maximum efficiency, clamp mounts on a metal roof are hard to beat. If weight is a concern, flexible panels may be the practical answer.
In every case, work with a mounting system that is UL 2703 certified. This certification ensures the hardware has been tested for wind uplift, corrosion, and fire resistance. It is the standard you need for both safety and insurance purposes.
Structural Reinforcement: When You Absolutely Need It
If your roof load capacity comes up short, you have two paths. Either choose a lighter mounting method or reinforce the structure. Reinforcement is not a small job, but it is sometimes the only safe option.
How to know if your roof needs bracing. Start with the HUD data plate. It tells you the original design loads. If the rating is 5 psf and your planned system adds 4 psf, you have no margin for snow or wind.
You need reinforcement.
Reinforcement options without gutting your ceiling. The most practical approach is adding structural bracing from the attic or ceiling cavity. Steel C-channel or 2×4 lumber can be installed between trusses to distribute the load. This work must follow an engineered design.
Why an engineer's stamp matters more than you think. A structural engineer calculates the exact loads and specifies the reinforcement. Their stamped drawing is what the building department will require for a permit. Skip this step, and you risk an unsafe installation that insurance may not cover.
Some mobile home owners choose to add a secondary roof structure. This is a separate frame built above the existing roof that carries the solar panels independently. It is more expensive but it avoids any modification to the original roof deck.
The decision tree here is clear. If your roof has a live load rating of 10 psf or higher and you use lightweight panels, you may not need reinforcement. If your rating is 5 psf or you have any structural concerns, get an engineer involved before you spend money on equipment.
Permits, Codes, and HUD Compliance: The Legal Side
This is where good intentions can hit a wall. Every solar installation on a mobile home must comply with multiple layers of regulation.
Local building permits. Your city or county will likely require a building permit for any roof-mounted solar system. The permit application needs structural calculations, a site plan, and electrical diagrams. The inspector will check that your roof can handle the load.
NEC 2020 requirements for solar. The National Electrical Code Article 690 governs solar installations. It requires rapid shutdown, proper grounding, and disconnect switches. These requirements are the same whether your home is on wheels or a permanent foundation.
Utility interconnection and net metering. Your utility company must approve any grid-tied system. They will require an interconnection agreement and a meter that can handle net metering. Some utilities have specific rules for manufactured homes.
HUD restrictions you cannot override. The HUD code limits modifications that affect the structural integrity of a manufactured home. If your installation requires cutting trusses, removing roof sheathing, or altering the frame, you may violate the original certification. Your best bet is to use non-penetrating mounts that leave the structure untouched.
One practical consideration is your mobile home park. If you live in a park or community, check the lease or HOA rules. Some parks prohibit visible solar panels or any roof modifications.
Others actively support green energy. Know the rules before you invest.
Working through the paperwork now prevents headaches later. Pulling a permit and passing inspection protects your investment and your safety.
Ground-Mounted Solar: The Best Alternative for Many Mobile Home Owners
If roof mounting sounds too complicated, consider ground-mounted solar. For many mobile home owners, this is actually the smarter move.
When ground mount makes more sense. You have land around your home. Your roof is curved, lightweight, or in poor condition. You want maximum panel efficiency without roof penetrations.
In these cases, ground mounting removes every structural concern.
Space and land requirements. A typical 4 kW system needs about 250 square feet of clear ground. That is roughly a 10 by 25 foot area. The panels need unobstructed sunlight, so avoid shade from trees, buildings, or fences.
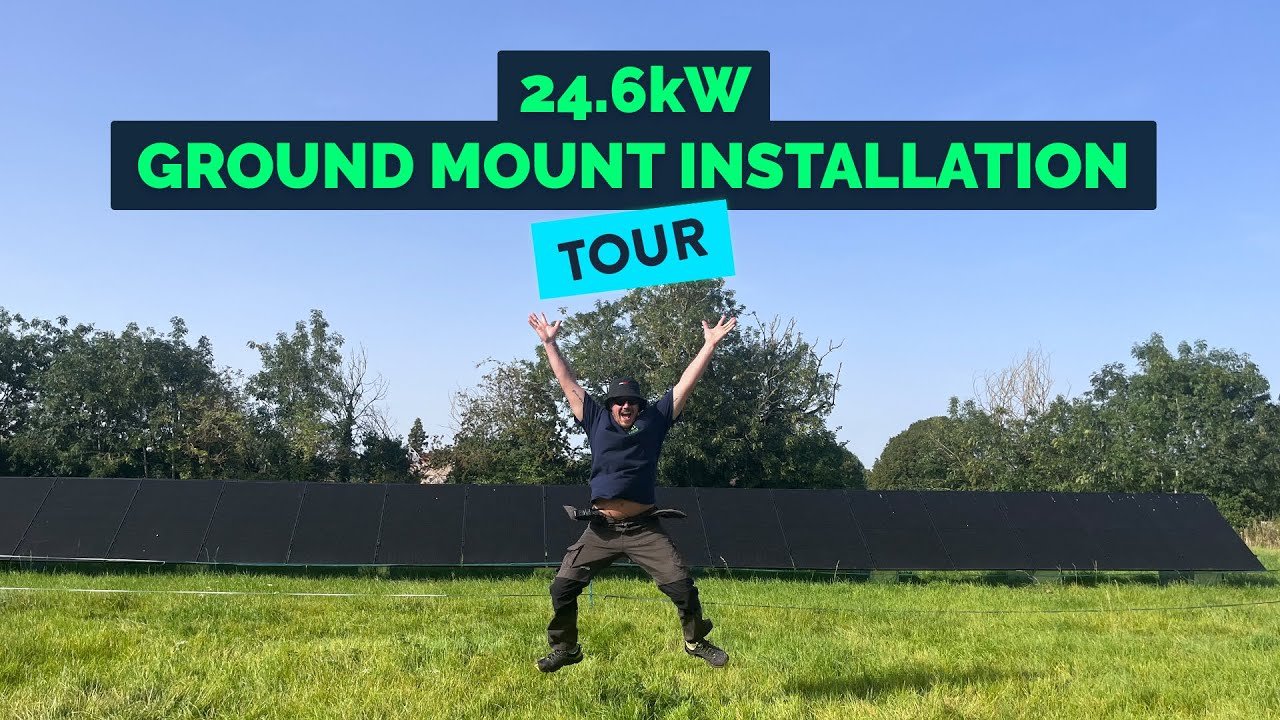
Cost comparison vs. roof mount. Ground-mounted systems cost more upfront because they need their own racking, concrete footings, and trenching for wiring. Expect to pay $0.50 to $1.00 more per watt compared to a roof mount. The trade-off is a safer, more accessible system that is easier to maintain.
Here is a simple comparison:
| Option | Upfront Cost | Structural Risk | Maintenance Access | Best For |
|---|---|---|---|---|
| Roof mount (non-penetrating) | Lower | Low to moderate | Difficult (on roof) | Metal roofs with good load capacity |
| Roof mount (penetrating) | Moderate | High | Difficult | Not recommended for mobile homes |
| Ground mount | Higher | None | Easy | Homes with available land |
| Flexible panels | Lower | Low | Moderate | Lightweight or curved roofs |
The process for a ground mount is straightforward. Install the racking on concrete piers or screw piles. Run conduit underground to your home.
Connect to your main panel through a dedicated breaker. It is more labor but far less stress on your home.
If you have the land, this option eliminates most of the risks we discussed earlier. The different types of solar panels available work equally well in ground mounts, so your choice comes down to efficiency and budget.
Real Cost Breakdown for a Mobile Home Solar System
Let's talk dollars. The numbers here are based on current market data as of 2026.
Average system size and pricing. Most mobile homes need a 3 to 6 kW system. A 4 kW system costs between $10,000 and $14,000 before incentives. That price includes panels, mounting hardware, inverter, wiring, and labor for a professional install.
Federal tax credit (30% ITC). The federal Investment Tax Credit covers 30 percent of your total system cost. On a $12,000 system, that is $3,600 back on your taxes. This credit is available through 2032 and then steps down.
State and local incentives. Many states offer additional rebates or tax credits. Some utility companies have performance-based incentives. Check with the Database of State Incentives for Renewables and Efficiency for your area.
Payback period realities. Expect 8 to 12 years for a roof-mounted system and 10 to 14 years for ground mount. Your actual payback depends on your local electricity rates, net metering rules, and system size. The advantages and disadvantages of solar panels in terms of financial return vary by location.
Here is a sample budget for a 4 kW roof-mounted system:
| Item | Estimated Cost |
|---|---|
| Solar panels (10 panels at $250 each) | $2,500 |
| Non-penetrating mounting system | $800 |
| Inverter (microinverters or string) | $1,200 |
| Wiring and disconnect | $400 |
| Labor (professional install) | $3,500 |
| Permits and engineering | $600 |
| Total before incentives | $9,000 |
| Federal tax credit (30%) | $2,700 |
| Net cost | $6,300 |
These numbers are averages. Your actual cost may be higher or lower depending on your location, roof complexity, and chosen equipment.
The Closest You Can Get to DIY
Some mobile home owners want to do the work themselves. That is possible with the right preparation, but know your limits.
Roof inspection checklist. Before you touch anything, check the roof for soft spots, rust, or previous repairs. Walk the entire surface. Look for signs of water damage in the ceiling below.
If the roof is compromised, fix it first.
Mount installation steps (non-penetrating). For adhesive mounts, clean the roof surface thoroughly. Apply the adhesive according to the manufacturer's instructions. Let it cure for the recommended time, usually 24 to 72 hours.
For clamp mounts, verify the seam spacing and tighten to the specified torque.
Wiring and electrical connections. Run the wires from the panels to the inverter. Use conduit to protect the wiring. Connect the inverter to a dedicated breaker in your main panel.
The main components of a solar panel system include the panels, inverter, disconnect switch, and meter.
When you must hire a licensed electrician. You can install the panels and racking yourself. You can run the conduit and wires. But the final connection to your main panel and the utility interconnection must be done by a licensed electrician.
Most building departments require this for code compliance.
Here are the steps in order:
- Inspect roof and confirm load capacity
- Select mounting system (non-penetrating preferred)
- Purchase panels and equipment
- Install mounting hardware
- Mount panels on racking
- Run wires and conduit to inverter
- Connect inverter to main panel (electrician required)
- Schedule inspection
- Apply for utility interconnection
DIY can save you $2,000 to $4,000 on labor. But mistakes in mounting or wiring can cost much more. Be honest about your skills.
If you have never worked with electrical systems, leave that part to the professionals.
Common Mistakes That End Up Costing Thousands
The biggest mistake is skipping the structural assessment. A few hundred dollars on an engineer now can save thousands in roof repairs later.
Another common error is using standard racking on a curved roof. The panels sit unevenly. The mounts stress unevenly.
Leaks and failures follow.
Ignoring wind load requirements is a third mistake. Your mobile home is lightweight and panels add sail area. Verify your wind zone and use UL 2703 certified hardware.
Finally, never assume your park or HOA will allow panels. Check the rules first. Buying equipment before confirming approval is a costly gamble.
Who Should Do This (And Who Shouldn't)
You are a good candidate if your roof has a 10 psf or higher load rating. You have a standing seam metal roof that accepts clamps. You own the land and have space for a ground mount if needed.
You should reconsider if your roof is curved and lightweight. If your HUD data plate shows a 5 psf rating, roof mounting is risky. If you live in a park that restricts modifications, skip the roof mount entirely.
Better alternatives exist for problem roofs. Ground mounting avoids every structural concern. Community solar programs require no installation at all.
Portable solar kits offer a low commitment entry point.
Final Decision Guide: Roof Mount, Ground Mount, or Pass
Here is your decision tree.
If your roof can handle the load and you have a metal roof, use non-penetrating clamp mounts. This is the most efficient path.
If your roof is lightweight or curved, choose ground mounting. It costs more but removes all structural risk.
If your roof cannot handle the load and you have no land for ground mount, pass on solar for now. Focus on energy efficiency upgrades instead.
The right choice depends on your specific situation. When in doubt, pay for a structural engineer consultation. It is the best money you will spend.
Frequently Asked Questions
Can I install solar panels on a mobile home myself?
You can install the racking and panels yourself. The electrical connection to your panel requires a licensed electrician. Most building departments will verify this on inspection.
Will solar panels void my mobile home warranty?
It depends on your manufacturer. Check your warranty language. Non-penetrating mounts that leave the roof untouched are less likely to void coverage.
How much weight can a mobile home roof support?
Most mobile home roofs are rated for 5 to 10 pounds per square foot live load. Check your HUD data plate for the exact number. An engineer can confirm your specific capacity.
Do I need a permit for solar on a manufactured home?
Yes. Most local building departments require a permit for any roof-mounted solar system. The process includes structural calculations and electrical inspection.
Is ground-mounted solar better than roof mount for mobile homes?
It is often safer. Ground mounts avoid all roof penetration risks and structural concerns. The trade-off is higher upfront cost and the need for available land.

Similar Posts