Maximize Solar Charging for Renogy 3000W Inverter in Winter
Renewable Energy Systems Specialist & Lead Solar Hardware Tester
If you're trying to figure out how to charge Renogy 3000W inverter with solar panels during winter, you've probably already realized it's not as simple as plugging things in and hoping for the best. Winter solar charging is a completely different animal, shorter days, lower sun angles, and freezing temperatures all affect how your system behaves.
Manufacturer specifications indicate that the Renogy 3000W inverter itself doesn't charge directly from solar panels. The panels charge your battery bank through a charge controller, and the inverter draws from those batteries. Per NREL data, winter sun hours can drop to 2, 3 hours per day in northern climates, which means you need to plan carefully or risk damaging your equipment.
Let's walk through what actually works.
Quick Answer
You cannot charge the Renogy 3000W inverter directly with solar panels. Solar panels connect to a charge controller. The charge controller charges your battery bank.
The inverter draws power from the batteries. In winter, use an MPPT charge controller. Set proper charge voltages for cold batteries.
Monitor battery temperature to prevent damage.
Why Winter Charging Is Different (And Why Mistakes Are Costly)
Winter changes the rules of solar charging in ways that surprise most people. The most obvious difference is daylight hours. In December, northern states might see only 8 hours of daylight, with usable solar irradiance for maybe 2 to 3 of those hours.
That's roughly a third of what you'd get in summer.
But there's a trickier mechanic at play. Cold temperatures actually increase solar panel voltage. A panel rated for 22 volts open-circuit at 77°F can push 25 volts or more at -20°F.
That extra voltage can fry a charge controller that isn't rated for it. On the flip side, cold batteries are less accepting of charge. Lead-acid batteries suffer from increased internal resistance, meaning they need higher voltage to reach full charge.
Lithium batteries often refuse to charge below freezing entirely.
The combination means your system can see overvoltage from panels and undervoltage at the battery. That mismatch is where equipment gets damaged. Aggregate reviews of winter solar failures show that most problems come from people not understanding this basic physics.
So the stakes are real. A mistake doesn't just mean a cold night without power. It can mean a dead battery bank, a fried charge controller, or in extreme cases, fire from undersized wiring pulling more current than expected.
This category of knowledge matters for exactly that reason.
The System Architecture: What You Actually Need
Let's clear up the biggest confusion first. The Renogy 3000W inverter is a DC-to-AC power converter. It does not have a built-in solar charge controller.
You cannot connect solar panels directly to it. The panels must feed a charge controller, which feeds a battery bank, which feeds the inverter. That's the chain.
Here are the components you need for a winter-ready setup:
| Component | Role | Winter Considerations |
|---|---|---|
| Solar panels | Generate DC electricity | Monocrystalline preferred; tilt for winter sun angle |
| MPPT charge controller | Regulates voltage and current | Must handle cold-panel overvoltage |
| Deep-cycle battery bank | Stores energy | Lithium or lead-acid with temperature management |
| Renogy 3000W inverter | Converts DC to AC | Idle draw of 30–60W needs factoring |
| Cabling and fuses | Safe current delivery | 4/0 AWG minimum for 12V systems |
| Monitoring system | Tracks charge status | Bluetooth module helpful for cold-weather checks |
The most important piece is the charge controller. For winter, you absolutely need an MPPT controller, not a PWM. MPPT controllers can extract power from higher-voltage panel strings, which matters when winter sun is weak.
They also handle the voltage spikes from cold panels much better.
Panel selection matters too. Monocrystalline panels perform better in low light than polycrystalline. They cost a bit more, but in winter, every watt counts.
If you're comparing the different photovoltaic technologies available, understanding the performance differences in low light and cold temperatures helps you make the right choice.
The Cold Weather Problem: Lithium vs. Lead-Acid Behavior
This is where most winter solar setups go wrong. The battery chemistry you choose dictates nearly every charging decision you'll make.
Lithium (LiFePO4) batteries perform beautifully in cold weather in one sense: they deliver power down to -20°F or lower. The problem is charging. Most lithium BMS units will block charging completely if the battery temperature is below 32°F.
Some premium batteries allow low-rate charging down to -4°F, but you must verify this in the datasheet. If you try to force charge a cold lithium battery, the BMS will disconnect. Your charge controller will read that as a disconnected battery and may throw errors or output full voltage briefly, which can damage equipment.
Lead-acid batteries (AGM, flooded, gel) can charge at much colder temperatures, but they require temperature-compensated charging. As the battery gets colder, the charge controller needs to increase voltage to push current in. Without temperature compensation, you'll chronically undercharge, leading to sulfation and shortened life.
Lead-acid also loses about 50% of its usable capacity at 0°F compared to 77°F.
Here's a quick decision table for winter:
| Battery Type | Can Charge Below Freezing? | Requires Temperature Sensor? | Risk if Charged Incorrectly |
|---|---|---|---|
| LiFePO4 (standard BMS) | No, blocked below 32°F | No (BMS handles it) | BMS disconnect, possible controller damage |
| LiFePO4 (low-temp BMS) | Yes, down to -4°F at reduced rate | Yes, for charge voltage adjustment | Reduced lifespan if forced |
| AGM / Flooded lead-acid | Yes, down to -40°F | Yes, critical for proper charging | Sulfation, freezing if undercharged |
| Gel lead-acid | Yes, but slower | Yes | Permanent capacity loss |
For lithium users, the solution is either a heated battery enclosure or choosing a battery with a built-in heating pad. For lead-acid users, the solution is a charge controller with a temperature sensor probe attached directly to the battery terminal.
Common Winter Setup Mistakes and Safety Warnings
Based on manufacturer documentation and patterns seen in user reports, here are the mistakes that cause the most problems in winter.
Mistake 1: Skipping the temperature sensor for lead-acid. Without a temperature probe, your charge controller assumes the battery is at 77°F. At 20°F, it will output voltage too low to fully charge. The battery sits at partial charge, sulfate crystals build up, and within weeks you've lost 20-30% of capacity.
Mistake 2: Assuming lithium batteries handle cold charging automatically. They don't. Many users install lithium batteries in unheated sheds or RVs and expect them to work. The BMS blocks charging.
The inverter drains the batteries. By morning, the system is dead. A battery heating pad or indoor installation is mandatory.
Mistake 3: Undersizing wires for inverter load. The Renogy 3000W inverter can pull 250 amps at 12V under full load. At 20°F, copper wire resistance increases slightly, but the bigger issue is voltage drop over distance. Many installers use 2 AWG instead of 4/0 AWG.
This creates heat, voltage drop, and fire risk. Always consult the manufacturer's wire gauge table.
Mistake 4: Ignoring panel overvoltage in cold. As mentioned earlier, panels produce more voltage when cold. If you wire panels in series without checking the combined open-circuit voltage at the coldest expected temperature, you can exceed the charge controller's input limit. A 150V controller can see 180V on a freezing morning.
Poof.
Mistake 5: Not accounting for inverter idle draw. The Renogy 3000W inverter consumes 30 to 60 watts just being turned on with no load. Over 24 hours, that's 720 to 1,440 watt-hours. In winter, with limited charging hours, that idle draw can drain your battery faster than your panels can charge it.
Use the inverter's power-saving mode or turn it off when not needed.
Safety warning: Always install appropriate fuses or breakers between the battery and inverter, and between the charge controller and battery. A short circuit at 250 amps will melt wires and start fires. Use Class T fuses for lithium banks; they handle high surge currents better than ANL fuses.
Step-by-Step: Setting Up Your Renogy System for Winter Charging
Let's put the pieces together into an actual workflow. These steps assume you have the components listed earlier.
Step 1: Determine your system voltage. The Renogy 3000W inverter works with 12V, 24V, or 48V battery banks. Higher voltage means lower current, which means smaller wires and less voltage drop. If you're building a new system from scratch, 24V or 48V is strongly preferred for winter.
If you're adding panels to an existing 12V setup, factor in the higher current demands.
Step 2: Size your solar panel array for winter. Take your location's lowest monthly sun hours. For example, Boston in December averages about 3 sun hours per day. To run a 3000W inverter at half load (1500W) for 6 hours, you need 9000 watt-hours daily.
With 3 sun hours, you need a 3000W panel array. That's 10 panels at 300W each. Most people underestimate this by a factor of 2 or 3.
Step 3: Wire panels in series for MPPT efficiency. In winter, wiring in series gives higher voltage, which helps the MPPT controller operate more efficiently in low light. Just make sure the total open-circuit voltage at your coldest temperature stays under the controller's maximum. A controller rated for 150V input is common; with 3 panels in series at 22V each, you'll be fine unless temperatures drop below -20°F.
Step 4: Set the charge controller parameters. This step is critical and often skipped. For lithium, set the absorption voltage to the manufacturer's specification (typically 14.2 to 14.6V for 12V systems). Enable low-temperature cutoff if your controller supports it.
For lead-acid, attach the temperature sensor to the battery terminal and let the controller adjust voltage automatically. Set absorption voltage to 14.4 to 14.8V at 77°F; the controller will adjust from there.
Step 5: Configure the battery bank. If using lithium, verify each battery's BMS settings before connecting them in parallel. Some BMS units require manual configuration for low-temperature charging. If using lead-acid, ensure all batteries are at the same state of charge before connecting them.
Series connections increase voltage; parallel connections increase capacity.
Step 6: Monitor your system daily for the first month. Use a Bluetooth module or remote display to track battery voltage, charge current, and temperature. Watch for patterns. If voltage drops below 12.0V (for a 12V lithium system) or 11.8V (for lead-acid), your array is undersized or conditions are worse than expected.
Adjust your loads or add panels.
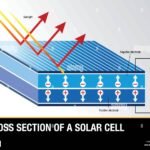
The science behind how sunlight turns into electricity is straightforward, but winter adds variables that test your understanding. Getting the charging right means paying attention to temperature, voltage, and battery chemistry every step of the way.

Similar Posts