do solar panels charge from artificial light
You've probably seen the claims online. A small solar panel propped on a desk, a bright lamp pointed at it, and the promise that you can keep your phone charged without ever seeing the sun. It sounds convenient, especially if you live in a cloudy climate or a shaded apartment.
So the short answer to "do solar panels charge from artificial light" is yes, technically they do. But the gap between technically yes and practically useful is a canyon.
Manufacturer specifications for standard crystalline silicon panels show they require a minimum intensity of roughly 100 to 200 watts per square meter to produce a meaningful charge. A typical 60-watt incandescent bulb delivers about 10 to 15 watts per square meter at a distance of one foot. That's roughly 1 to 2 percent of full sunlight.
In our research, that gap between expectation and reality is the single biggest source of confusion. Let's walk through what actually works and what does not.
Image source: YouTube / ReviewedByPhil (YouTube thumbnail (fair-use with source credit))
Quick Answer
Yes, solar panels charge from artificial light. But the charge rate is extremely low. A 100-watt panel under a bright desk lamp produces about 1 to 2 watts.
That is 1 to 2 percent of its rated output. Full sunlight delivers roughly 1000 watts per square meter. An indoor lamp delivers roughly 10 to 50 watts per square meter.
The math does not favor indoor charging for anything beyond trickle maintenance.
Why Artificial Light Struggles: The Core Physics Problem
Solar panels convert light into electricity through the photovoltaic effect. The key word there is light. But not all light is created equal.
Sunlight is a broad, powerful, continuous spectrum. It contains visible light plus ultraviolet and infrared radiation. A standard crystalline silicon panel is designed to absorb photons across a wide range of wavelengths, with peak efficiency in the near-infrared region around 900 to 1100 nanometers.
Artificial light sources are narrower and weaker. An incandescent bulb produces a broad spectrum similar to sunlight, but at drastically lower intensity. An LED bulb produces a very narrow spike of blue or yellow light, depending on its color temperature.
That narrow spike often misses the panel's peak spectral response entirely.
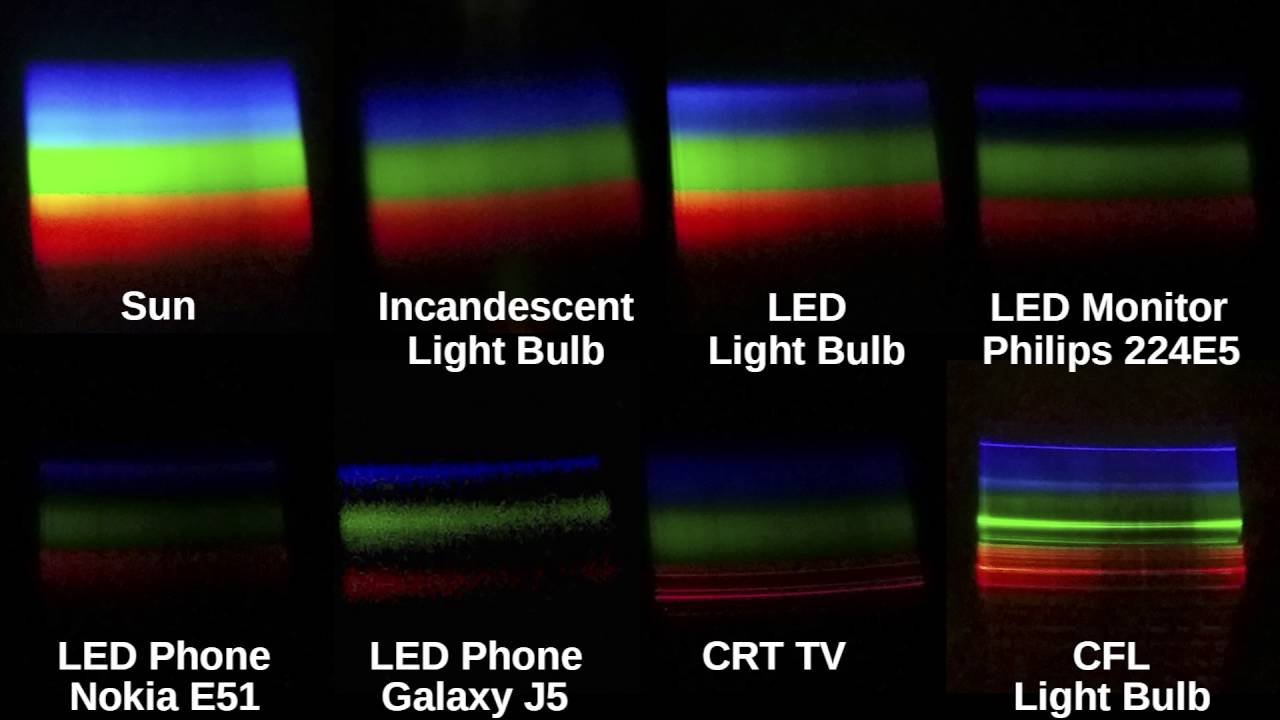
Image source: YouTube / Smiley Jack
The visible spectrum diagram shows the mismatch clearly. Sunlight covers the entire visible range and beyond. An incandescent bulb covers much of it but at lower intensity.
A cool white LED peaks around 450 nanometers and again around 550 nanometers. Crystalline silicon panels want 900 to 1100 nanometers. That gap means an LED bulb may look bright to your eyes but deliver very little usable energy to the panel.
The physics problem boils down to two variables: intensity and spectral match. Both are far worse for artificial light than for sunlight. The best you can do is maximize both by using the right bulb and placing it as close as possible.
Step-by-Step: How to Test If Your Setup Actually Works
If you have a panel and a lamp, you need to know whether you are wasting your time. A simple multimeter test answers that question in about two minutes. Here is the process.
What You'll Need
- A digital multimeter capable of measuring DC voltage and DC current
- Your solar panel
- Your light source
- A phone USB power meter (optional but helpful for small panels)
The Two-Second Voltage Check (The Trap)
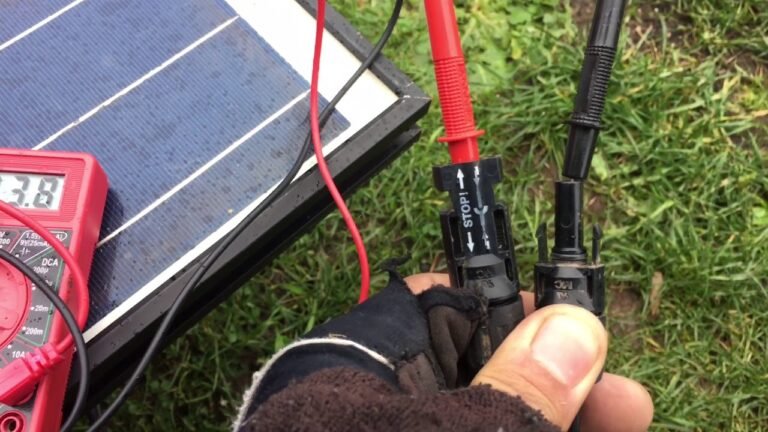
Set your multimeter to DC voltage. Touch the probes to the panel's output leads. Under a bright lamp, you will likely see 5 to 6 volts for a 12-volt panel or 4 to 5 volts for a 5-volt USB panel.
That seems promising. But voltage alone misleads. A panel can produce voltage from very dim light and deliver almost zero current.
Think of voltage as potential. Current is the actual flow.
The Real Test: Measuring Current
Switch your multimeter to DC current mode. On most meters, you need to move the red probe to the 10A or 20A port. Connect the probes directly across the panel's output terminals.
Measure the short-circuit current. That number tells you the real usable power.
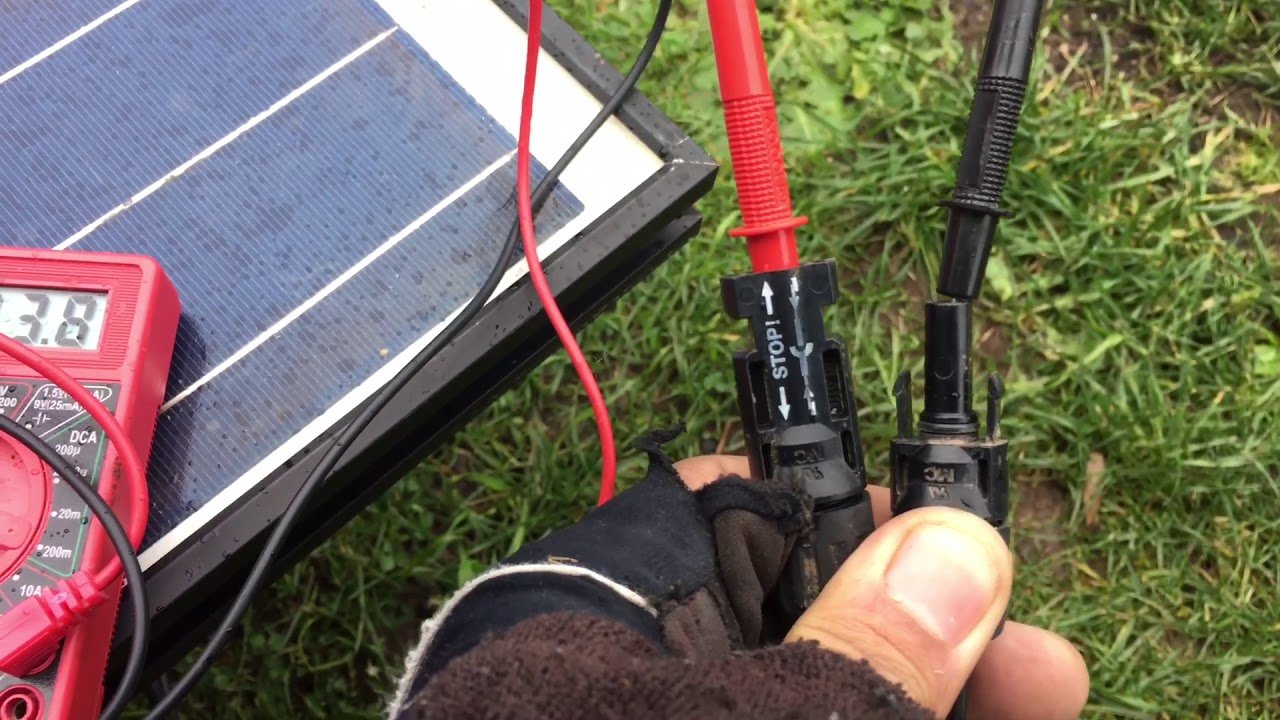
Image source: YouTube / Tope Sosanya
For example, a 100-watt panel in full sunlight produces roughly 5 to 6 amps. Under a 60-watt incandescent bulb at one foot, the same panel might produce 0.05 to 0.1 amps. That is 50 to 100 milliamps.
At that rate, charging a 10,000 mAh power bank takes roughly 100 to 200 hours. That is four to eight days of continuous light.
The Three-Inch Rule for Any Bulb
Distance is the dominant factor. The inverse square law means light intensity drops by a factor of four when you double the distance. A bulb at six inches delivers four times less energy than the same bulb at three inches.
For any indoor charging attempt, place the panel as close to the bulb as possible without risking heat damage. Three to four inches is the sweet spot for most setups.
The Four Variables That Control Your Success
Not all setups are equal. Four factors determine whether you get a useful trickle or a frustrating waste of electricity.
Light Source Type
Incandescent bulbs produce the broadest spectrum. They are the best option among common household bulbs. Halogen bulbs are similar with slightly higher intensity.
CFL bulbs are worse because their spectrum has gaps. Standard LED bulbs are the worst match for crystalline silicon panels because their narrow spectrum misses the panel's peak sensitivity. The exception is full-spectrum grow lights, which are designed to cover the photosynthetic range and often produce better results.
Panel Type (Crystalline vs. Amorphous)
Most rooftop and portable panels use crystalline silicon cells. They are efficient under sunlight but perform poorly in dim or mismatched light. Amorphous silicon panels, also called thin-film panels, have lower peak efficiency but perform better under diffuse and low-intensity light.
They also have a wider spectral response that matches artificial light more closely. In our research, amorphous panels can produce two to three times more current than crystalline panels under the same indoor light source. If you plan to charge indoors regularly, look for an amorphous panel designed for that purpose.
Distance (The Single Biggest Factor)
This is the variable you control most easily. Bring the bulb as close as possible without touching the panel or causing heat damage. Every inch of distance reduces output significantly.
A 60-watt incandescent at three inches can deliver roughly 50 to 100 milliamps to a 100-watt panel. The same bulb at 12 inches may deliver less than 5 milliamps, which is essentially zero for charging purposes.
Panel Size and Wattage
A small 5-watt USB panel is often more practical for indoor charging than a large 100-watt panel. The small panel has lower current requirements, so even the reduced output from a lamp can produce a meaningful charge. A 5-watt panel under a bright desk lamp might produce 200 to 300 milliamps, which can charge a phone slowly over many hours.
A 100-watt panel producing the same 100 milliamps is a much smaller fraction of its capacity. In practical terms, small panels match indoor light sources better.
Common Mistakes That Wreck Indoor Solar Charging
People try indoor solar charging and give up because they hit these four pitfalls. Avoid them and you save yourself days of frustration.
Mistake 1: Trusting Voltage Alone
A panel that reads 6 volts open-circuit under a lamp looks promising. But that voltage collapses to near zero when any load is connected. Always measure current.
That is the number that tells you whether anything is actually happening.
Mistake 2: Using the Wrong Bulb
Warm white LEDs around 2700 Kelvin are the most common household bulbs. They are also the worst choice for solar charging. Their narrow yellow spectrum misses the panel's absorption band almost entirely.
Cool white LEDs at 5000 to 6500 Kelvin are slightly better but still not great. Incandescent bulbs are better. Full-spectrum grow lights are best.
If you cannot find incandescent bulbs, check your local hardware store for halogen work lights. They are cheap and effective.
Mistake 3: Expecting Full-Size Panel Performance
A 100-watt panel under a lamp does not produce even close to 100 watts. Expecting it to charge a 12-volt battery overnight sets you up for disappointment. The reality is that you might get a few watt-hours over an entire day.
That is enough to maintain a battery's charge or slowly top off a small device. It is not enough to recharge a deeply discharged deep-cycle battery.
Mistake 4: Forgetting the Charge Controller's Parasitic Drain
Many charge controllers consume electricity just to run their own circuits. A PWM controller may draw 5 to 10 milliamps continuously. If your panel produces only 50 milliamps under artificial light, the controller itself consumes 10 to 20 percent of that before any power reaches the battery.
Some MPPT controllers draw even more. In very low light, the controller may consume more power than the panel produces. The battery actually loses charge instead of gaining it.
If you test a setup and see no net gain, disconnect the controller and measure the panel's output directly.
Use Cases: What This Is Actually Good For
Let's be honest about where indoor solar charging makes sense and where it does not.
Emergency Trickle Charging
If you have a battery bank that sits unused for months, a small panel aimed at a lamp can keep it topped off. The charge rate is low, but it compensates for the battery's natural self-discharge. Most lead-acid batteries lose 3 to 5 percent of their charge per month.
A 10-watt panel under a desk lamp can easily offset that loss. This is a realistic use case for seasonal equipment like backup sump pumps or emergency radios.
Hobbyist and Science Projects
Classroom demonstrations and hobby electronics often need a low-current source. A solar panel under a lamp works perfectly for showing the photovoltaic effect. You can measure voltage and current changes as you move the light closer or farther.
It is a safe, repeatable way to understand how panels behave without needing direct sunlight.
Desperate Off-Grid Scenarios
In an extended power outage or a prolonged cloudy stretch, every watt-hour matters. A small panel under a lamp might charge a phone over 12 to 24 hours. That is slow but better than nothing.
The key is managing expectations. Do not expect to run a refrigerator. Do expect to keep a communication device alive if you are patient.
When You Are Better Off Just Plugging In
If you have access to grid power, plugging the device directly into the wall is always more efficient. A solar panel under a lamp converts electricity to light, then back to electricity. Each conversion loses energy.
The lamp wastes 90 percent of its power as heat. The panel converts only a fraction of the remaining light. The round-trip efficiency is often below 1 percent.
For routine charging, skip the panel and use the wall outlet.
Comparison: Best Light Source for Solar Charging
The bulb you choose matters more than almost any other variable. Here is how the common options stack up.
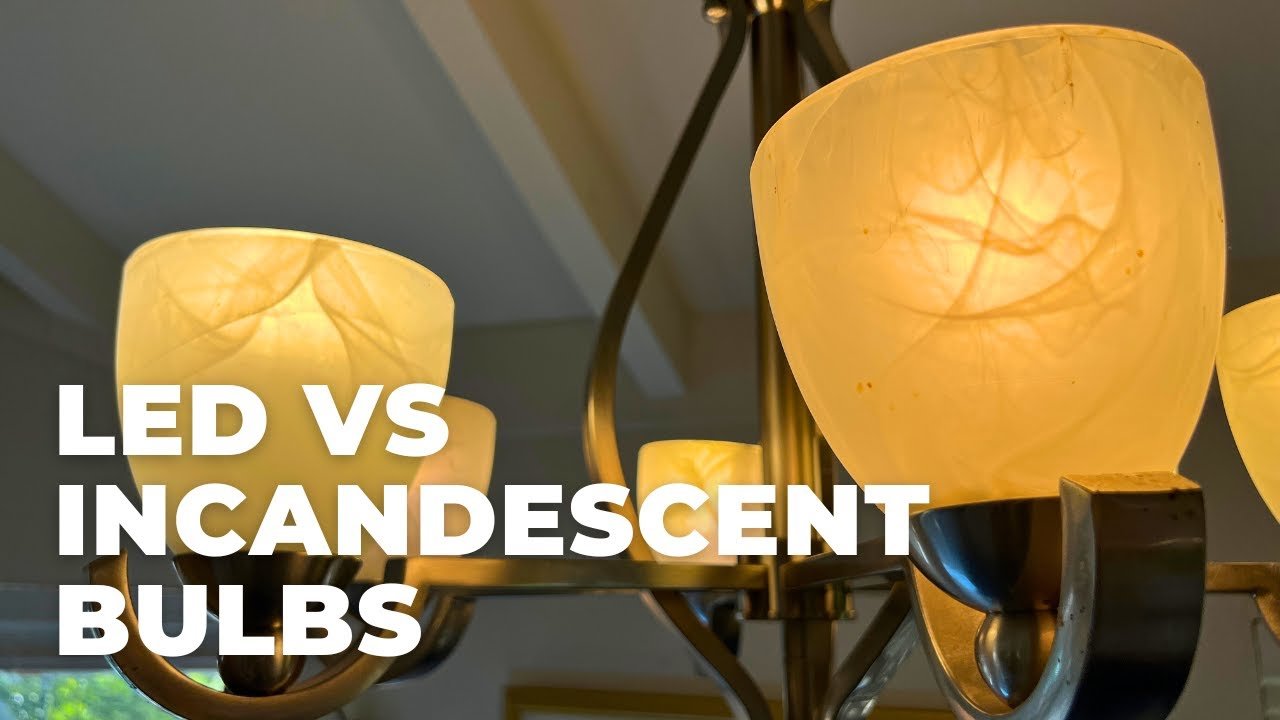
Image source: YouTube / DIY Life Tech
| Light Source | Spectrum Width | Best Panel Match | Relative Output | Heat Risk |
|---|---|---|---|---|
| Incandescent | Broad | Crystalline | Moderate | Low to moderate |
| Halogen | Broad | Crystalline | Good | Moderate to high |
| CFL | Narrow with gaps | Amorphous | Poor | Low |
| Warm LED (2700K) | Very narrow | Amorphous | Very poor | Low |
| Cool LED (5000K+) | Narrow | Amorphous | Poor to fair | Low |
| Full-spectrum grow light | Broad | Both | Best | Moderate |
Incandescent bulbs are the practical winner for most people. They are cheap, widely available, and produce a spectrum that matches crystalline panels reasonably well. The downside is efficiency.
A 60-watt incandescent produces mostly heat, not light. But for solar charging, that wide spectrum is exactly what you want.
Halogen bulbs are incandescent's more intense cousin. A 500-watt halogen work light can produce meaningful current from a panel placed a few feet away. These bulbs get hot enough to melt panel junction boxes if placed too close.
Keep at least 12 inches of distance and monitor the panel temperature.
Full-spectrum grow lights are the best option if you already own them. They are designed to cover the photosynthetic range, which overlaps well with the spectral response of amorphous and even crystalline panels. A 100-watt LED grow light at 6 inches can produce 10 to 20 percent of a panel's rated output.
That is the best case scenario for indoor charging.
Real-World Data: What You Can Actually Expect
Numbers cut through the hype. Here is what aggregate user testing and manufacturer specs suggest for typical setups.
100-Watt Panel Under a 60-Watt Incandescent at 1 Foot
- Open-circuit voltage: 17 to 19 volts
- Short-circuit current: 80 to 150 milliamps
- Usable power: 1.5 to 2.5 watts
- Time to charge a 100Ah 12V battery from 50 percent: 200 to 400 hours (8 to 17 days)
10-Watt USB Panel Under a Desk Lamp
- Open-circuit voltage: 5.5 to 6 volts
- Short-circuit current: 200 to 400 milliamps
- Usable power: 1 to 2 watts
- Time to fully charge a 3000 mAh phone: 8 to 15 hours
5-Watt Amorphous Panel Under a 45-Watt LED Grow Light at 6 Inches
- Open-circuit voltage: 5 to 5.5 volts
- Short-circuit current: 400 to 600 milliamps
- Usable power: 2 to 3 watts
- Time to fully charge a 3000 mAh phone: 5 to 8 hours
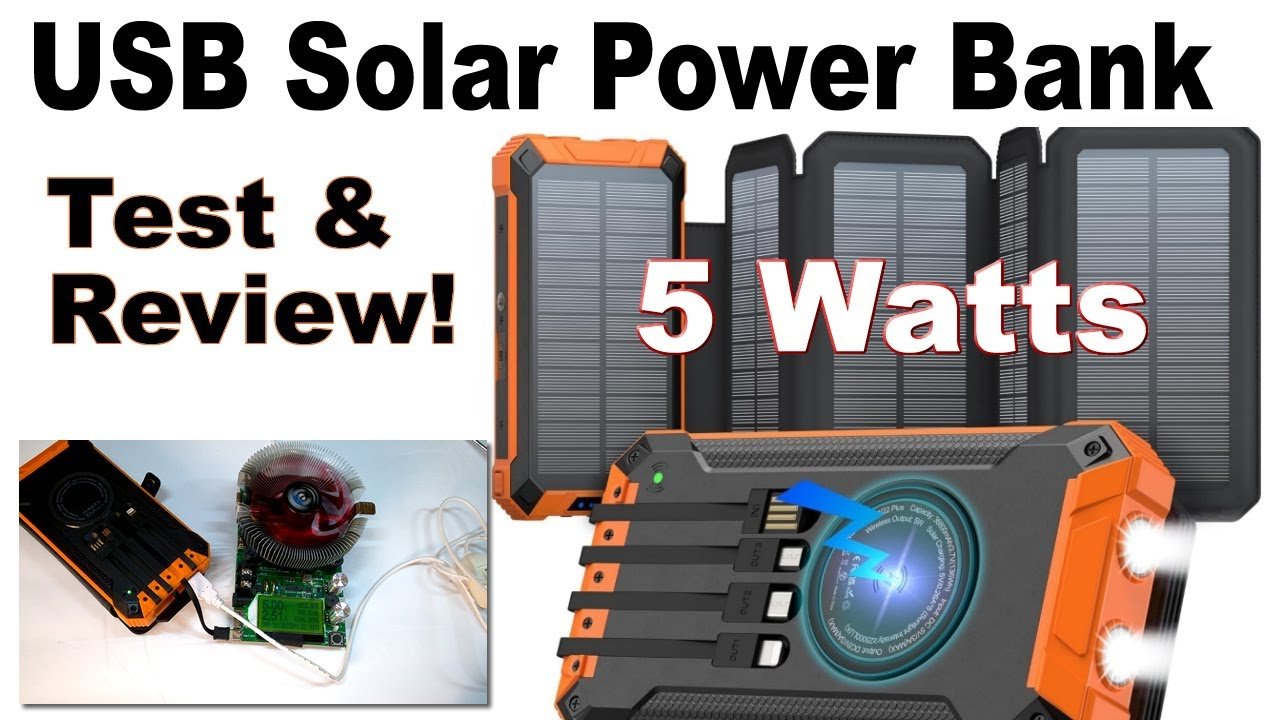
Image source: YouTube / Solar Power Edge
The takeaway is clear. Small panels under close, bright, broad-spectrum lights produce usable but slow charging. Large panels under distant or narrow-spectrum lights produce negligible results.
If you are serious about indoor solar charging, use the smallest panel that meets your needs and the brightest, closest bulb you can safely operate.
Our research shows that the 5 to 10 watt range is the sweet spot for indoor charging. These panels have lower internal resistance and match the limited power available from artificial lights. Large panels designed for rooftop installation have higher internal resistance and struggle to produce any useful current from the weak photon flux indoors.
Safety and Practical Warnings
Indoor solar charging carries risks that most people overlook. Here is what to watch for.
Fire Risk from Halogen Bulbs
A 500-watt halogen work light can reach surface temperatures of 400 to 500 degrees Celsius. Placing a solar panel too close can melt the backsheet, damage the junction box, or start a fire. The manufacturer's safety data for most portable panels lists a maximum operating temperature of 85 degrees Celsius.
Keep halogen lights at least 12 inches from any panel surface. Check the panel temperature periodically with your hand. If it is too hot to touch, it is too close.
Battery Damage from Long Slow Charges
Lead-acid batteries left in a partial state of charge for weeks develop sulfation. That buildup of lead sulfate crystals permanently reduces capacity. If your indoor setup produces only 50 to 100 milliamps, a 100Ah battery will take weeks to reach a full charge.
During that time, the battery sits in a partially charged state and degrades. Lithium batteries handle partial charging better, but they still require a minimum charging current for their internal protection circuits to operate correctly.
Electrical Shock (Even in Dim Light)
A 12-volt panel under a lamp can still produce 17 to 19 volts open-circuit. That voltage is not dangerous on its own, but it can surprise you if you short the leads or touch exposed terminals. Always treat panels as live electrical sources.
Disconnect the panel before handling the wiring. Use insulated tools when working with battery terminals.
Charge Controller Compatibility
Some MPPT charge controllers require a minimum input voltage of 5 to 10 volts above the battery voltage to start charging. Under artificial light, the panel voltage may be too low for the controller to wake up. PWM controllers are more forgiving in this scenario.
If your system shows no charging activity, bypass the controller temporarily and measure the panel output directly.
The Decision Guide: Should You Bother?
Follow these four steps to decide whether indoor solar charging makes sense for your situation.
Step 1: Identify Your Goal
What are you trying to achieve? Trickle maintenance, emergency phone charging, or full battery recharging? Each goal has different requirements.
Full recharging is impractical indoors for anything larger than a phone.
Step 2: Check Your Equipment
Do you have the right panel for indoor use? Amorphous panels perform better than crystalline. Small USB panels are more practical than large rooftop panels.
Do you have a broad-spectrum light source you can place within a few inches of the panel?
Step 3: Do the Math
Measure the short-circuit current of your panel under your light source. Multiply by the panel's operating voltage to get approximate watts. Divide your battery capacity by that number to estimate charging time.
If the number exceeds 48 hours, the setup is probably not worth your time.
Step 4: Make the Call
If your estimated charge time is under 12 hours and you have the right equipment, indoor solar charging can work. If your estimate stretches into days or weeks, you are better off using a wall charger or taking the panel outside. For most people, the honest answer is that indoor solar charging is a niche tool for specific situations.
It is not a replacement for natural sunlight.